Aglis: Difference between revisions
(+Added maps) |
(+Added encounter rates) |
||
| (2 intermediate revisions by the same user not shown) | |||
| Line 19: | Line 19: | ||
#Next to the teleporters leading to the seven tests of courage. | #Next to the teleporters leading to the seven tests of courage. | ||
#Before the room containing Moot. | #Before the room containing Moot. | ||
|Collectibles= | |||
Answering all questions correctly during the test of courage will award the [[Items#pscyhedelicbombx|Psychedelic Bomb X]], otherwise the [[Items#pscyhedelicbomb|Psychedelic Bomb]] is awarded instead. The correct answers during the test are as follows: | |||
:[[Kongol]] - "Take Doel's sword." | |||
:[[Miranda]] - "For the world" and "I cannot die now," | |||
:[[Albert]] - "I cannot do that." | |||
:[[Meru]] - "I still cannot die." | |||
:[[Haschel]] - "I couldn't stop her." | |||
:[[Rose]] - Answer does not change the outcome | |||
:[[Dart]] - "I will save Shana no matter what!" | |||
|Treasure= | |Treasure= | ||
| Line 26: | Line 36: | ||
! Contents !! Acquisition !! Image | ! Contents !! Acquisition !! Image | ||
{{!}}- | {{!}}- | ||
{{!}} [[Items#burnout|Burn Out]] {{!}}{{!}} | {{!}} [[Items#burnout|Burn Out]] {{!}}{{!}} On the lower platform of the first set of teleporters after the first fork. {{!}}{{!}} [[File:Aglis_Chest01.webp|256px]] | ||
{{!}}- | {{!}}- | ||
{{!}} [[Items#gushingmagma|Gushing Magma]] {{!}}{{!}} | {{!}} [[Items#gushingmagma|Gushing Magma]] {{!}}{{!}} On the upper platform of the first set of teleporters after the first fork. {{!}}{{!}} [[File:Aglis_Chest02.webp|256px]] | ||
{{!}}- | {{!}}- | ||
{{!}} [[Equipment#magicalhat|Magical Hat]] {{!}}{{!}} | {{!}} [[Equipment#magicalhat|Magical Hat]] {{!}}{{!}} Leftmost chest on the central platform of the second set of teleporters after the first fork. {{!}}{{!}} [[File:Aglis_Chest03.webp|256px]] | ||
{{!}}- | {{!}}- | ||
{{!}} [[Items#moonserenade|Moon Serenade]] {{!}}{{!}} | {{!}} [[Items#moonserenade|Moon Serenade]] {{!}}{{!}} Rightmost chest on the central platform of the second set of teleporters after the first fork. {{!}}{{!}} [[File:Aglis_Chest04.webp|256px]] | ||
{{!}}- | {{!}}- | ||
{{!}} [[Items#angelsprayer| | {{!}} [[Items#angelsprayer|Angel's Prayer]] {{!}}{{!}} In the far left corner of the research room with Phewy. {{!}}{{!}} [[File:Aglis_Chest05.webp|256px]] | ||
{{!}}- | {{!}}- | ||
{{!}} [[Items#sunrhapsody|Sun Rhapsody]] {{!}}{{!}} | {{!}} [[Items#sunrhapsody|Sun Rhapsody]] {{!}}{{!}} On the far right side of the teleporters past the research room. {{!}}{{!}} [[File:Aglis_Chest06.webp|256px]] | ||
{{!}}- | {{!}}- | ||
{{!}} [[Items#healingfog|Healing Fog]] {{!}}{{!}} | {{!}} [[Items#healingfog|Healing Fog]] {{!}}{{!}} Behind the first teleporter past the mirror room. {{!}}{{!}} [[File:Aglis_Chest07.webp|256px]] | ||
{{!}}- | {{!}}- | ||
{{!}} [[Items#healingrain|Healing Rain]] {{!}}{{!}} | {{!}} [[Items#healingrain|Healing Rain]] {{!}}{{!}} On a platform near the first set of teleporters past the mirror room, but can only be reached by using the second set of teleporters further on. {{!}}{{!}} [[File:Aglis_Chest08.webp|256px]] | ||
{{!}}- | {{!}}- | ||
{{!}} 200G {{!}}{{!}} | {{!}} 200G {{!}}{{!}} On the lower platform past the room collecting courage. {{!}}{{!}} [[File:Aglis_Chest09.webp|256px]] | ||
{{!}}- | {{!}}- | ||
{{!}} [[Items#healingbreeze|Healing Breeze]] {{!}}{{!}} | {{!}} [[Items#healingbreeze|Healing Breeze]] {{!}}{{!}} On the upper platform past the room collecting courage. {{!}}{{!}} [[File:Aglis_Chest10.webp|256px]] | ||
{{!}}- | {{!}}- | ||
{{!}}} | {{!}}} | ||
| Line 114: | Line 124: | ||
{{{!}} class="wikitable mw-collapsible" | {{{!}} class="wikitable mw-collapsible" | ||
{{!}}- | {{!}}- | ||
! # !! Description !! Submap ID !! Image !! Encounter Formations (ID) !! Encounter% !! Escape% | ! # !! Description !! Submap ID !! Image !! Encounter Rate !! Encounter Formations (ID) !! Encounter% !! Escape% | ||
{{!}}- | {{!}}- | ||
{{!}} 1 {{!}}{{!}} Gate leading into the city. {{!}}{{!}} 569 {{!}}{{!}} [[Missing File]] | {{!}} 1 {{!}}{{!}} Gate leading into the city. {{!}}{{!}} 569 {{!}}{{!}} [[Missing File]] {{!}}{{!}} N/A {{!}}{{!}} None {{!}}{{!}} N/A {{!}}{{!}} N/A | ||
{{!}}- | {{!}}- | ||
{{!}} 2 {{!}}{{!}} Teleporters just past the gate. {{!}}{{!}} 570 {{!}}{{!}} [[Missing File]] | {{!}} 2 {{!}}{{!}} Teleporters just past the gate. {{!}}{{!}} 570 {{!}}{{!}} [[Missing File]] {{!}}{{!}} 17 {{!}}{{!}} Stern Fish (232)<br>Jelly, Scud Shark (235)<br>Aqua King, Minotaur (236)<br>Scud Shark (230) {{!}}{{!}} 35%<br>35%<br>20%<br>10% {{!}}{{!}} 30% | ||
{{!}}- | {{!}}- | ||
{{!}} 3 {{!}}{{!}} Fork leading to the teleporter to Zenebatos and further into the city. {{!}}{{!}} 571 {{!}}{{!}} [[Missing File]] | {{!}} 3 {{!}}{{!}} Fork leading to the teleporter to Zenebatos and further into the city. {{!}}{{!}} 571 {{!}}{{!}} [[Missing File]] {{!}}{{!}} 17 {{!}}{{!}} Jelly, Scud Shark (235)<br>Aqua King, Minotaur (236)<br>Jelly x2 (237)<br>Jelly (231) {{!}}{{!}} 35%<br>35%<br>20%<br>10% {{!}}{{!}} 30% | ||
{{!}}- | {{!}}- | ||
{{!}} 4 {{!}}{{!}} First set of teleporters after the fork. {{!}}{{!}} 573 {{!}}{{!}} [[Missing File]] | {{!}} 4 {{!}}{{!}} First set of teleporters after the fork. {{!}}{{!}} 573 {{!}}{{!}} [[Missing File]] {{!}}{{!}} 21 {{!}}{{!}} Aqua King, Minotaur (236)<br>Jelly x2 (237)<br>Scud Shark, Aqua King (238)<br>Minotaur (233) {{!}}{{!}} 35%<br>35%<br>20%<br>10% {{!}}{{!}} 30% | ||
{{!}}- | {{!}}- | ||
{{!}} 5 {{!}}{{!}} Second set of teleporters after the fork. {{!}}{{!}} 574 {{!}}{{!}} [[Missing File]] | {{!}} 5 {{!}}{{!}} Second set of teleporters after the fork. {{!}}{{!}} 574 {{!}}{{!}} [[Missing File]] {{!}}{{!}} 21 {{!}}{{!}} Jelly x2 (237)<br>Scud Shark, Aqua King (238)<br>Jelly, Minotaur (239)<br>Aqua King (234) {{!}}{{!}} 35%<br>35%<br>20%<br>10% {{!}}{{!}} 30% | ||
{{!}}- | {{!}}- | ||
{{!}} 6 {{!}}{{!}} Research room where Phewy is helping prepare the Psychedelic Bomb and Moot. {{!}}{{!}} 575 {{!}}{{!}} [[Missing File]] | {{!}} 6 {{!}}{{!}} Research room where Phewy is helping prepare the Psychedelic Bomb and Moot. {{!}}{{!}} 575 {{!}}{{!}} [[Missing File]] {{!}}{{!}} N/A {{!}}{{!}} None {{!}}{{!}} N/A {{!}}{{!}} N/A | ||
{{!}}- | {{!}}- | ||
{{!}} 7 {{!}}{{!}} Teleports past the Research room. {{!}}{{!}} 576 {{!}}{{!}} [[Missing File]] | {{!}} 7 {{!}}{{!}} Teleports past the Research room. {{!}}{{!}} 576 {{!}}{{!}} [[Missing File]] {{!}}{{!}} 21 {{!}}{{!}} Scud Shark, Aqua King (238)<br>Jelly, Minotaur (239)<br>Stern Fish (232)<br>Scud Shark (230) {{!}}{{!}} 35%<br>35%<br>20%<br>10% {{!}}{{!}} 30% | ||
{{!}}- | {{!}}- | ||
{{!}} 8 {{!}}{{!}} Mirror room that reflects the present. {{!}}{{!}} 577 {{!}}{{!}} [[Missing File]] | {{!}} 8 {{!}}{{!}} Mirror room that reflects the present. {{!}}{{!}} 577 {{!}}{{!}} [[Missing File]] {{!}}{{!}} N/A {{!}}{{!}} None {{!}}{{!}} N/A {{!}}{{!}} N/A | ||
{{!}}- | {{!}}- | ||
{{!}} 9 {{!}}{{!}} First set of teleporters past the Mirror room. {{!}}{{!}} 578 {{!}}{{!}} [[Missing File]] | {{!}} 9 {{!}}{{!}} First set of teleporters past the Mirror room. {{!}}{{!}} 578 {{!}}{{!}} [[Missing File]] {{!}}{{!}} 21 {{!}}{{!}} Stern Fish (232)<br>Jelly, Scud Shark (235)<br>Aqua King, Minotaur (236)<br>Jelly (231) {{!}}{{!}} 35%<br>35%<br>20%<br>10% {{!}}{{!}} 30% | ||
{{!}}- | {{!}}- | ||
{{!}} 10 {{!}}{{!}} Second set of teleporters past the Mirror room. {{!}}{{!}} 579 {{!}}{{!}} [[Missing File]] | {{!}} 10 {{!}}{{!}} Second set of teleporters past the Mirror room. {{!}}{{!}} 579 {{!}}{{!}} [[Missing File]] {{!}}{{!}} 21 {{!}}{{!}} Jelly, Scud Shark (235)<br>Aqua King, Minotaur (236)<br>Jelly x2 (237)<br>Stern Fish (232) {{!}}{{!}} 35%<br>35%<br>20%<br>10% {{!}}{{!}} 30% | ||
{{!}}- | {{!}}- | ||
{{!}} 11 {{!}}{{!}} Room containing the seven tests of courage. {{!}}{{!}} 580 {{!}}{{!}} [[Missing File]] | {{!}} 11 {{!}}{{!}} Room containing the seven tests of courage. {{!}}{{!}} 580 {{!}}{{!}} [[Missing File]] {{!}}{{!}} N/A {{!}}{{!}} None {{!}}{{!}} N/A {{!}}{{!}} N/A | ||
{{!}}- | {{!}}- | ||
{{!}} 12 {{!}}{{!}} Test of courage for Kongol, Miranda, Albert, and Rose. {{!}}{{!}} 581 {{!}}{{!}} [[Missing File]] | {{!}} 12 {{!}}{{!}} Test of courage for Kongol, Miranda, Albert, and Rose. {{!}}{{!}} 581 {{!}}{{!}} [[Missing File]] {{!}}{{!}} N/A {{!}}{{!}} None {{!}}{{!}} N/A {{!}}{{!}} N/A | ||
{{!}}- | {{!}}- | ||
{{!}} 13 {{!}}{{!}} Test of courage for Meru, Haschel, and Dart. {{!}}{{!}} 594 {{!}}{{!}} [[Missing File]] | {{!}} 13 {{!}}{{!}} Test of courage for Meru, Haschel, and Dart. {{!}}{{!}} 594 {{!}}{{!}} [[Missing File]] {{!}}{{!}} N/A {{!}}{{!}} None {{!}}{{!}} N/A {{!}}{{!}} N/A | ||
{{!}}- | {{!}}- | ||
{{!}} 14 {{!}}{{!}} Teleporters past the test of courage. {{!}}{{!}} 582 {{!}}{{!}} [[Missing File]] | {{!}} 14 {{!}}{{!}} Teleporters past the test of courage. {{!}}{{!}} 582 {{!}}{{!}} [[Missing File]] {{!}}{{!}} 21 {{!}}{{!}} Jelly x2 (237)<br>Scud Shark, Aqua King (238)<br>Jelly, Minotaur (239)<br>Aqua King (234) {{!}}{{!}} 35%<br>35%<br>20%<br>10% {{!}}{{!}} 30% | ||
{{!}}- | {{!}}- | ||
{{!}} 15 {{!}}{{!}} Room collecting courage to form the Psychedelic Bomb. {{!}}{{!}} 711 {{!}}{{!}} [[Missing File]] | {{!}} 15 {{!}}{{!}} Room collecting courage to form the Psychedelic Bomb. {{!}}{{!}} 711 {{!}}{{!}} [[Missing File]] {{!}}{{!}} N/A {{!}}{{!}} None {{!}}{{!}} N/A {{!}}{{!}} N/A | ||
{{!}}- | {{!}}- | ||
{{!}} 16 {{!}}{{!}} Teleporters past the courage collection room. {{!}}{{!}} 712 {{!}}{{!}} [[Missing File]] | {{!}} 16 {{!}}{{!}} Teleporters past the courage collection room. {{!}}{{!}} 712 {{!}}{{!}} [[Missing File]] {{!}}{{!}} 21 {{!}}{{!}} Scud Shark, Aqua King (238)<br>Jelly, Minotaur (239)<br>Stern Fish (232)<br>Scud Shark (230) {{!}}{{!}} 35%<br>35%<br>20%<br>10% {{!}}{{!}} 30% | ||
{{!}}- | {{!}}- | ||
{{!}} 17 {{!}}{{!}} Hallway with a save point. {{!}}{{!}} 713 {{!}}{{!}} [[Missing File]] | {{!}} 17 {{!}}{{!}} Hallway with a save point. {{!}}{{!}} 713 {{!}}{{!}} [[Missing File]] {{!}}{{!}} 21 {{!}}{{!}} Jelly, Minotaur (239)<br>Stern Fish (232)<br>Jelly, Scud Shark (235)<br>Jelly (231) {{!}}{{!}} 35%<br>35%<br>20%<br>10% {{!}}{{!}} 30% | ||
{{!}}- | {{!}}- | ||
{{!}} 18 {{!}}{{!}} Platform overlooking Moot. {{!}}{{!}} 714 {{!}}{{!}} [[Missing File]] | {{!}} 18 {{!}}{{!}} Platform overlooking Moot. {{!}}{{!}} 714 {{!}}{{!}} [[Missing File]] {{!}}{{!}} N/A {{!}}{{!}} Last Kraken (432) {{!}}{{!}} Scripted {{!}}{{!}} 0% | ||
{{!}}- | {{!}}- | ||
{{!}} 19 {{!}}{{!}} Teleporter leading to Zenebatos. {{!}}{{!}} 572 {{!}}{{!}} [[Missing File]] | {{!}} 19 {{!}}{{!}} Teleporter leading to Zenebatos. {{!}}{{!}} 572 {{!}}{{!}} [[Missing File]] {{!}}{{!}} N/A {{!}}{{!}} None {{!}}{{!}} N/A {{!}}{{!}} N/A | ||
{{!}}- | {{!}}- | ||
{{!}}} | {{!}}} | ||
| Line 158: | Line 168: | ||
|Trivia= | |Trivia= | ||
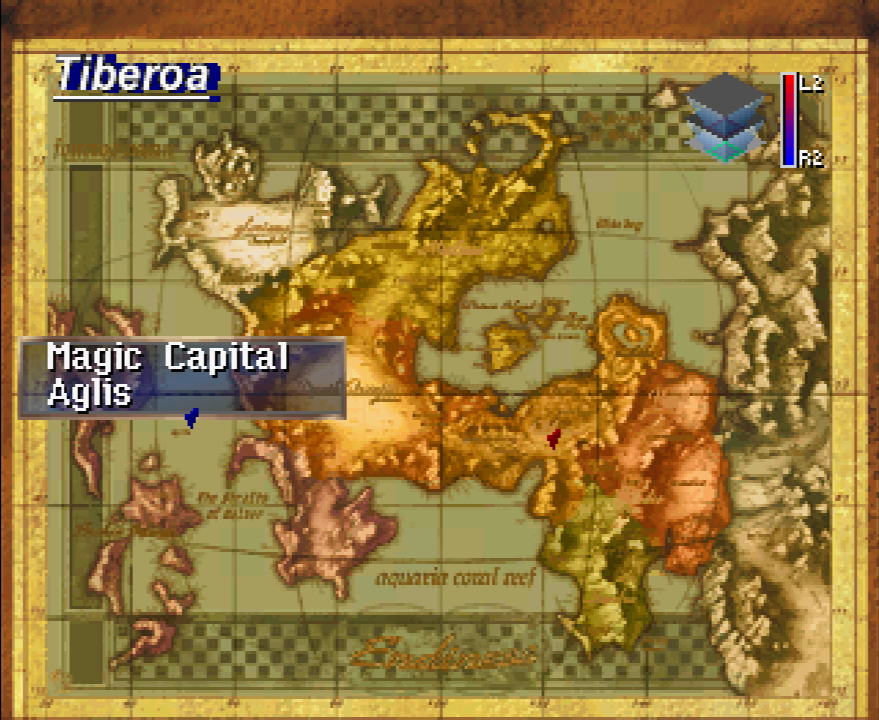
#The location of Aglis according to the in-game quest marker is [[:Media:Aglis location.png|here]]. | #The location of Aglis according to the in-game quest marker is [[:Media:Aglis location.png|here]]. | ||
#Submap ID 581 actually contains encounter data, despite being a test of courage room that is impossible to enter outside of the scripted sequence. Were it possible to experience encounters here, they would be identical to those found in Submap ID 573. | |||
|Gallery= | |Gallery= | ||
Latest revision as of 06:53, 29 March 2026
| Aglis | |
| [[File:Missing File|256px|center]] | |
| Services |
|
| Collectibles |
|
| Combat |
|
| Unique Locations |
|
Aglis, the Magical City, rests at the bottom of the sea near the Broken Islands, adjacent to Rouge. A former hub of Wingly society, Aglis was centered on magic research and development. As Dart and company arrive in Rouge, Aglis partially emerges and reveals a path, inviting them to enter.
Story
Dart and company approach the hidden city in pursuit of Zieg, with the intention of protecting its Signet Sphere. Upon their arrival, they find a host of magical creatures with odd personalities. All of them are created by Savan, the lone inhabitant of Aglis. Savan has spent his life in service to magic, designing a creature powerful enough to guard the Signet. With the party's help, Savan hopes to create the Psychedelic Bomb, a magical weapon of great power.
Read More
Collapse story content
Services
Save Points
- Next to the teleporters leading to the seven tests of courage.
- Before the room containing Moot.
Rest Areas
None.
Shops
None.
Collectibles
Answering all questions correctly during the test of courage will award the Psychedelic Bomb X, otherwise the Psychedelic Bomb is awarded instead. The correct answers during the test are as follows:
- Kongol - "Take Doel's sword."
- Miranda - "For the world" and "I cannot die now,"
- Albert - "I cannot do that."
- Meru - "I still cannot die."
- Haschel - "I couldn't stop her."
- Rose - Answer does not change the outcome
- Dart - "I will save Shana no matter what!"
Goods
Main article: Goods
None.
Stardust
Main article: Stardust
None.
Treasure Chests
Main article: Treasure Chests
There are 10 treasure chests in this area.
| Contents | Acquisition | Image |
|---|---|---|
| Burn Out | On the lower platform of the first set of teleporters after the first fork. | File:Aglis Chest01.webp |
| Gushing Magma | On the upper platform of the first set of teleporters after the first fork. | File:Aglis Chest02.webp |
| Magical Hat | Leftmost chest on the central platform of the second set of teleporters after the first fork. | File:Aglis Chest03.webp |
| Moon Serenade | Rightmost chest on the central platform of the second set of teleporters after the first fork. | File:Aglis Chest04.webp |
| Angel's Prayer | In the far left corner of the research room with Phewy. | File:Aglis Chest05.webp |
| Sun Rhapsody | On the far right side of the teleporters past the research room. | File:Aglis Chest06.webp |
| Healing Fog | Behind the first teleporter past the mirror room. | File:Aglis Chest07.webp |
| Healing Rain | On a platform near the first set of teleporters past the mirror room, but can only be reached by using the second set of teleporters further on. | File:Aglis Chest08.webp |
| 200G | On the lower platform past the room collecting courage. | File:Aglis Chest09.webp |
| Healing Breeze | On the upper platform past the room collecting courage. | File:Aglis Chest10.webp |
Combat
Minor Enemies
Main article: Minor Enemies
| Aqua King | ||
|---|---|---|
| File:Mob Aqua King.webp | ||
| Water | ||
| EXP 135 |
Gold 30 |
Drops Angel's Prayer 8% |
| Jelly | ||
|---|---|---|
| File:Mob Jelly.webp | ||
| Water | ||
| EXP 120 |
Gold 24 |
Drops Healing Fog 10% |
| Minotaur | ||
|---|---|---|
| File:Mob Minotaur.webp | ||
| Earth | ||
| EXP 180 |
Gold 48 |
Drops Heavy Mace 2% |
| Scud Shark | ||
|---|---|---|
| File:Mob Scud Shark.webp | ||
| Water | ||
| EXP 150 |
Gold 39 |
Drops Body Purifier 8% |
| Stern Fish | ||
|---|---|---|
| File:Mob Stern Fish.webp | ||
| Water | ||
| EXP 165 |
Gold 54 |
Drops Frozen Jet 8% |
Bosses
Main article: Bosses
| Last Kraken | ||
|---|---|---|
| File:Boss Last Kraken.webp | ||
| Water | ||
| EXP 12,000 |
Gold 300 |
Drops Pretty Hammer 100% |
Maps
Before Visiting Aglis
| # | Description | Submap ID | Image |
|---|---|---|---|
| 1 | Mirror room looking at Rose. | 701 | Missing File |
Aglis
| # | Description | Submap ID | Image | Encounter Rate | Encounter Formations (ID) | Encounter% | Escape% |
|---|---|---|---|---|---|---|---|
| 1 | Gate leading into the city. | 569 | Missing File | N/A | None | N/A | N/A |
| 2 | Teleporters just past the gate. | 570 | Missing File | 17 | Stern Fish (232) Jelly, Scud Shark (235) Aqua King, Minotaur (236) Scud Shark (230) |
35% 35% 20% 10% |
30% |
| 3 | Fork leading to the teleporter to Zenebatos and further into the city. | 571 | Missing File | 17 | Jelly, Scud Shark (235) Aqua King, Minotaur (236) Jelly x2 (237) Jelly (231) |
35% 35% 20% 10% |
30% |
| 4 | First set of teleporters after the fork. | 573 | Missing File | 21 | Aqua King, Minotaur (236) Jelly x2 (237) Scud Shark, Aqua King (238) Minotaur (233) |
35% 35% 20% 10% |
30% |
| 5 | Second set of teleporters after the fork. | 574 | Missing File | 21 | Jelly x2 (237) Scud Shark, Aqua King (238) Jelly, Minotaur (239) Aqua King (234) |
35% 35% 20% 10% |
30% |
| 6 | Research room where Phewy is helping prepare the Psychedelic Bomb and Moot. | 575 | Missing File | N/A | None | N/A | N/A |
| 7 | Teleports past the Research room. | 576 | Missing File | 21 | Scud Shark, Aqua King (238) Jelly, Minotaur (239) Stern Fish (232) Scud Shark (230) |
35% 35% 20% 10% |
30% |
| 8 | Mirror room that reflects the present. | 577 | Missing File | N/A | None | N/A | N/A |
| 9 | First set of teleporters past the Mirror room. | 578 | Missing File | 21 | Stern Fish (232) Jelly, Scud Shark (235) Aqua King, Minotaur (236) Jelly (231) |
35% 35% 20% 10% |
30% |
| 10 | Second set of teleporters past the Mirror room. | 579 | Missing File | 21 | Jelly, Scud Shark (235) Aqua King, Minotaur (236) Jelly x2 (237) Stern Fish (232) |
35% 35% 20% 10% |
30% |
| 11 | Room containing the seven tests of courage. | 580 | Missing File | N/A | None | N/A | N/A |
| 12 | Test of courage for Kongol, Miranda, Albert, and Rose. | 581 | Missing File | N/A | None | N/A | N/A |
| 13 | Test of courage for Meru, Haschel, and Dart. | 594 | Missing File | N/A | None | N/A | N/A |
| 14 | Teleporters past the test of courage. | 582 | Missing File | 21 | Jelly x2 (237) Scud Shark, Aqua King (238) Jelly, Minotaur (239) Aqua King (234) |
35% 35% 20% 10% |
30% |
| 15 | Room collecting courage to form the Psychedelic Bomb. | 711 | Missing File | N/A | None | N/A | N/A |
| 16 | Teleporters past the courage collection room. | 712 | Missing File | 21 | Scud Shark, Aqua King (238) Jelly, Minotaur (239) Stern Fish (232) Scud Shark (230) |
35% 35% 20% 10% |
30% |
| 17 | Hallway with a save point. | 713 | Missing File | 21 | Jelly, Minotaur (239) Stern Fish (232) Jelly, Scud Shark (235) Jelly (231) |
35% 35% 20% 10% |
30% |
| 18 | Platform overlooking Moot. | 714 | Missing File | N/A | Last Kraken (432) | Scripted | 0% |
| 19 | Teleporter leading to Zenebatos. | 572 | Missing File | N/A | None | N/A | N/A |
Trivia
- The location of Aglis according to the in-game quest marker is here.
- Submap ID 581 actually contains encounter data, despite being a test of courage room that is impossible to enter outside of the scripted sequence. Were it possible to experience encounters here, they would be identical to those found in Submap ID 573.
Gallery
References