Hellena Prison: Difference between revisions
DrewUniverse (talk | contribs) m (spelling corrections) |
(+Fixed hyperlink) |
||
| (53 intermediate revisions by 5 users not shown) | |||
| Line 1: | Line 1: | ||
{{Infobox_Location|Name=Hellena Prison|Image=|Save= | {{Infobox_Location | ||
|Name=Hellena Prison | |||
|Image=Hellena_Preview.webp | |||
|Save=2 | |||
|Shops=Item | |||
|Goods=Key to Shana's Cell (Prison Key) | |||
|Treasure=8 (first visit),<br>12 (second visit) | |||
|Mobs=Contact | |||
|Boss=[[Fruegel]], [[Jiango]] | |||
|Previous=[[Forest|#2 Forest]] | |||
|Next=[[Prairie|#4 Prairie]]}} | |||
{{Location | |||
|Synopsis='''Hellena Prison''' is a prison island on the southern coast of [[Serdio]], under the direct command of [[Sandora|Imperial Sandora]]. Isolated from land by a narrow drawbridge, the dark, stone prison resembles a skull with torch light and black smoke rising from its windows. It was built by humans who converted it from the ruins of a destroyed species.<ref name="GBJP">''Legend of Dragoon: Official Guidebook'', (ASCII, 2000), p.411</ref> Guards patrol every walkway and room, ready to attack intruders or escapees without hesitation. [[Fruegel]], the prison warden, is a cruel giant of a man who greatly abuses his powers and works in league with Imperial Sandora under [[Emperor Doel]]'s rule. The prison has become renown for brutality and the inhumane treatment of its captives as those who are taken there are never released. | |||
|Story1=A winged beast glides overhead the ghastly prison. After making his way through the [[Forest]], Dart arrives at a pathway leading to Hellena Prison. In hesitation, he looks down the narrow path leading to a single drawbridge, where he would surely be exposed on all sides. As he thinks of a plan to infiltrate the prison, a merchant's caravan arrives and heads straight for the gate. Dart decides to tail the caravan with the hopes of sneaking in unnoticed. | |||
At the gate, the merchant declares his cargo of meat and fish to the [[Hellena Warden]] guarding the entry. He inquires about the recent increase in shipments but is rebuked by the warden who begins his inspection. Meanwhile, Dart dashes to the opposite side of the caravan, staying out of sight until the delivery is approved for entry. The drawbridge lowers, the warden returns to his post and Dart dives into the back of the caravan heading into the prison. | |||
| | |Story2=Upon entering the prison, Dart jumps out of the caravan, startling the merchant who raises the alarm. Immediately, a warden arrives to detain the intruder and a fight ensues. Making short work of the guard, Dart reassures the merchant of his safety, who in turn swears to secrecy and offers to sell him items. Security is tight in the prison as wardens patrol the grounds in rhythmic patterns. Leaving the storeroom, Dart sneaks past the guards up a stairwell to reach the second floor. Crossing a wooden bridge, Dart arrives outside the barracks where he finds yet another elevator taking him to the first prison tower. Once inside, he continues down the torchlit hallway built of the same shoddy wood planks and bricks as the rest of the prison. Searching from cell to cell, he stumbles upon a couple of wardens harassing their new detainees, two Knights of [[Serdio#Kingdom of Basil|Basil]] who have recently been captured as prisoners of war. They continue to taunt and ridicule their doomed captives, promising a horrific death by being fed to [[Jiango|Fruegel's monster]]. | ||
Nearby, a fight breaks out as another prisoner attempts to escape. Plunging in from an adjacent hallway, a skilled spearman in green and silver uniform swoops in to defend the knights, ordering them to escape back to the castle. Unfortunately, prison back up arrives and the escaping knights are dispatched off the floor to fall to their deaths. Dart joins forces with the honorable knight, who introduces himself as [[Lavitz]], the Head of the First Knighthood in the Kingdom of Basil. After fending off the guards together, Lavitz turns on Dart, spear clashing with sword. Defending himself, Dart explains that he is not the enemy. They continue to fight off another wave of guards before catching their breath and discussing how each came to be at the infamous prison. Dart explains his dire need to rescue [[Shana]] and Lavitz, impressed with his audacious mission and combat skills, insists that they work together to escape, of course, after rescuing the imprisoned woman. | |||
As a team, they search the prison cells and gather news of a young girl from [[Seles]] confined with a high level of security in another tower. Arriving at a locked door to the second prison tower, Dart and Lavitz carefully search a nearby corridor for the key. They slip past a dozen wardens to reach a stairwell leading to a series of rickety wooden bridges. Upon a wooden crate, sparkles the [[Goods#prisonkey|Key to Shana's Cell]]. Returning to the second prison tower, the two fugitives cause a commotion, which catches Shana's attention from a nearby cell. With Lavitz keeping watch, Dart can finally rejoice to see his dearest friend, whom he cherishes like a sister. Shana asks to see his face and notices how strong he has grown during their time apart. After taking a final look about at her cell, Shana follows Dart into the hallway where now more guards are waiting for them. After fiercely defending Shana, Dart promises that he will always protect her. Shana walks over to a brick wall to pick up a bow and arrow, drawing the string taut to demonstrate that she, too, can help fight. Impressed with their fortitude to survive this nightmarish prison, Lavitz commends the two of them for their strength and determination. | |||
Meanwhile, Fruegel has been alerted of the girl's liberation by a knight of Basil and a man in red armor. Furiously, Fruegel throws one of his men from the skyline bridge into the hellish depths. Barking to another guard, Fruegel demands that she be detained, alive as was explicitly ordered by [[Emperor Doel]]. | |||
Dart and party return to the ground floor of the prison to finally escape but they are intercepted by the head warden, Fruegel. Fiendishly, he promises to feed them to his pet before disclosing that capturing Shana was a paltry order from his Majesty Doel. Since the task was so trivial, he ordered that Seles be razed to the ground for his own wicked delight. Lashing out in anger, Dart begins the battle, which ends with a defeated Fruegel living to see another day. In swift haste, the party flees the prison on horseback, hoping to never return. | |||
When they reach the [[Forest]], Dart notices that soldiers have been stationed there. With Fruegel's men in hot pursuit, the party is forced to head to the [[Prairie]]. | |||
Meanwhile, back at the prison, the mysterious [[Hooded Man]] enrobed in black reprimands the warden for his failure to contain the girl. He demands of Fruegel to correct his folly, lest he inform the Emperor of the head warden's misconduct. Reassuringly, the Hooded man claims that the mistake is not dire and that all is going according to plan. | |||
===== Second Visit ===== | |||
As the party leaves [[Lohan]], a wounded Knight of Basil limps into town, mortally wounded but grateful to find Lavitz. He reports that Imperial Sandora launched a surprise attack on Bale and has taken the King as captive. Overcome with concern for [[Albert|King Albert]], Lavitz loses self-control and is subdued by the martial arts master, [[Haschel]], the third place winner of the Hero Competition. When Lavitz regains consciousness, Haschel returns from his scouting mission to report that Bale is under occupation and that Lavitz is the only hope for both king and country. In exchange for the safety of his people, King Albert was willingly taken to Hellena Prison. With renewed hope, Dart and party return to Hellena Prison, only this time with new party members and Dragoon spirits. | |||
Upon arrival at the prison, the party nearly misses the drawbridge being raised for another supplies delivery. Valiantly, Lavitz scales the rising bridge and overcomes the guards. With the drawbridge lowered once again, the team is free to infiltrate the prison and search for King Albert. | |||
Meanwhile, on the prison rooftop, Fruegel delights in the coming of dawn as he promises his captive, King Albert, that he may see the sun once more before his impending execution. Honorably, King Albert refuses to be baited by him, claiming that he has no means to speak with vulgar men. When Fruegel reveals the trap set for Dart and party, King Albert is shocked by the villainy of both Fruegel himself and Lord Doel. A warden arrives to announce that Lavitz and the red one, Dart, have arrived on scene but that they will never reach the top floor alive. | |||
After | Dart and party find themselves in the storeroom once more with the same merchant as before, who is still willing to quietly cooperate and sell them items. After navigating an intricate system of elevators, doors and rope ladders, the party reaches the skybridge and follows the path to the second floor corridor where the Prison Key was found during the first visit. Full of arrogance and scorn, the wardens jeer at the party before releasing the trap door. They fall into a dusty prison chamber with skeletons and bones strewn about. Shana notices a draft from behind a massive boulder when the party hears the growling of Fruegel's infamous pet, [[Jiango]]. After overcoming the hideous beast, the party realizes that the boulder blocking the path has been crushed and they can now escape. Ascending the stairs, they return to the second floor corridor and head left to ascend another flight of stairs to reach the rooftop. | ||
Meanwhile, Fruegel announces sunrise with a sickening glee. He mocks King Albert's wish for peace by promising him an end to the war achieved with his own execution. Although knowingly defying Lord Doel and the silver haired one, Fruegel intends to follow through with his death threat until Shana looses an arrow and the party arrives to rescue King Albert. After the party defeats his pet beasts, [[Rodriguez]] and [[Guftas]], Lavitz lands the finishing blow to finally vanquish the nefarious Fruegel. | |||
Suddenly, the [[Hooded Man]] appears and taking King Albert hostage, he stabs his thieving hand into the King's back and reveals the [[Goods#moongem|Moon Gem]]. Fearlessly, Lavitz transforms into the Jade Dragoon and nosedives into the Hooded One, who instantly brandishes a formidable, [[Equipment#dragonbuster|magical blade]] and slays Lavitz in his place. His hood falls away to reveal [[Lloyd]], the first place winner of the Hero Competition in Lohan. With haste, Lloyd makes his escape, leaving behind a gruesome scene. As brave Lavitz lays dying, he entrusts the protection of King Albert to Dart before ultimately perishing. King Albert grimaces when the life leaves Lavitz's body and Shana winces, turning away toward Rose. The Jade Dragoon spirit once again flies into the air from its lost host only to sink down gently before King Albert, the next Jade Dragoon. In anguish, Dart screams Lavitz's name as he holds his departed friend in his arms. | |||
|SavePoints= | |||
#On the first visit, past the main entrance by an elevator to the south. It borders a barracks and Hellena Wardens occasionally patrol close by. | |||
#On the second visit, near the top of the summit after defeating Jiango and ascending several flights of stairs. | |||
|Shops= | |Shops= | ||
{{{!}} class="wikitable mw-collapsible" style="display:inline;" | |||
!colspan="2" {{!}} First Visit | |||
{{!}}- | |||
! Price !! Item | |||
{{!}}- | |||
{{!}} 10G {{!}}{{!}} [[Items#healingpotion|Healing Potion]] | |||
{ | {{!}}- | ||
{{!}} 30G {{!}}{{!}} [[Items#angelsprayer|Angel's Prayer]] | |||
! | {{!}}- | ||
{{!}} 10G {{!}}{{!}} [[Items#sparknet|Spark Net]] | |||
{{!}}} | |||
| | {{{!}} class="wikitable mw-collapsible" style="display:inline;" | ||
!colspan="2" {{!}} Second Visit | |||
{{!}}- | |||
! Price !! Item | |||
{{!}}- | |||
{{!}} 10G {{!}}{{!}} [[Items#healingpotion|Healing Potion]] | |||
{{!}}- | |||
{{!}} 50G {{!}}{{!}} [[Items#sunrhapsody|Sun Rhapsody]] | |||
{{!}}- | |||
{{!}} 30G {{!}}{{!}} [[Items#angelsprayer|Angel's Prayer]] | |||
{{!}}- | |||
{{!}} 20G {{!}}{{!}} [[Items#mindpurifier#|Mind Purifier]] | |||
{{!}}- | |||
{{!}} 20G {{!}}{{!}} [[Items#midnightterror|Midnight Terror]] | |||
{{!}}- | |||
{{!}} 20G {{!}}{{!}} [[Items#thunderbolt|Thunderbolt]] | |||
{{!}}} | |||
|Goods= | |Goods= | ||
{ | {{{!}} class{{=}}"wikitable mw-collapsible" style{{=}}"width: 700px;" | ||
{{!}}- | |||
! Name !! | ! Name on Acquisition !! Name in Inventory !! Acquisition !! Image | ||
{{!}}- | |||
{{!}} [[Goods#prisonkey|Key to Shana's Cell]] {{!}}{{!}} Prison Key {{!}}{{!}} Upon reaching the room with two groups of Hellena Wardens, circle around upstairs and across two bridges to a crate with a glint to trigger a story event and acquire the key. {{!}}{{!}} [[File:Goods_PrisonKey.webp|256px|right]] | |||
} | {{!}}- | ||
{{!}}} | |||
|Treasure= | |Treasure= | ||
{{TreasureCount|20}} | |||
Note: Chests available during the first visit to Hellena Prison remain accessible upon returning for the second visit; however, all chests will be permanently inaccessible after leaving for the second time. | |||
Note: | |||
'''First Visit''' | '''First Visit''' | ||
{ | {{{!}} class{{=}}"wikitable mw-collapsible" style{{=}}"width: 700px;" | ||
{{!}}- | |||
! Contents !! | ! Contents !! Acquisition !! Image | ||
{{!}}- | |||
{{!}} [[Items#burnout|Burn Out]] {{!}}{{!}} From the storeroom with the merchant, take the top left exit and follow the path. {{!}}{{!}} [[file:Hellena_Chest01.webp|256px]] | |||
{{!}}- | |||
{{!}} [[Items#angelsprayer|Angel's Prayer]] {{!}}{{!}} Head up to level two of the prison and just beyond the first elevator, enter the barracks to find this chest in the upper left area of the room near the beds. {{!}}{{!}} [[file:Hellena_Chest02.webp|256px]] | |||
{{!}}- | |||
{{!}} [[Equipment#leatherjacket|Leather Jacket]] {{!}}{{!}} In the barracks: continue left beyond the first chest {{!}}{{!}} [[file:Hellena_Chest03.webp|256px]] | |||
{{!}}- | |||
{{!}} 50G {{!}}{{!}} In the barracks: central kitchen area{{!}}{{!}} [[file:Hellena_Chest04.webp|256px]] | |||
{{!}}- | |||
{{!}} [[Items#sparknet|Spark Net]] {{!}}{{!}} First prison tower: inside a cell{{!}}{{!}} [[file:Hellena_Chest05.webp|256px]] | |||
{{!}}- | |||
{{!}} 20G {{!}}{{!}} First prison tower: inside a cell{{!}}{{!}} [[file:Hellena_Chest06.webp|256px]] | |||
{{!}}- | |||
{{!}} 20G {{!}}{{!}} Second prison tower: inside a cell {{!}}{{!}} [[file:Hellena_Chest07.webp|256px]] | |||
{{!}}- | |||
{{!}} 20G {{!}}{{!}} Second prison tower: inside a cell{{!}}{{!}} [[file:Hellena_Chest08.webp|256px]] | |||
{{!}}} | |||
'''Second Visit''' | '''Second Visit''' | ||
{ | {{{!}} class{{=}}"wikitable mw-collapsible" style{{=}}"width: 700px;" | ||
{{!}}- | |||
! Contents !! | ! Contents !! Acquisition !! Image | ||
{{!}}- | |||
{{!}} [[Equipment#felthat|Felt Hat]] {{!}}{{!}} Take the elevator that was previously out of order to get to the next screen. Get off and enter the door. Then, head right to jump over the pit and enter that door.{{!}}{{!}} [[File:Area13(Hellena2)Chest1.png|256px]] | |||
{{!}}- | |||
{{!}} [[Equipment#therapyring|Therapy Ring]] {{!}}{{!}} Continue past the previous chest following the path. {{!}}{{!}} [[File:Area13(Hellena2)Chest2.png|256px]] | |||
{{!}}- | |||
{{!}} [[Equipment#leatherarmor|Leather Armor]] {{!}}{{!}} Get off the elevator and take the rope ladder. {{!}}{{!}} [[File:Area13(Hellena2)Chest3.png|256px]] | |||
{{!}}- | |||
{{!}} [[Items#thunderbolt|Thunderbolt]] {{!}}{{!}} Through the door from the elevator, take the door on your left and follow the path.{{!}}{{!}} [[File:Area13(Hellena2)Chest5.png|256px]] | |||
{{!}}- | |||
{{!}} [[Equipment#silvervest|Silver Vest]] {{!}}{{!}} From the previous chest, instead of taking the elevator slide down the rope to your right.{{!}}{{!}} [[File:Area13(Hellena2)Chest6.png|256px]] | |||
{{!}}- | |||
{{!}} [[Items#pandemonium|Pandemonium]] {{!}}{{!}} Instead of the right door, take the far left door and follow the path.{{!}}{{!}} [[File:Area13(Hellena2)Chest4.png|256px]] | |||
{{!}}- | |||
{{!}} [[Items#healingpotion|Healing Potion]] {{!}}{{!}} Return to the main elevator and head up to the skybridge. Take the path on the left.{{!}}{{!}} [[File:Area13(Hellena2)Chest7.png|256px]] | |||
{{!}}- | |||
{{!}} [[Items#sachet|Sachet]] {{!}}{{!}} Fall into Jiango's lair and head to the top of the room.{{!}}{{!}} [[File:Area13(Hellena2)Chest8.png|256px]] | |||
{{!}}- | |||
{{!}} [[Items#healingpotion|Healing Potion]] {{!}}{{!}} After defeating Jiango, continue on the path.{{!}}{{!}} [[File:Area13(Hellena2)Chest9.png|256px]] | |||
{{!}}- | |||
{{!}} [[Equipment#broadsword|Broad Sword]] {{!}}{{!}} On the roof, near the Save Point: top{{!}}{{!}} [[File:Area13(Hellena2)Chest10.png|256px]] | |||
{{!}}- | |||
{{!}} [[Equipment#spear|Spear]] {{!}}{{!}} On the roof, near the Save Point: left{{!}}{{!}} [[File:Area13(Hellena2)Chest11.png|256px]] | |||
{{!}}- | |||
{{!}} 20G{{!}}{{!}}On the roof, near the Save Point: bottom{{!}}{{!}} [[File:Area13(Hellena2)Chest12.png|256px]] | |||
{{!}}} | |||
|Combat= | |Combat= | ||
| | |MinorEnemies= | ||
'''First Visit''' | |||
{{Combat Preview | |||
|Name=Hellena Warden | |||
|Image=Mob_Hellena_Warden.webp | |||
|Element={{TElemFi}} | |||
|EXP=6 | |||
|Gold=9}} | |||
'''Second Visit''' | |||
{{Combat Preview | |||
|Name=[[Hellena Warden]] | |||
|Image=Mob_Hellena_Warden.webp | |||
|Element={{TElemFi}} | |||
|EXP=20 | |||
|Gold=15 | |||
|Drops=[[Equipment#morningstar|Morning Star]] | |||
|Chance=2%}} | |||
{{Combat Preview | |||
|Name=[[Senior Warden]] | |||
|Image=Mob_Senior_Warden.webp | |||
|Element={{TElemFi}} | |||
|EXP=24 | |||
|Gold=21 | |||
|Drops=[[Equipment#spear|Spear]] | |||
|Chance=2%}} | |||
{{Combat Preview | |||
|Name=[[Fowl Fighter]] | |||
|Image=Mob_Fowl_Fighter.webp | |||
|Element={{TElemFi}} | |||
|EXP=16 | |||
|Gold=9 | |||
|Drops=[[Items#mindpurifier|Mind Purifier]] | |||
|Chance=8%}} | |||
{{Combat Preview | |||
|Name=[[Guftas]] | |||
|Image=[[Missing File]] | |||
|Element={{TElemDa}} | |||
|EXP=0 | |||
|Gold=0 | |||
|Drops=Nothing}} | |||
{{Combat Preview | |||
|Name=[[Rodriguez]] | |||
|Image=[[Missing File]] | |||
|Element={{TElemWi}} | |||
|EXP=0 | |||
|Gold=0 | |||
|Drops=Nothing}} | |||
|Bosses= | |||
'''First Visit''' | '''First Visit''' | ||
{ | {{Combat Preview | ||
| | |Name=[[Fruegel]] | ||
|Image=Boss_Fruegel.webp | |||
|Element={{TElemEa}} | |||
|EXP=300 | |||
| | |Gold=50 | ||
| [[ | |Drops=[[Equipment#knightshield|Knight Shield]] | ||
|Chance=100%}} | |||
'''Second Visit''' | '''Second Visit''' | ||
{ | {{Combat Preview | ||
| | |Name=[[Jiango]] | ||
|Image=Boss_Jiango.webp | |||
|Element={{TElemEa}} | |||
|EXP=2,000 | |||
| | |Gold=100 | ||
| [[ | |Drops=[[Items#sachet|Sachet]] | ||
|Chance=100%}} | |||
| [[ | {{Combat Preview | ||
|} | |Name=[[Fruegel]] | ||
|Image=Boss_Fruegel.webp | |||
|Element={{TElemEa}} | |||
|EXP=2,000 | |||
|Gold=200 | |||
|Drops=[[Items#gravitygrabber|Gravity Grabber]] | |||
|Chance=100%}} | |||
| | |Maps= | ||
{ | '''Before Visiting''' | ||
{{{!}} class="wikitable mw-collapsible" style{{=}}"width: 700px;" | |||
! | {{!}}- | ||
! # !! Description !! Submap ID !! Image | |||
{{!}}- | |||
{{!}} 1 {{!}}{{!}} Cutscene intro that plays when Dart leaves Seles. {{!}}{{!}} 742 {{!}}{{!}} [[Missing File]] | |||
{{!}}- | |||
{{!}} 2 {{!}}{{!}} Cutscene where Shana is thrown into the cell. {{!}}{{!}} 694 {{!}}{{!}} [[Missing File]] | |||
{{!}}- | |||
{{!}} 3 {{!}}{{!}} Cutscene where the Man in Hood confronts Fruegel. {{!}}{{!}} 695 {{!}}{{!}} [[Missing File]] | |||
{{!}}} | |||
|} | '''First Visit''' | ||
{{{!}} class="wikitable mw-collapsible" | |||
{{!}}- | |||
! # !! Description !! Submap ID !! Image !! Encounter Formations (ID) !! Encounter% !! Escape% | |||
{{!}}- | |||
{{!}} 4 {{!}}{{!}} Coastal path leading towards the prison gate. {{!}}{{!}} 13 {{!}}{{!}} [[File:loc-hellena1.png|256px]] {{!}}{{!}} None {{!}}{{!}} N/A {{!}}{{!}} N/A | |||
{{!}}- | |||
{{!}} 5 {{!}}{{!}} Gate to the prison where Dart hides in a merchant's cart. {{!}}{{!}} 14 {{!}}{{!}} [[File:loc-hellena2.png|256px]] {{!}}{{!}} None {{!}}{{!}} N/A {{!}}{{!}} N/A | |||
{{!}}- | |||
{{!}} 6 {{!}}{{!}} Shown briefly in a cutscene while Dart remains hidden in the merchant's cart. Visually identical to submap ID 15. {{!}}{{!}} 37 {{!}}{{!}} [[Missing File]] {{!}}{{!}} None {{!}}{{!}} N/A {{!}}{{!}} N/A | |||
{{!}}- | |||
{{!}} 7 {{!}}{{!}} Unloading area for goods and the first save point. {{!}}{{!}} 16 {{!}}{{!}} [[Missing File]] {{!}}{{!}} Hellena Warden (1st) (470) {{!}}{{!}} Scripted {{!}}{{!}} 0% | |||
{{!}}- | |||
{{!}} 8 {{!}}{{!}} Hallway with two chests at different elevations, one containing a Burn Out and the other a Felt Hat. {{!}}{{!}} 19 {{!}}{{!}} [[Missing File]] {{!}}{{!}} None {{!}}{{!}} N/A {{!}}{{!}} N/A | |||
{{!}}- | |||
{{!}} 9 {{!}}{{!}} Pathways connecting the two halves of the prison, the unloading area, and the main gate. {{!}}{{!}} 15 {{!}}{{!}} [[Missing File]] {{!}}{{!}} '''1st Visit Only:''' Hellena Warden (1st) (470)<br>Fruegel, Hellena Warden x2, Senior Warden x2 (386)<br>'''2nd Visit Only:''' Hellena Warden (2nd,) Senior Warden (483) {{!}}{{!}} Contact<br>Scripted<br>Contact {{!}}{{!}} 0% | |||
{{!}}- | |||
{{!}} 10 {{!}}{{!}} Left path of the prison with an out of order elevator. {{!}}{{!}} 17 {{!}}{{!}} [[Missing File]] {{!}}{{!}} None {{!}}{{!}} N/A {{!}}{{!}} N/A | |||
{{!}}- | |||
{{!}} 11 {{!}}{{!}} Right path of the prison, with a guard posted next to ladder. {{!}}{{!}} 23 {{!}}{{!}} [[Missing File]] {{!}}{{!}} '''1st Visit Only:''' Hellena Warden (1st) (470)<br>'''2nd Visit Only:''' Hellena Warden (2nd,) Senior Warden (483) {{!}}{{!}} Contact {{!}}{{!}} 0% | |||
{{!}}- | |||
{{!}} 12 {{!}}{{!}} Platforms housing the elevators which connect various prison blocks. {{!}}{{!}} 20 {{!}}{{!}} [[Missing File]] {{!}}{{!}} '''1st Visit Only:''' Hellena Warden (1st) (470)<br>'''2nd Visit Only:''' Hellena Warden (2nd,) Senior Warden (483) {{!}}{{!}} Contact&Scripted<br>Contact {{!}}{{!}} 0% | |||
{{!}}- | |||
{{!}} 13 {{!}}{{!}} Warden barracks with several beds and a massive fireplace. {{!}}{{!}} 21 {{!}}{{!}} [[Missing File]] {{!}}{{!}} '''1st Visit Only:''' Hellena Warden (1st) (470)<br>'''2nd Visit Only:''' Hellena Warden (2nd,) Senior Warden (483) {{!}}{{!}} Contact {{!}}{{!}} 0% | |||
{{!}}- | |||
{{!}} 14 {{!}}{{!}} Hallway with an exit in the first cell block. {{!}}{{!}} 25 {{!}}{{!}} [[Missing File]] {{!}}{{!}} '''1st Visit Only:''' Hellena Warden x2 (1st) (486)<br>'''2nd Visit Only:''' Hellena Warden x2 (2nd) (482) {{!}}{{!}} Contact {{!}}{{!}} 0% | |||
{{!}}- | |||
{{!}} 15 {{!}}{{!}} Hallway in the first cell block where Dart first meets Lavitz. {{!}}{{!}} 24 {{!}}{{!}} [[Missing File]] {{!}}{{!}} '''1st Visit Only:''' Hellena Warden x3 (1st) (478)<br>Hellena Warden x2 (1st) (486)<br>'''2nd Visit Only:''' Hellena Warden (2nd,) Senior Warden (483) {{!}}{{!}} Scripted<br>Contact<br>Contact {{!}}{{!}} 0% | |||
{{!}}- | |||
{{!}} 16 {{!}}{{!}} Cell in the first block containing a skeleton on a bed. {{!}}{{!}} 640 {{!}}{{!}} [[Missing File]] {{!}}{{!}} None {{!}}{{!}} N/A {{!}}{{!}} N/A | |||
{{!}}- | |||
{{!}} 17 {{!}}{{!}} Hallway in the first cell block with two accessible cells. {{!}}{{!}} 26 {{!}}{{!}} [[Missing File]] {{!}}{{!}} '''1st Visit Only:''' Hellena Warden x2 (1st) (486)<br>'''2nd Visit Only:''' Hellena Warden x2 (2nd) (482) {{!}}{{!}} Contact {{!}}{{!}} 0% | |||
{{!}}- | |||
{{!}} 18 {{!}}{{!}} Cell with two prisoners and a chest containing a Spark Net. {{!}}{{!}} 642 {{!}}{{!}} [[Missing File]] {{!}}{{!}} None {{!}}{{!}} N/A {{!}}{{!}} N/A | |||
{{!}}- | |||
{{!}} 19 {{!}}{{!}} Cell with a prisoner terrified of Fruegel and full of crates that Dart leaps across. {{!}}{{!}} 641 {{!}}{{!}} [[Missing File]] {{!}}{{!}} None {{!}}{{!}} N/A {{!}}{{!}} N/A | |||
{{!}}- | |||
{{!}} 20 {{!}}{{!}} Trap door room containing the Key to Shana's Cell. {{!}}{{!}} 31 {{!}}{{!}} [[Missing File]] {{!}}{{!}} '''2nd Visit Only:''' Hellena Warden x2 (2nd) (482)<br>Hellena Warden (2nd,) Senior Warden (483) {{!}}{{!}} Scripted<br>Contact {{!}}{{!}} 0% | |||
{{!}}- | |||
{{!}} 21 {{!}}{{!}} Hallway with an exit in the second cell block. {{!}}{{!}} 28 {{!}}{{!}} [[Missing File]] {{!}}{{!}} '''1st Visit Only:''' Hellena Warden x3 (1st) (478)<br>'''2nd Visit Only:'''Hellena Warden x2 (2nd) (482) {{!}}{{!}} Contact {{!}}{{!}} 0% | |||
{{!}}- | |||
{{!}} 22 {{!}}{{!}} Hallway in the second cell block that does not contain Shana's cell. {{!}}{{!}} 29 {{!}}{{!}} [[Missing File]] {{!}}{{!}} '''1st Visit Only:''' Hellena Warden x3 (1st) (478)<br>'''2nd Visit Only:'''Hellena Warden x2 (2nd) (482) {{!}}{{!}} Contact {{!}}{{!}} 0% | |||
{{!}}- | |||
{{!}} 23 {{!}}{{!}} Cell with an optimistic prisoner, a pessimistic prisoner, and a chest containing 20 Gold. {{!}}{{!}} 644 {{!}}{{!}} [[Missing File]] {{!}}{{!}} None {{!}}{{!}} N/A {{!}}{{!}} N/A | |||
{{!}}- | |||
{{!}} 24 {{!}}{{!}} Hallway in the second cell block that contains Shana's cell. {{!}}{{!}} 27 {{!}}{{!}} [[Missing File]] {{!}}{{!}} '''1st Visit Only:''' Hellena Warden x3 (1st) (478)<br>'''2nd Visit Only:''' Hellena Warden x2 (2nd) (482) {{!}}{{!}} Contact&Scripted<br>Contact {{!}}{{!}} 0% | |||
{{!}}- | |||
{{!}} 25 {{!}}{{!}} Shana's cell. {{!}}{{!}} 643 {{!}}{{!}} [[Missing File]] {{!}}{{!}} None {{!}}{{!}} N/A {{!}}{{!}} N/A | |||
{{!}}- | |||
{{!}} 26 {{!}}{{!}} Bridge where Fruegel hurls a warden over the ledge. {{!}}{{!}} 22 {{!}}{{!}} [[Missing File]] {{!}}{{!}} None {{!}}{{!}} N/A {{!}}{{!}} N/A | |||
{{!}}- | |||
{{!}} 27 {{!}}{{!}} Cell with a prisoner warning of strange noises and a chest containing 20 Gold behind stacked crates. {{!}}{{!}} 645 {{!}}{{!}} [[Missing File]] {{!}}{{!}} None {{!}}{{!}} N/A {{!}}{{!}} N/A | |||
{{!}}- | |||
{{!}} 28 {{!}}{{!}} Gate where Dart, Shana, and Lavitz escape the prison. Visually identical to submap ID 14. {{!}}{{!}} 56 {{!}}{{!}} [[Missing File]] {{!}}{{!}} None {{!}}{{!}} N/A {{!}}{{!}} N/A | |||
{{!}}} | |||
'''Second Visit Only''' | |||
{{{!}} class="wikitable mw-collapsible" | |||
{{!}}- | |||
! # !! Description !! Submap ID !! Image !! Encounter Formations (ID) !! Encounter% !! Escape% | |||
! | {{!}}- | ||
{{!}} 29 {{!}}{{!}} Summit of the prison where Albert is held captive at night. {{!}}{{!}} 35 {{!}}{{!}} [[Missing File]] {{!}}{{!}} None {{!}}{{!}} N/A {{!}}{{!}} N/A | |||
{{!}}- | |||
{{!}} 30 {{!}}{{!}} Elevator room with a dragon relief carved into the wall. {{!}}{{!}} 18 {{!}}{{!}} [[Missing File]] {{!}}{{!}} None {{!}}{{!}} N/A {{!}}{{!}} N/A | |||
{{!}}- | |||
{{!}} 31 {{!}}{{!}} Pit where the party encounters Jiango. {{!}}{{!}} 30 {{!}}{{!}} [[Missing File]] {{!}}{{!}} Jiango (413) {{!}}{{!}} Scripted {{!}}{{!}} 0% | |||
{{!}}- | |||
{{!}} 32 {{!}}{{!}} Stairwell just after defeating Jiango. {{!}}{{!}} 32 {{!}}{{!}} [[Missing File]] {{!}}{{!}} Hellena Warden (2nd,) Senior Warden (483) {{!}}{{!}} Contact {{!}}{{!}} 0% | |||
{{!}}- | |||
{{!}} 33 {{!}}{{!}} Stairwell past the trap door room. {{!}}{{!}} 33 {{!}}{{!}} [[Missing File]] {{!}}{{!}} Fowl Fighter x2, Hellena Warden (2nd) (484) {{!}}{{!}} Contact {{!}}{{!}} 0% | |||
{{!}}- | |||
{{!}} 34 {{!}}{{!}} Save point near the summit of the prison. {{!}}{{!}} 34 {{!}}{{!}} [[Missing File]] {{!}}{{!}} None {{!}}{{!}} N/A {{!}}{{!}} N/A | |||
{{!}}- | |||
{{!}} 35 {{!}}{{!}} Summit of the prison where Albert is held captive at daybreak. {{!}}{{!}} 36 {{!}}{{!}} [[Missing File]] {{!}}{{!}} Fruegel, Rodriguez, Guftas (387) {{!}}{{!}} Scripted {{!}}{{!}} 0% | |||
{{!}}- | |||
{{!}}} | |||
|Trivia= | |Trivia= | ||
# This is the first location that uses physical contact to trigger battles. | |||
# As the party breaks out of Hellena on horseback, beta models are used for Dart and Shana. | |||
|Gallery= | |||
| | <gallery> | ||
loc-hellena10.png|Loading Area | |||
loc-hellena5.png|Barracks | |||
loc-hellena6.png|Break Out Attempt | |||
loc-hellena7.png|Upper Bridge | |||
loc-hellena8.png|Outside Barracks | |||
loc-hellena9.png|Shana's Cell | |||
</gallery> | |||
|References= | |References= | ||
<references/> | |||
}} | }} | ||
[[Category:Locations]][[Category:Disc 1]] | |||
[[Category:Missing Information]] | |||
Latest revision as of 09:57, 1 June 2026
| Hellena Prison | |
 | |
| Services |
|
| Collectibles |
|
| Combat |
|
| Unique Locations |
|
Hellena Prison is a prison island on the southern coast of Serdio, under the direct command of Imperial Sandora. Isolated from land by a narrow drawbridge, the dark, stone prison resembles a skull with torch light and black smoke rising from its windows. It was built by humans who converted it from the ruins of a destroyed species.[1] Guards patrol every walkway and room, ready to attack intruders or escapees without hesitation. Fruegel, the prison warden, is a cruel giant of a man who greatly abuses his powers and works in league with Imperial Sandora under Emperor Doel's rule. The prison has become renown for brutality and the inhumane treatment of its captives as those who are taken there are never released.
Story
A winged beast glides overhead the ghastly prison. After making his way through the Forest, Dart arrives at a pathway leading to Hellena Prison. In hesitation, he looks down the narrow path leading to a single drawbridge, where he would surely be exposed on all sides. As he thinks of a plan to infiltrate the prison, a merchant's caravan arrives and heads straight for the gate. Dart decides to tail the caravan with the hopes of sneaking in unnoticed.
At the gate, the merchant declares his cargo of meat and fish to the Hellena Warden guarding the entry. He inquires about the recent increase in shipments but is rebuked by the warden who begins his inspection. Meanwhile, Dart dashes to the opposite side of the caravan, staying out of sight until the delivery is approved for entry. The drawbridge lowers, the warden returns to his post and Dart dives into the back of the caravan heading into the prison.
Read More
Upon entering the prison, Dart jumps out of the caravan, startling the merchant who raises the alarm. Immediately, a warden arrives to detain the intruder and a fight ensues. Making short work of the guard, Dart reassures the merchant of his safety, who in turn swears to secrecy and offers to sell him items. Security is tight in the prison as wardens patrol the grounds in rhythmic patterns. Leaving the storeroom, Dart sneaks past the guards up a stairwell to reach the second floor. Crossing a wooden bridge, Dart arrives outside the barracks where he finds yet another elevator taking him to the first prison tower. Once inside, he continues down the torchlit hallway built of the same shoddy wood planks and bricks as the rest of the prison. Searching from cell to cell, he stumbles upon a couple of wardens harassing their new detainees, two Knights of Basil who have recently been captured as prisoners of war. They continue to taunt and ridicule their doomed captives, promising a horrific death by being fed to Fruegel's monster.
Nearby, a fight breaks out as another prisoner attempts to escape. Plunging in from an adjacent hallway, a skilled spearman in green and silver uniform swoops in to defend the knights, ordering them to escape back to the castle. Unfortunately, prison back up arrives and the escaping knights are dispatched off the floor to fall to their deaths. Dart joins forces with the honorable knight, who introduces himself as Lavitz, the Head of the First Knighthood in the Kingdom of Basil. After fending off the guards together, Lavitz turns on Dart, spear clashing with sword. Defending himself, Dart explains that he is not the enemy. They continue to fight off another wave of guards before catching their breath and discussing how each came to be at the infamous prison. Dart explains his dire need to rescue Shana and Lavitz, impressed with his audacious mission and combat skills, insists that they work together to escape, of course, after rescuing the imprisoned woman.
As a team, they search the prison cells and gather news of a young girl from Seles confined with a high level of security in another tower. Arriving at a locked door to the second prison tower, Dart and Lavitz carefully search a nearby corridor for the key. They slip past a dozen wardens to reach a stairwell leading to a series of rickety wooden bridges. Upon a wooden crate, sparkles the Key to Shana's Cell. Returning to the second prison tower, the two fugitives cause a commotion, which catches Shana's attention from a nearby cell. With Lavitz keeping watch, Dart can finally rejoice to see his dearest friend, whom he cherishes like a sister. Shana asks to see his face and notices how strong he has grown during their time apart. After taking a final look about at her cell, Shana follows Dart into the hallway where now more guards are waiting for them. After fiercely defending Shana, Dart promises that he will always protect her. Shana walks over to a brick wall to pick up a bow and arrow, drawing the string taut to demonstrate that she, too, can help fight. Impressed with their fortitude to survive this nightmarish prison, Lavitz commends the two of them for their strength and determination.
Meanwhile, Fruegel has been alerted of the girl's liberation by a knight of Basil and a man in red armor. Furiously, Fruegel throws one of his men from the skyline bridge into the hellish depths. Barking to another guard, Fruegel demands that she be detained, alive as was explicitly ordered by Emperor Doel.
Dart and party return to the ground floor of the prison to finally escape but they are intercepted by the head warden, Fruegel. Fiendishly, he promises to feed them to his pet before disclosing that capturing Shana was a paltry order from his Majesty Doel. Since the task was so trivial, he ordered that Seles be razed to the ground for his own wicked delight. Lashing out in anger, Dart begins the battle, which ends with a defeated Fruegel living to see another day. In swift haste, the party flees the prison on horseback, hoping to never return.
When they reach the Forest, Dart notices that soldiers have been stationed there. With Fruegel's men in hot pursuit, the party is forced to head to the Prairie.
Meanwhile, back at the prison, the mysterious Hooded Man enrobed in black reprimands the warden for his failure to contain the girl. He demands of Fruegel to correct his folly, lest he inform the Emperor of the head warden's misconduct. Reassuringly, the Hooded man claims that the mistake is not dire and that all is going according to plan.
Second Visit
As the party leaves Lohan, a wounded Knight of Basil limps into town, mortally wounded but grateful to find Lavitz. He reports that Imperial Sandora launched a surprise attack on Bale and has taken the King as captive. Overcome with concern for King Albert, Lavitz loses self-control and is subdued by the martial arts master, Haschel, the third place winner of the Hero Competition. When Lavitz regains consciousness, Haschel returns from his scouting mission to report that Bale is under occupation and that Lavitz is the only hope for both king and country. In exchange for the safety of his people, King Albert was willingly taken to Hellena Prison. With renewed hope, Dart and party return to Hellena Prison, only this time with new party members and Dragoon spirits.
Upon arrival at the prison, the party nearly misses the drawbridge being raised for another supplies delivery. Valiantly, Lavitz scales the rising bridge and overcomes the guards. With the drawbridge lowered once again, the team is free to infiltrate the prison and search for King Albert.
Meanwhile, on the prison rooftop, Fruegel delights in the coming of dawn as he promises his captive, King Albert, that he may see the sun once more before his impending execution. Honorably, King Albert refuses to be baited by him, claiming that he has no means to speak with vulgar men. When Fruegel reveals the trap set for Dart and party, King Albert is shocked by the villainy of both Fruegel himself and Lord Doel. A warden arrives to announce that Lavitz and the red one, Dart, have arrived on scene but that they will never reach the top floor alive.
Dart and party find themselves in the storeroom once more with the same merchant as before, who is still willing to quietly cooperate and sell them items. After navigating an intricate system of elevators, doors and rope ladders, the party reaches the skybridge and follows the path to the second floor corridor where the Prison Key was found during the first visit. Full of arrogance and scorn, the wardens jeer at the party before releasing the trap door. They fall into a dusty prison chamber with skeletons and bones strewn about. Shana notices a draft from behind a massive boulder when the party hears the growling of Fruegel's infamous pet, Jiango. After overcoming the hideous beast, the party realizes that the boulder blocking the path has been crushed and they can now escape. Ascending the stairs, they return to the second floor corridor and head left to ascend another flight of stairs to reach the rooftop.
Meanwhile, Fruegel announces sunrise with a sickening glee. He mocks King Albert's wish for peace by promising him an end to the war achieved with his own execution. Although knowingly defying Lord Doel and the silver haired one, Fruegel intends to follow through with his death threat until Shana looses an arrow and the party arrives to rescue King Albert. After the party defeats his pet beasts, Rodriguez and Guftas, Lavitz lands the finishing blow to finally vanquish the nefarious Fruegel.
Suddenly, the Hooded Man appears and taking King Albert hostage, he stabs his thieving hand into the King's back and reveals the Moon Gem. Fearlessly, Lavitz transforms into the Jade Dragoon and nosedives into the Hooded One, who instantly brandishes a formidable, magical blade and slays Lavitz in his place. His hood falls away to reveal Lloyd, the first place winner of the Hero Competition in Lohan. With haste, Lloyd makes his escape, leaving behind a gruesome scene. As brave Lavitz lays dying, he entrusts the protection of King Albert to Dart before ultimately perishing. King Albert grimaces when the life leaves Lavitz's body and Shana winces, turning away toward Rose. The Jade Dragoon spirit once again flies into the air from its lost host only to sink down gently before King Albert, the next Jade Dragoon. In anguish, Dart screams Lavitz's name as he holds his departed friend in his arms.
Collapse story content
Services
Save Points
- On the first visit, past the main entrance by an elevator to the south. It borders a barracks and Hellena Wardens occasionally patrol close by.
- On the second visit, near the top of the summit after defeating Jiango and ascending several flights of stairs.
Rest Areas
None.
Shops
| First Visit | |
|---|---|
| Price | Item |
| 10G | Healing Potion |
| 30G | Angel's Prayer |
| 10G | Spark Net |
| Second Visit | |
|---|---|
| Price | Item |
| 10G | Healing Potion |
| 50G | Sun Rhapsody |
| 30G | Angel's Prayer |
| 20G | Mind Purifier |
| 20G | Midnight Terror |
| 20G | Thunderbolt |
Collectibles
Goods
Main article: Goods
| Name on Acquisition | Name in Inventory | Acquisition | Image |
|---|---|---|---|
| Key to Shana's Cell | Prison Key | Upon reaching the room with two groups of Hellena Wardens, circle around upstairs and across two bridges to a crate with a glint to trigger a story event and acquire the key. |  |
Stardust
Main article: Stardust
None.
Treasure Chests
Main article: Treasure Chests
There are 20 treasure chests in this area.
Note: Chests available during the first visit to Hellena Prison remain accessible upon returning for the second visit; however, all chests will be permanently inaccessible after leaving for the second time.
First Visit
| Contents | Acquisition | Image |
|---|---|---|
| Burn Out | From the storeroom with the merchant, take the top left exit and follow the path. | 
|
| Angel's Prayer | Head up to level two of the prison and just beyond the first elevator, enter the barracks to find this chest in the upper left area of the room near the beds. | 
|
| Leather Jacket | In the barracks: continue left beyond the first chest | 
|
| 50G | In the barracks: central kitchen area | 
|
| Spark Net | First prison tower: inside a cell | 
|
| 20G | First prison tower: inside a cell | 
|
| 20G | Second prison tower: inside a cell | 
|
| 20G | Second prison tower: inside a cell | 
|
Second Visit
| Contents | Acquisition | Image |
|---|---|---|
| Felt Hat | Take the elevator that was previously out of order to get to the next screen. Get off and enter the door. Then, head right to jump over the pit and enter that door. | Chest1.png)
|
| Therapy Ring | Continue past the previous chest following the path. | Chest2.png)
|
| Leather Armor | Get off the elevator and take the rope ladder. | Chest3.png)
|
| Thunderbolt | Through the door from the elevator, take the door on your left and follow the path. | Chest5.png)
|
| Silver Vest | From the previous chest, instead of taking the elevator slide down the rope to your right. | Chest6.png)
|
| Pandemonium | Instead of the right door, take the far left door and follow the path. | Chest4.png)
|
| Healing Potion | Return to the main elevator and head up to the skybridge. Take the path on the left. | Chest7.png)
|
| Sachet | Fall into Jiango's lair and head to the top of the room. | Chest8.png)
|
| Healing Potion | After defeating Jiango, continue on the path. | Chest9.png)
|
| Broad Sword | On the roof, near the Save Point: top | Chest10.png)
|
| Spear | On the roof, near the Save Point: left | Chest11.png)
|
| 20G | On the roof, near the Save Point: bottom | Chest12.png)
|
Combat
Minor Enemies
Main article: Minor Enemies
First Visit
| Hellena Warden | ||
|---|---|---|

| ||
| Fire | ||
| EXP 6 |
Gold 9 |
Drops Nothing |
Second Visit
| Hellena Warden | ||
|---|---|---|
|
| ||
| Fire | ||
| EXP 20 |
Gold 15 |
Drops Morning Star 2% |
| Senior Warden | ||
|---|---|---|

| ||
| Fire | ||
| EXP 24 |
Gold 21 |
Drops Spear 2% |
| Fowl Fighter | ||
|---|---|---|
| File:Mob Fowl Fighter.webp | ||
| Fire | ||
| EXP 16 |
Gold 9 |
Drops Mind Purifier 8% |
| Guftas | ||
|---|---|---|
| [[File:Missing File|128px|link=Guftas]] | ||
| Darkness | ||
| EXP 0 |
Gold 0 |
Drops Nothing |
| Rodriguez | ||
|---|---|---|
| [[File:Missing File|128px|link=Rodriguez]] | ||
| Wind | ||
| EXP 0 |
Gold 0 |
Drops Nothing |
Bosses
Main article: Bosses
First Visit
| Fruegel | ||
|---|---|---|

| ||
| Earth | ||
| EXP 300 |
Gold 50 |
Drops Knight Shield 100% |
Second Visit
| Jiango | ||
|---|---|---|

| ||
| Earth | ||
| EXP 2,000 |
Gold 100 |
Drops Sachet 100% |
| Fruegel | ||
|---|---|---|
|
| ||
| Earth | ||
| EXP 2,000 |
Gold 200 |
Drops Gravity Grabber 100% |
Maps
Before Visiting
| # | Description | Submap ID | Image |
|---|---|---|---|
| 1 | Cutscene intro that plays when Dart leaves Seles. | 742 | Missing File |
| 2 | Cutscene where Shana is thrown into the cell. | 694 | Missing File |
| 3 | Cutscene where the Man in Hood confronts Fruegel. | 695 | Missing File |
First Visit
| # | Description | Submap ID | Image | Encounter Formations (ID) | Encounter% | Escape% |
|---|---|---|---|---|---|---|
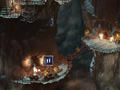
| 4 | Coastal path leading towards the prison gate. | 13 |  |
None | N/A | N/A |
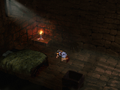
| 5 | Gate to the prison where Dart hides in a merchant's cart. | 14 |  |
None | N/A | N/A |
| 6 | Shown briefly in a cutscene while Dart remains hidden in the merchant's cart. Visually identical to submap ID 15. | 37 | Missing File | None | N/A | N/A |
| 7 | Unloading area for goods and the first save point. | 16 | Missing File | Hellena Warden (1st) (470) | Scripted | 0% |
| 8 | Hallway with two chests at different elevations, one containing a Burn Out and the other a Felt Hat. | 19 | Missing File | None | N/A | N/A |
| 9 | Pathways connecting the two halves of the prison, the unloading area, and the main gate. | 15 | Missing File | 1st Visit Only: Hellena Warden (1st) (470) Fruegel, Hellena Warden x2, Senior Warden x2 (386) 2nd Visit Only: Hellena Warden (2nd,) Senior Warden (483) |
Contact Scripted Contact |
0% |
| 10 | Left path of the prison with an out of order elevator. | 17 | Missing File | None | N/A | N/A |
| 11 | Right path of the prison, with a guard posted next to ladder. | 23 | Missing File | 1st Visit Only: Hellena Warden (1st) (470) 2nd Visit Only: Hellena Warden (2nd,) Senior Warden (483) |
Contact | 0% |
| 12 | Platforms housing the elevators which connect various prison blocks. | 20 | Missing File | 1st Visit Only: Hellena Warden (1st) (470) 2nd Visit Only: Hellena Warden (2nd,) Senior Warden (483) |
Contact&Scripted Contact |
0% |
| 13 | Warden barracks with several beds and a massive fireplace. | 21 | Missing File | 1st Visit Only: Hellena Warden (1st) (470) 2nd Visit Only: Hellena Warden (2nd,) Senior Warden (483) |
Contact | 0% |
| 14 | Hallway with an exit in the first cell block. | 25 | Missing File | 1st Visit Only: Hellena Warden x2 (1st) (486) 2nd Visit Only: Hellena Warden x2 (2nd) (482) |
Contact | 0% |
| 15 | Hallway in the first cell block where Dart first meets Lavitz. | 24 | Missing File | 1st Visit Only: Hellena Warden x3 (1st) (478) Hellena Warden x2 (1st) (486) 2nd Visit Only: Hellena Warden (2nd,) Senior Warden (483) |
Scripted Contact Contact |
0% |
| 16 | Cell in the first block containing a skeleton on a bed. | 640 | Missing File | None | N/A | N/A |
| 17 | Hallway in the first cell block with two accessible cells. | 26 | Missing File | 1st Visit Only: Hellena Warden x2 (1st) (486) 2nd Visit Only: Hellena Warden x2 (2nd) (482) |
Contact | 0% |
| 18 | Cell with two prisoners and a chest containing a Spark Net. | 642 | Missing File | None | N/A | N/A |
| 19 | Cell with a prisoner terrified of Fruegel and full of crates that Dart leaps across. | 641 | Missing File | None | N/A | N/A |
| 20 | Trap door room containing the Key to Shana's Cell. | 31 | Missing File | 2nd Visit Only: Hellena Warden x2 (2nd) (482) Hellena Warden (2nd,) Senior Warden (483) |
Scripted Contact |
0% |
| 21 | Hallway with an exit in the second cell block. | 28 | Missing File | 1st Visit Only: Hellena Warden x3 (1st) (478) 2nd Visit Only:Hellena Warden x2 (2nd) (482) |
Contact | 0% |
| 22 | Hallway in the second cell block that does not contain Shana's cell. | 29 | Missing File | 1st Visit Only: Hellena Warden x3 (1st) (478) 2nd Visit Only:Hellena Warden x2 (2nd) (482) |
Contact | 0% |
| 23 | Cell with an optimistic prisoner, a pessimistic prisoner, and a chest containing 20 Gold. | 644 | Missing File | None | N/A | N/A |
| 24 | Hallway in the second cell block that contains Shana's cell. | 27 | Missing File | 1st Visit Only: Hellena Warden x3 (1st) (478) 2nd Visit Only: Hellena Warden x2 (2nd) (482) |
Contact&Scripted Contact |
0% |
| 25 | Shana's cell. | 643 | Missing File | None | N/A | N/A |
| 26 | Bridge where Fruegel hurls a warden over the ledge. | 22 | Missing File | None | N/A | N/A |
| 27 | Cell with a prisoner warning of strange noises and a chest containing 20 Gold behind stacked crates. | 645 | Missing File | None | N/A | N/A |
| 28 | Gate where Dart, Shana, and Lavitz escape the prison. Visually identical to submap ID 14. | 56 | Missing File | None | N/A | N/A |
Second Visit Only
| # | Description | Submap ID | Image | Encounter Formations (ID) | Encounter% | Escape% |
|---|---|---|---|---|---|---|
| 29 | Summit of the prison where Albert is held captive at night. | 35 | Missing File | None | N/A | N/A |
| 30 | Elevator room with a dragon relief carved into the wall. | 18 | Missing File | None | N/A | N/A |
| 31 | Pit where the party encounters Jiango. | 30 | Missing File | Jiango (413) | Scripted | 0% |
| 32 | Stairwell just after defeating Jiango. | 32 | Missing File | Hellena Warden (2nd,) Senior Warden (483) | Contact | 0% |
| 33 | Stairwell past the trap door room. | 33 | Missing File | Fowl Fighter x2, Hellena Warden (2nd) (484) | Contact | 0% |
| 34 | Save point near the summit of the prison. | 34 | Missing File | None | N/A | N/A |
| 35 | Summit of the prison where Albert is held captive at daybreak. | 36 | Missing File | Fruegel, Rodriguez, Guftas (387) | Scripted | 0% |
Trivia
- This is the first location that uses physical contact to trigger battles.
- As the party breaks out of Hellena on horseback, beta models are used for Dart and Shana.
Gallery
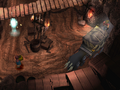
Loading Area
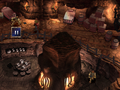
Barracks
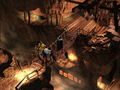
Break Out Attempt
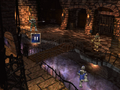
Upper Bridge
Outside Barracks
Shana's Cell


References
- ↑ Legend of Dragoon: Official Guidebook, (ASCII, 2000), p.411