Marshland: Difference between revisions
SwirlingCrow (talk | contribs) |
mNo edit summary |
||
| (14 intermediate revisions by 4 users not shown) | |||
| Line 1: | Line 1: | ||
{{ | {{Infobox Location | ||
|Name=Marshland | |||
|Image=Marshland_Preview.webp | |||
|Stardust=1 | |||
|Treasure=10 | |||
|Mobs=Random Encounters; Scripted | |||
|Previous=[[Hoax]] | |||
|Next=[[Volcano Villude]]}} | |||
{{Location | |||
|Synopsis='''Marshland''' is a boggy swamp area in [[Serdio]]. It is east of [[Hoax]], and home to the Seventh Fort of Basil. [[Dart]] and company are tasked with helping in the defense of the Seventh Fort as well as searching for the Dragon's Nest. | |||
|Story1=Upon reaching the Marshland, Dart and company have the choice to either continue straight and defend the Seventh Fort, or to take the left path and continue to Volcano Villude. | |||
= | |Story2=If the party decides to defend the Seventh Fort, they will have to fight five sets of Sandora Soldiers and a Sandora Commander to end the battle. Dart and company then proceed inside to find that there is only one lone survivor. As they approach and speak to him, he reveals that the Sandora Army used the dragon in the battle. After his subsequent death, Lavitz swears, "We will wreak your revenge upon them." Upon inspecting a few of the deceased soldiers, it seems as though some of them have no physical wounds, which the group assumes to be the Dragon's poison as the culprit. When heading towards [[Volcano Villude]], Shana twists her ankle in the mud, and Dart offers to give her a piggyback ride. After a short dialog between the two, Shana's ankle is fine , and the party continues on their way to Volcano Villude. | ||
If the party decides to continue to Volcano Villude without defending the Seventh Fort, they have until they travel down into the [[Nest of Dragon]] to return to it. If skipped, returning to the Seventh Fort will show all the chests as having been looted, although the dying Head of the 10th Knighthood will still give his [[Equipment#wargodsamulet|Wargod's Amulet]] when approached. After returning to [[Lohan]] following the events that take place at the [[Shrine of Shirley]], the bodies at the Seventh Fort vanish. | |||
Later in Disc 1, there is the option to return to Marshland whenever [[Albert]] joins the party, this results in a special dialogue where Albert talks about Sandora's occupation of Basil. This optional dialogue will disappear after the war ends. | |||
|Stardust={{{!}} class="wikitable mw-collapsible" style{{=}}"width: 700px;" | |||
{{ | ! # !! Location !! Image | ||
{{!}}- | |||
{{!}} 10 {{!}}{{!}} Inside the Seventh Fort fireplace. {{!}}{{!}} [[File:Marshland_Stardust01.webp|256px]] | |||
! Location !! Image | {{!}}} | ||
|Treasure={{TreasureCount|10}} | |||
{{ | {{{!}} class="wikitable mw-collapsible" style{{=}}"width: 700px;" | ||
{{!}}- | |||
{{ | |||
! Contents !! Acquisition !! Image | ! Contents !! Acquisition !! Image | ||
{{!}}- | |||
{{!}} [[Items#sunrhapsody|Sun Rhapsody]] {{!}}{{!}} Instead of taking the tree path in the first area, go on the upper right path to the Seventh Fort. (Missable if you don't fight the Sandorans){{!}}{{!}} [[File:Marshland_Chest01.webp|256px]] | |||
{{!}}- | |||
{{!}} [[Items#sunrhapsody|Sun Rhapsody]] {{!}}{{!}} Inside the Fort on the right. (Missable if you don't fight the Sandorans) {{!}}{{!}} [[File:Marshland_Chest02.webp|256px]] | |||
{{!}}- | |||
{{!}} [[Items#healingpotion|Healing Potion]] {{!}}{{!}} Inside the Fort on the left. (Missable if you don't fight the Sandorans) {{!}}{{!}} [[File:Marshland_Chest03.webp|256px]] | |||
{{!}}- | |||
{{!}} [[Items#spiritpotion|Spirit Potion]] {{!}}{{!}} Inside the Fort in the bottom right corner. (Missable if you don't fight the Sandorans) {{!}}{{!}} [[File:Marshland_Chest04.webp|256px]] | |||
{{!}}- | |||
{{!}} [[Equipment#lance|Lance]] {{!}}{{!}} Inside the Fort take the path on the left to go outside the fort. (Missable if you don't fight the Sandorans) {{!}}{{!}} [[File:Marshland_Chest05.webp|256px]] | |||
{{!}}- | |||
{{!}} [[Items#spiritpotion|Spirit Potion]] {{!}}{{!}} Follow the tree path in the first are and get on the boat. Get off at the first stop. {{!}}{{!}} [[File:Marshland_Chest06.webp|256px]] | |||
{{!}}- | |||
{{!}} [[Items#burnout|Burn Out]] {{!}}{{!}} Down from the first boat stop and get off. {{!}}{{!}} [[File:Marshland_Chest07.webp|256px]] | |||
{{!}}- | |||
{{!}} [[Items#bodypurifier|Body Purifier]] {{!}}{{!}} Down from the second boat stop and get off. {{!}}{{!}} [[File:Marshland_Chest08.webp|256px]] | |||
{{!}}- | |||
{{!}} [[Equipment#stunguard|Stun Guard]] {{!}}{{!}} Go left from the third boat stop, on the right side. {{!}}{{!}} [[File:Marshland_Chest09.webp|256px]] | |||
{{!}}- | |||
{{!}} [[Items#magicstoneofsignet|Magic Stone of Signet]] {{!}}{{!}} On the left side of last boat stop. {{!}}{{!}} [[File:Marshland_Chest10.webp|256px]] | |||
{{!}}} | |||
{ | |||
! | |||
= | |MinorEnemies={{Combat Preview | ||
|Name=[[Sea Dragon]] | |||
|Image=Mob_Sea_Dragon.webp | |||
|Element={{TElemFi}} | |||
|Font=White | |||
|EXP=14 | |||
| | |Gold=9 | ||
| [[ | |Drops=[[Items#burnout|Burn Out]] | ||
|Chance=10%}} | |||
| [[ | {{Combat Preview | ||
| | |Name=[[Crocodile]] | ||
| [[ | |Image=Mob_Crocodile.webp | ||
|Element={{TElemWa}} | |||
| [[Myconido]] || | |EXP=17 | ||
| | |Gold=6 | ||
| [[ | |Drops=[[Items#pellet|Pellet]] | ||
|Chance=10%}} | |||
| | {{Combat Preview | ||
| | |Name=[[Myconido]] | ||
| [[ | |Image=Mob_Myconido.webp | ||
| | |Element={{TElemEa}} | ||
| [[ | |EXP=11 | ||
| | |Gold=8 | ||
| | |Drops=[[Items#bodypurifier|Body Purifier]] | ||
|} | |Chance=10%}} | ||
{{Combat Preview | |||
|Name=Merman | |||
|Image=Mob_Merman.webp | |||
|Element={{TElemWa}} | |||
|EXP=15 | |||
|Gold=12 | |||
|Drops=[[Equipment#spear|Spear]] | |||
|Chance=20%}} | |||
{{Combat Preview | |||
|Name=[[Sandora Soldier]] | |||
|Image=Mob_Sandora_Soldier.webp | |||
|Element={{TElemFi}} | |||
|EXP=14 | |||
|Gold=9 | |||
|Drops=[[Items#healingpotion|Healing Potion]] | |||
|Chance=8%}} | |||
{{Combat Preview | |||
|Name=[[Sandora Soldier]] | |||
|Image=Mob_Sandora_Soldier.webp | |||
|Element={{TElemWa}} | |||
|EXP=11 | |||
|Gold=12 | |||
|Drops=[[Items#sunrhapsody|Sun Rhapsody]] | |||
|Chance=10%}} | |||
=== | |Bosses={{Combat Preview | ||
|Name=[[Commander]] | |||
|Image=Boss_Commander_Marshland.webp | |||
|Element={{TElemDa}} | |||
|EXP=17 | |||
|Gold=9 | |||
|Drops=[[Items#attackball|Attack Ball]] | |||
|Chance=100%}} | |||
== | |Maps= | ||
{{{!}} class="wikitable mw-collapsible" | |||
{{!}}- | |||
! # !! Description !! Submap ID !! Image !! Encounter Formations (ID) !! Encounter% !! Escape% | |||
{{!}}- | |||
{{!}} 1 {{!}}{{!}} First area. {{!}}{{!}} 106 {{!}}{{!}} [[Missing File]] {{!}}{{!}} Myconido x2 (34)<br>Sea Dragon, Myconido (35)<br>Merman x2 (36)<br>Sea Dragon (30) {{!}}{{!}} 35%<br>35%<br>20%<br>10% {{!}}{{!}} 60% | |||
{{!}}- | |||
{{!}} 2 {{!}}{{!}} Area with stepping stones leading towards the Seventh Fort. {{!}}{{!}} 107 {{!}}{{!}} [[Missing File]] {{!}}{{!}} Sea Dragon, Myconido (35)<br>Merman x2 (36)<br>Myconido x2, Merman (37)<br>Crocodile (31) {{!}}{{!}} 35%<br>35%<br>20%<br>10% {{!}}{{!}} 60% | |||
{{!}}- | |||
{{!}} 3 {{!}}{{!}} Exterior of the Seventh Fort under siege. {{!}}{{!}} 108 {{!}}{{!}} [[Missing File]] {{!}}{{!}} Merman x2 (36)<br>Myconido x2, Merman (37)<br>Myconido x2 (34)<br>Myconido (32)<br>Sandora Soldier (Fire), Sandora Soldier (Water) (479)<br>Sandora Soldier (Fire) x2, Commander (487) {{!}}{{!}} 35%<br>35%<br>20%<br>10%<br>Scripted<br>Scripted {{!}}{{!}} 60%<br>60%<br>60%<br>60%<br>100%<br>100% | |||
{{!}}- | |||
{{!}} 4 {{!}}{{!}} Inside the Seventh Fort. {{!}}{{!}} 109 {{!}}{{!}} [[Missing File]] {{!}}{{!}} None {{!}}{{!}} N/A {{!}}{{!}} N/A | |||
{{!}}- | |||
{{!}} 5 {{!}}{{!}} Path where Shana's foot gets stuck. {{!}}{{!}} 110 {{!}}{{!}} [[Missing File]] {{!}}{{!}} Crocodile x2 (38)<br>Myconido x2, Merman (37)<br>Sea Dragon x2, Merman (39)<br>Merman (33) {{!}}{{!}} 35%<br>35%<br>20%<br>10% {{!}}{{!}} 60% | |||
{{!}}- | |||
{{!}} 6 {{!}}{{!}} Isle with the chest containing the [[Items#magicstoneofsignet|Magic Stone of Signet]]. {{!}}{{!}} 111 {{!}}{{!}} [[Missing File]] {{!}}{{!}} Sea Dragon x2, Merman (39)<br>Crocodile x2 (38)<br>Myconido x2, Merman (37)<br>Sea Dragon (30) {{!}}{{!}} 35%<br>35%<br>20%<br>10% {{!}}{{!}} 60% | |||
{{!}}} | |||
|Trivia= | |||
# | #If the party defeat Feyrbrand first and then returns to the Seventh Fort, the dialogue between Lavitz and the the Head of the 10th Knighthood is slightly different. Lavitz mentions having beaten the Dragon, and apologizes for not being able to come sooner instead of promising revenge. The Knight thanks him for defeating the Dragon and gives a last God bless King Albert instead of warning them about the Dragon's poison. Notably Shana will be absent from this exchange, as after her recovery from the Dragon's poison the bodies of the knights at the Seventh Fort disappear. | ||
}} | |||
[[Category:Locations]][[Category: | [[Category:Locations]][[Category:Disc 1]] | ||
[[Category: | [[Category:Missing Information]] | ||
Revision as of 16:43, 5 January 2026
| Marshland | |
 | |
| Services |
|
| Collectibles |
|
| Combat |
|
| Unique Locations |
|
Marshland is a boggy swamp area in Serdio. It is east of Hoax, and home to the Seventh Fort of Basil. Dart and company are tasked with helping in the defense of the Seventh Fort as well as searching for the Dragon's Nest.
Story
Upon reaching the Marshland, Dart and company have the choice to either continue straight and defend the Seventh Fort, or to take the left path and continue to Volcano Villude.
Read More
If the party decides to defend the Seventh Fort, they will have to fight five sets of Sandora Soldiers and a Sandora Commander to end the battle. Dart and company then proceed inside to find that there is only one lone survivor. As they approach and speak to him, he reveals that the Sandora Army used the dragon in the battle. After his subsequent death, Lavitz swears, "We will wreak your revenge upon them." Upon inspecting a few of the deceased soldiers, it seems as though some of them have no physical wounds, which the group assumes to be the Dragon's poison as the culprit. When heading towards Volcano Villude, Shana twists her ankle in the mud, and Dart offers to give her a piggyback ride. After a short dialog between the two, Shana's ankle is fine , and the party continues on their way to Volcano Villude.
If the party decides to continue to Volcano Villude without defending the Seventh Fort, they have until they travel down into the Nest of Dragon to return to it. If skipped, returning to the Seventh Fort will show all the chests as having been looted, although the dying Head of the 10th Knighthood will still give his Wargod's Amulet when approached. After returning to Lohan following the events that take place at the Shrine of Shirley, the bodies at the Seventh Fort vanish.
Later in Disc 1, there is the option to return to Marshland whenever Albert joins the party, this results in a special dialogue where Albert talks about Sandora's occupation of Basil. This optional dialogue will disappear after the war ends.
Collapse story content
Services
Save Points
None.
Rest Areas
None.
Shops
None.
Collectibles
Goods
Main article: Goods
None.
Stardust
Main article: Stardust
| # | Location | Image |
|---|---|---|
| 10 | Inside the Seventh Fort fireplace. | 
|
Treasure Chests
Main article: Treasure Chests
There are 10 treasure chests in this area.
| Contents | Acquisition | Image |
|---|---|---|
| Sun Rhapsody | Instead of taking the tree path in the first area, go on the upper right path to the Seventh Fort. (Missable if you don't fight the Sandorans) | 
|
| Sun Rhapsody | Inside the Fort on the right. (Missable if you don't fight the Sandorans) | 
|
| Healing Potion | Inside the Fort on the left. (Missable if you don't fight the Sandorans) | 
|
| Spirit Potion | Inside the Fort in the bottom right corner. (Missable if you don't fight the Sandorans) | 
|
| Lance | Inside the Fort take the path on the left to go outside the fort. (Missable if you don't fight the Sandorans) | 
|
| Spirit Potion | Follow the tree path in the first are and get on the boat. Get off at the first stop. | 
|
| Burn Out | Down from the first boat stop and get off. | 
|
| Body Purifier | Down from the second boat stop and get off. | 
|
| Stun Guard | Go left from the third boat stop, on the right side. | 
|
| Magic Stone of Signet | On the left side of last boat stop. | 
|
Combat
Minor Enemies
Main article: Minor Enemies
| Sea Dragon | ||
|---|---|---|
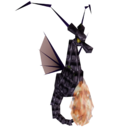
| ||
| Fire | ||
| EXP 14 |
Gold 9 |
Drops Burn Out 10% |
| Crocodile | ||
|---|---|---|
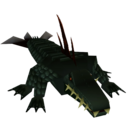
| ||
| Water | ||
| EXP 17 |
Gold 6 |
Drops Pellet 10% |
| Myconido | ||
|---|---|---|

| ||
| Earth | ||
| EXP 11 |
Gold 8 |
Drops Body Purifier 10% |
| Merman | ||
|---|---|---|
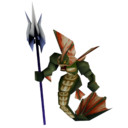
| ||
| Water | ||
| EXP 15 |
Gold 12 |
Drops Spear 20% |
| Sandora Soldier | ||
|---|---|---|
| ||
| Fire | ||
| EXP 14 |
Gold 9 |
Drops Healing Potion 8% |
| Sandora Soldier | ||
|---|---|---|
|
| ||
| Water | ||
| EXP 11 |
Gold 12 |
Drops Sun Rhapsody 10% |
Bosses
Main article: Bosses
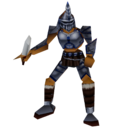
| Commander | ||
|---|---|---|
| ||
| Darkness | ||
| EXP 17 |
Gold 9 |
Drops Attack Ball 100% |
Maps
| # | Description | Submap ID | Image | Encounter Formations (ID) | Encounter% | Escape% |
|---|---|---|---|---|---|---|
| 1 | First area. | 106 | Missing File | Myconido x2 (34) Sea Dragon, Myconido (35) Merman x2 (36) Sea Dragon (30) |
35% 35% 20% 10% |
60% |
| 2 | Area with stepping stones leading towards the Seventh Fort. | 107 | Missing File | Sea Dragon, Myconido (35) Merman x2 (36) Myconido x2, Merman (37) Crocodile (31) |
35% 35% 20% 10% |
60% |
| 3 | Exterior of the Seventh Fort under siege. | 108 | Missing File | Merman x2 (36) Myconido x2, Merman (37) Myconido x2 (34) Myconido (32) Sandora Soldier (Fire), Sandora Soldier (Water) (479) Sandora Soldier (Fire) x2, Commander (487) |
35% 35% 20% 10% Scripted Scripted |
60% 60% 60% 60% 100% 100% |
| 4 | Inside the Seventh Fort. | 109 | Missing File | None | N/A | N/A |
| 5 | Path where Shana's foot gets stuck. | 110 | Missing File | Crocodile x2 (38) Myconido x2, Merman (37) Sea Dragon x2, Merman (39) Merman (33) |
35% 35% 20% 10% |
60% |
| 6 | Isle with the chest containing the Magic Stone of Signet. | 111 | Missing File | Sea Dragon x2, Merman (39) Crocodile x2 (38) Myconido x2, Merman (37) Sea Dragon (30) |
35% 35% 20% 10% |
60% |
Trivia
- If the party defeat Feyrbrand first and then returns to the Seventh Fort, the dialogue between Lavitz and the the Head of the 10th Knighthood is slightly different. Lavitz mentions having beaten the Dragon, and apologizes for not being able to come sooner instead of promising revenge. The Knight thanks him for defeating the Dragon and gives a last God bless King Albert instead of warning them about the Dragon's poison. Notably Shana will be absent from this exchange, as after her recovery from the Dragon's poison the bodies of the knights at the Seventh Fort disappear.
Gallery
None.
References
None.