Limestone Cave: Difference between revisions
DrewUniverse (talk | contribs) (Conversion to dynamic template.) |
DrewUniverse (talk | contribs) mNo edit summary |
||
| (3 intermediate revisions by one other user not shown) | |||
| Line 1: | Line 1: | ||
{{ | {{Infobox Location | ||
|Name=Limestone Cave | |||
|Image=Limestone_Cave_Preview.webp | |||
|Save=Yes | |||
|Rest=Rock Fireflies | |||
|Treasure=16 | |||
|Mobs=Interval | |||
|Boss=[[Urobolus]]}} | |||
{{Location | {{Location | ||
|Synopsis=The '''Limestone Cave''' is a natural cavern at the northern end of the mountain range that splits [[Serdio]] in two. Ordinarily, it facilitates travel between [[Seles]] and [[Bale]] by way the [[Prairie]], but its recent occupation by a [[Urobolus|poisonous monster]] has dissuaded travel. It was already a dangerous route to begin with. A stream runs through it, and passage in some areas is only possible via stepping stones to cross the water. Nevertheless, it houses a variety of spectacular features including waterfalls, vacuous crags, and glowing stone. Despite being a subterranean passageway, overhead breaches allow sunlight to enter, and some of the minerals inside the cave seem to glow. | |||
|Story1=[[Dart]], [[Shana]], and [[Lavitz]] arrive at the Limestone Cave from the Prairie. They enter via a mouth in a bluff created by an estuary. Their going is mostly easy until the trio comes upon a series of stepping stones. With no other way to cross the water, Dart urges Shana to be cautious, and they proceed. Just before they have all crossed safely, Lavitz slips on the penultimate stone. He would have tumbled off the stone and over a waterfall if not for Dart reacting quickly and catching him. Dart is able to pull Lavitz out of danger, and together they return safely to solid ground, exasperated and relieved. | |||
|Story2=Lavitz thanks Dart for saving his life for the second time since [[Hellena Prison]]. Dart stoically dismisses Lavitz's gratitude. They rejoice in a moment of camaraderie involving much shoulder-patting with Lavitz declaring that the pair will share a long friendship. Having observed the sudden blossoming in their relationship, Shana feels left out of the celebration as Dart and Lavitz proceed leaning on each other's shoulders. | |||
Deeper in the cave, while traversing a vacuous chamber, the group finds a swarm of glowing organisms. Dart immediately identifies them as [[Rock Fireflies]]. Dart remarks that they have saved him often, and Lavitz agrees, expressing a special appreciation for the ones found near a battlefield. Ignorant and again feeling left out, Shana demands to know what they are. Dart gives her a practical demonstration while Lavitz explains that their light has the ability to heal. Dart teases that Shana at least learned something. Indignant, Shana states that she also knows something that Dart does not but refuses to specify. Lavitz opines that after five years of separation, it is expected that there will be things they do not know about each other. He goes on to reminisce in the familiarity he shares with his mother every time he goes home to visit. | |||
As the group approaches the other side, they arrive in another vacuous chamber containing an underground lake. While traversing it, they are set upon by the "guardian" of the Limestone Cave, a large, serpent-like beast known as the Urobolus. They defeat the creature with Dart delivering the final blow to its head. It screeches in agony and collapses. Although Dart and Lavitz proceed, Shana straggles behind, leaving her open to another attack from the Urobolus, which is still alive after all. | |||
Dart rushes to Shana's defense but hesitates when a bright glow emanates in front of Shana. Beams of light overtake the Urobolus, causing it to reel and disintegrate. The light fades away, leaving Dart stunned and Shana distraught. She momentarily collapses, unable to explain what just happened. As they question what they just saw, Lavitz recommends just pressing on to Bale. At last they emerge from the cave on the other side. | |||
|Services= | |Services= | ||
|SavePoints=There is one Save Point immediately before the boss battle with Urobolus. | |||
|RestAreas=There is a swarm of Rock Fireflies in the chasm just past the stepping stones. | |||
|SavePoints= | |||
|RestAreas= | |||
|Collectibles= | |Collectibles= | ||
|Treasure={{TreasureCount|16}} There is an easy-to-miss chest for players who follow the most obvious path first. When entering from the Prairie side, stay on the right side of the chasm, hug the edge, and look for the action icon. | |||
|Treasure= | |||
{{TreasureCount|16}} | |||
There is an easy-to-miss chest for | |||
{{{!}} class="wikitable mw-collapsible" | {{{!}} class="wikitable mw-collapsible" | ||
{{!}}- | {{!}}- | ||
! Contents !! Acquisition !! Image | ! Contents !! Acquisition !! Image | ||
{{!}}- | {{!}}- | ||
{{!}} [[Detonate Rock]] {{!}}{{!}} Directly to the left upon entering the first area. {{!}}{{!}}[[File: | {{!}} [[Items#detonaterock|Detonate Rock]] {{!}}{{!}} Directly to the left upon entering the first area. {{!}}{{!}} [[File:Limestone_Cave_Chest01.webp|256px]] | ||
{{!}}- | {{!}}- | ||
{{!}} [[Healing Potion]] {{!}}{{!}} Down a secret path along the bottom right of the first area. {{!}}{{!}}[[File: | {{!}} [[Items#healingpotion|Healing Potion]] {{!}}{{!}} Down a secret path along the bottom right of the first area. {{!}}{{!}} [[File:Limestone_Cave_Chest02.webp|256px]] | ||
{{!}}- | {{!}}- | ||
{{!}} | {{!}} 20G {{!}}{{!}} Take the slide in the second area without any inputs. {{!}}{{!}} [[File:Limestone_Cave_Chest03.webp|256px]] | ||
{{!}}- | {{!}}- | ||
{{!}} [[Bastard Sword]] {{!}}{{!}} Take the slide in the second area and hold up and then down to follow the correct | {{!}} [[Equipment#bastardsword|Bastard Sword]] {{!}}{{!}} Take the slide in the second area and hold up and then down to follow the correct path. {{!}}{{!}} [[File:Limestone_Cave_Chest04.webp|256px]] | ||
{{!}}- | {{!}}- | ||
{{!}} [[Total Vanishing]] {{!}}{{!}} Along the stepping stones. | {{!}} [[Items#totalvanishing|Total Vanishing]] {{!}}{{!}} Along the stepping stones. Shana can be made to block the path if the player advances too far.<br>If that happens, simply leave the area and return to get it. {{!}}{{!}} [[File:Limestone_Cave_Chest05.webp|256px]] | ||
{{!}}- | {{!}}- | ||
{{!}} [[Body Purifier]] {{!}}{{!}} Further along the stepping stones. {{!}}{{!}}[[File: | {{!}} [[Items#bodypurifier|Body Purifier]] {{!}}{{!}} Further along the stepping stones. {{!}}{{!}} [[File:Limestone_Cave_Chest06.webp|256px]] | ||
{{!}}- | {{!}}- | ||
{{!}} | {{!}} 100G {{!}}{{!}} Take the upper exit from the room after the stepping stones and jump across larger stones in the next area. {{!}}{{!}} [[File:Limestone_Cave_Chest07.webp|256px]] | ||
{{!}}- | {{!}}- | ||
{{!}} [[Angel's Prayer]] {{!}}{{!}} Just past the rock fireflies. {{!}}{{!}} [[File: | {{!}} [[Items#angelsprayer|Angel's Prayer]] {{!}}{{!}} Just past the rock fireflies. {{!}}{{!}} [[File:Limestone_Cave_Chest08.webp|256px]] | ||
{{!}}- | {{!}}- | ||
{{!}} [[Burn Out]] {{!}}{{!}} Continue up the path past the rock fireflies. {{!}}{{!}} [[File: | {{!}} [[Items#burnout|Burn Out]] {{!}}{{!}} Continue up the path past the rock fireflies. {{!}}{{!}} [[File:Limestone_Cave_Chest09.webp|256px]] | ||
{{!}}- | {{!}}- | ||
{{!}} [[Spark Net]] {{!}}{{!}} Head through the uppermost exit in the room after the rock fireflies, then jump more stones. {{!}}{{!}} [[File: | {{!}} [[Items#sparknet|Spark Net]] {{!}}{{!}} Head through the uppermost exit in the room after the rock fireflies, then jump more stones. {{!}}{{!}} [[File:Limestone_Cave_Chest10.webp|256px]] | ||
{{!}}- | {{!}}- | ||
{{!}} [[Poison Guard]] {{!}}{{!}} In the same room as above. You must chase and catch the frog creature for it to appear. {{!}}{{!}} [[File: | {{!}} [[Equipment#poisonguard|Poison Guard]] {{!}}{{!}} In the same room as above. You must chase and catch the frog creature for it to appear. {{!}}{{!}} [[File:Limestone_Cave_Chest11.webp|256px]] | ||
{{!}}- | {{!}}- | ||
{{!}} [[Charm Potion]] {{!}}{{!}} In the room past the rock fireflies, along the left path. {{!}}{{!}} [[File: | {{!}} [[Items#charmpotion|Charm Potion]] {{!}}{{!}} In the room past the rock fireflies, along the left path. {{!}}{{!}} [[File:Limestone_Cave_Chest12.webp|256px]] | ||
{{!}}- | {{!}}- | ||
{{!}} [[Body Purifier]] {{!}}{{!}} Past the save point to the left of the path. {{!}}{{!}} [[File: | {{!}} [[Items#bodypurifier|Body Purifier]] {{!}}{{!}} Past the save point to the left of the path. {{!}}{{!}} [[File:Limestone_Cave_Chest13.webp|256px]] | ||
{{!}}- | {{!}}- | ||
{{!}} [[Bandana]] {{!}}{{!}} On the path past the save point on the right of the path. {{!}}{{!}} [[File: | {{!}} [[Equipment#Bandana|Bandana]] {{!}}{{!}} On the path past the save point on the right of the path. {{!}}{{!}} [[File:Limestone_Cave_Chest14.webp|256px]] | ||
{{!}}- | {{!}}- | ||
{{!}} [[Healing Potion]] {{!}}{{!}} Along the winding path in the area after Orobolus. {{!}}{{!}} [[File: | {{!}} [[Items#healingpotion|Healing Potion]] {{!}}{{!}} Along the winding path in the area after Orobolus. {{!}}{{!}} [[File:Limestone_Cave_Chest15.webp|256px]] | ||
{{!}}- | {{!}}- | ||
{{!}} | {{!}} 50G {{!}}{{!}} Further along the winding path after Orobolus. {{!}}{{!}} [[File:Limestone_Cave_Chest16.webp|256px]] | ||
{{!}}} | {{!}}} | ||
|Combat= | |Combat= | ||
|MinorMobs={{Combat Preview | |||
| | |Name=Evil Spider | ||
|Image=Mob_Evil_Spider.webp | |||
{{{!}} class="wikitable | |Element=Earth | ||
|Fill=Tan | |||
|EXP=12 | |||
|Gold=12 | |||
|Drops=[[Items#angelsprayer|Angel's Prayer]] | |||
|Chance=8%}} | |||
{{Combat Preview | |||
|Name=Orc | |||
|Image=Mob_Orc.webp | |||
|Element=Darkness | |||
|Fill=darkblue | |||
|Font=white | |||
|EXP=10 | |||
|Gold=6 | |||
|Drops=[[Items#darkmist|Dark Mist]] | |||
|Chance=10%}} | |||
{{Combat Preview | |||
|Name=Screaming Bat | |||
|Image=Mob_Screaming_Bat.webp | |||
|Element=Darkness | |||
|Fill=darkblue | |||
|Font=white | |||
|EXP=8 | |||
|Gold=6 | |||
|Drops=[[Items#healingpotion|Healing Potion]] | |||
|Chance=8%}} | |||
{{Combat Preview | |||
|Name=Slime | |||
|Image=Mob_Slime.webp | |||
|Element=Earth | |||
|Fill=Tan | |||
|EXP=11 | |||
|Gold=6 | |||
|Drops=[[Items#bodypurifier|Body Purifier]] | |||
|Chance=10%}} | |||
{{Combat Preview | |||
|Name=Ugly Balloon | |||
|Image=Mob_Ugly_Balloon.webp | |||
|Element=Wind | |||
|Fill=lightgreen | |||
|EXP=10 | |||
|Gold=9 | |||
|Drops=[[Equipment#poisonguard|Poison Guard]] | |||
|Chance=2%}} | |||
|BattleFormations={{{!}} class="wikitable" style="display:inline" | |||
! Solo | |||
{{!}}- | |||
{{!}} Slime | |||
{{!}}- | |||
{{!}} Ugly Balloon | |||
{{!}}- | {{!}}- | ||
{{!}} Orc | |||
{{!}}- | {{!}}- | ||
{{!}} | {{!}} Evil Spider | ||
{{!}}} | |||
{{{!}} class="wikitable" style="display:inline" | |||
!colspan="2" {{!}} Duos | |||
{{!}}- | {{!}}- | ||
{{!}} | {{!}} Screaming Bat | ||
{{!}} Screaming Bat | |||
{{!}}- | {{!}}- | ||
{{!}} | {{!}} Screaming Bat | ||
{{!}} Ugly Balloon | |||
{{!}}- | {{!}}- | ||
{{!}} | {{!}} Slime | ||
{{!}} Ugly Balloon | |||
{{!}}- | {{!}}- | ||
{{!}} | {{!}} Slime | ||
{{!}} Slime | |||
{{!}}} | {{!}}} | ||
{{{!}} class="wikitable" style="display:inline" | |||
!colspan="3" {{!}} Trios | |||
{ | |||
{{!}}- | {{!}}- | ||
! | {{!}} Screaming Bat | ||
{{!}} Screaming Bat | |||
{{!}} Orc | |||
{{!}}- | {{!}}- | ||
{{!}} | {{!}} Ugly Ballon | ||
{{!}} Orc | |||
{{!}} Orc | |||
{{!}}} | {{!}}} | ||
|Bosses={{Combat Preview | |||
| | |Name=Urobolus | ||
|Image=Boss_Urobolus.webp | |||
#The Bandana gear acquired seems useless, as Dart already has a Bandana and Lavitz comes with a headgear that surpasses it. While wholly unnecessary, it is worth noting that the player can equip this new Bandana on Lavitz in order to give the Sallet to Dart. This technique is marginally more useful as the game progresses, in times when spare gear is low but you wish to move a piece of equipment from one character to another. | |Element=Earth | ||
|Fill=Tan | |||
|EXP=400 | |||
|Gold=50 | |||
|Drops=[[Equipment#wargodsamulet|Wargod's Amulet]] | |||
|Chance=100%}} | |||
|Gallery=<gallery> | |||
Limestone_Cave_Submap01.webp| | |||
}} | Limestone_Cave_Submap02.webp| | ||
Limestone_Cave_Submap03.webp| | |||
Limestone_Cave_Submap04.webp| | |||
Limestone_Cave_Submap05.webp| | |||
Limestone_Cave_Submap06.webp| | |||
Limestone_Cave_Submap07.webp| | |||
Limestone_Cave_Submap08.webp| | |||
Limestone_Cave_Submap09.webp| | |||
Limestone_Cave_Submap10.webp|</gallery> | |||
|Trivia=#The Bandana gear acquired seems useless, as Dart already has a Bandana and Lavitz comes with a headgear that surpasses it. While wholly unnecessary, it is worth noting that the player can equip this new Bandana on Lavitz in order to give the Sallet to Dart. This technique is marginally more useful as the game progresses, in times when spare gear is low but you wish to move a piece of equipment from one character to another.}} | |||
[[Category:Locations]][[Category:Disc 1]][[Category:Missing Information]] | [[Category:Locations]][[Category:Disc 1]][[Category:Missing Information]] | ||
Latest revision as of 18:15, 4 April 2025
| Limestone Cave | |
| Services |
|
| Collectibles |
|
| Combat |
|
The Limestone Cave is a natural cavern at the northern end of the mountain range that splits Serdio in two. Ordinarily, it facilitates travel between Seles and Bale by way the Prairie, but its recent occupation by a poisonous monster has dissuaded travel. It was already a dangerous route to begin with. A stream runs through it, and passage in some areas is only possible via stepping stones to cross the water. Nevertheless, it houses a variety of spectacular features including waterfalls, vacuous crags, and glowing stone. Despite being a subterranean passageway, overhead breaches allow sunlight to enter, and some of the minerals inside the cave seem to glow.
Story
Dart, Shana, and Lavitz arrive at the Limestone Cave from the Prairie. They enter via a mouth in a bluff created by an estuary. Their going is mostly easy until the trio comes upon a series of stepping stones. With no other way to cross the water, Dart urges Shana to be cautious, and they proceed. Just before they have all crossed safely, Lavitz slips on the penultimate stone. He would have tumbled off the stone and over a waterfall if not for Dart reacting quickly and catching him. Dart is able to pull Lavitz out of danger, and together they return safely to solid ground, exasperated and relieved.
Read More
Lavitz thanks Dart for saving his life for the second time since Hellena Prison. Dart stoically dismisses Lavitz's gratitude. They rejoice in a moment of camaraderie involving much shoulder-patting with Lavitz declaring that the pair will share a long friendship. Having observed the sudden blossoming in their relationship, Shana feels left out of the celebration as Dart and Lavitz proceed leaning on each other's shoulders.
Deeper in the cave, while traversing a vacuous chamber, the group finds a swarm of glowing organisms. Dart immediately identifies them as Rock Fireflies. Dart remarks that they have saved him often, and Lavitz agrees, expressing a special appreciation for the ones found near a battlefield. Ignorant and again feeling left out, Shana demands to know what they are. Dart gives her a practical demonstration while Lavitz explains that their light has the ability to heal. Dart teases that Shana at least learned something. Indignant, Shana states that she also knows something that Dart does not but refuses to specify. Lavitz opines that after five years of separation, it is expected that there will be things they do not know about each other. He goes on to reminisce in the familiarity he shares with his mother every time he goes home to visit.
As the group approaches the other side, they arrive in another vacuous chamber containing an underground lake. While traversing it, they are set upon by the "guardian" of the Limestone Cave, a large, serpent-like beast known as the Urobolus. They defeat the creature with Dart delivering the final blow to its head. It screeches in agony and collapses. Although Dart and Lavitz proceed, Shana straggles behind, leaving her open to another attack from the Urobolus, which is still alive after all.
Dart rushes to Shana's defense but hesitates when a bright glow emanates in front of Shana. Beams of light overtake the Urobolus, causing it to reel and disintegrate. The light fades away, leaving Dart stunned and Shana distraught. She momentarily collapses, unable to explain what just happened. As they question what they just saw, Lavitz recommends just pressing on to Bale. At last they emerge from the cave on the other side.
Collapse story content
Services
Save Points
There is one Save Point immediately before the boss battle with Urobolus.
Rest Areas
There is a swarm of Rock Fireflies in the chasm just past the stepping stones.
Shops
This location has no Shops.
Collectibles
Goods
Main article: Goods
This location has no Goods.
Stardust
Main article: Stardust
This location has no Stardust.
Treasure Chests
Main article: Treasure Chests
There are 16 treasure chests in this area. There is an easy-to-miss chest for players who follow the most obvious path first. When entering from the Prairie side, stay on the right side of the chasm, hug the edge, and look for the action icon.
| Contents | Acquisition | Image |
|---|---|---|
| Detonate Rock | Directly to the left upon entering the first area. | 
|
| Healing Potion | Down a secret path along the bottom right of the first area. | 
|
| 20G | Take the slide in the second area without any inputs. | 
|
| Bastard Sword | Take the slide in the second area and hold up and then down to follow the correct path. | 
|
| Total Vanishing | Along the stepping stones. Shana can be made to block the path if the player advances too far. If that happens, simply leave the area and return to get it. |

|
| Body Purifier | Further along the stepping stones. | 
|
| 100G | Take the upper exit from the room after the stepping stones and jump across larger stones in the next area. | 
|
| Angel's Prayer | Just past the rock fireflies. | 
|
| Burn Out | Continue up the path past the rock fireflies. | 
|
| Spark Net | Head through the uppermost exit in the room after the rock fireflies, then jump more stones. | 
|
| Poison Guard | In the same room as above. You must chase and catch the frog creature for it to appear. | 
|
| Charm Potion | In the room past the rock fireflies, along the left path. | 
|
| Body Purifier | Past the save point to the left of the path. | 
|
| Bandana | On the path past the save point on the right of the path. | 
|
| Healing Potion | Along the winding path in the area after Orobolus. | 
|
| 50G | Further along the winding path after Orobolus. | 
|
Combat
Minor Mobs
| Evil Spider | ||
|---|---|---|

| ||
| Earth | ||
| EXP 12 |
Gold 12 |
Drops Angel's Prayer 8% |
| Orc | ||
|---|---|---|

| ||
| Darkness | ||
| EXP 10 |
Gold 6 |
Drops Dark Mist 10% |
| Screaming Bat | ||
|---|---|---|
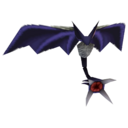
| ||
| Darkness | ||
| EXP 8 |
Gold 6 |
Drops Healing Potion 8% |
| Slime | ||
|---|---|---|

| ||
| Earth | ||
| EXP 11 |
Gold 6 |
Drops Body Purifier 10% |
| Ugly Balloon | ||
|---|---|---|
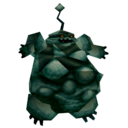
| ||
| Wind | ||
| EXP 10 |
Gold 9 |
Drops Poison Guard 2% |
Battle Formations
| Solo |
|---|
| Slime |
| Ugly Balloon |
| Orc |
| Evil Spider |
| Duos | |
|---|---|
| Screaming Bat | Screaming Bat |
| Screaming Bat | Ugly Balloon |
| Slime | Ugly Balloon |
| Slime | Slime |
| Trios | ||
|---|---|---|
| Screaming Bat | Screaming Bat | Orc |
| Ugly Ballon | Orc | Orc |
Bosses
| Urobolus | ||
|---|---|---|
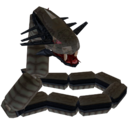
| ||
| Earth | ||
| EXP 400 |
Gold 50 |
Drops Wargod's Amulet 100% |
Gallery


Trivia
- The Bandana gear acquired seems useless, as Dart already has a Bandana and Lavitz comes with a headgear that surpasses it. While wholly unnecessary, it is worth noting that the player can equip this new Bandana on Lavitz in order to give the Sallet to Dart. This technique is marginally more useful as the game progresses, in times when spare gear is low but you wish to move a piece of equipment from one character to another.
References
This location has no references.