Treasure Chests: Difference between revisions
Jump to navigation
Jump to search
No edit summary |
mNo edit summary |
||
| (12 intermediate revisions by 4 users not shown) | |||
| Line 1: | Line 1: | ||
This page is a list of all chests in the game that give usable items or money. | This page is a list of all chests in the game that give usable items or money. | ||
== Disc 1 == | ==Disc 1== | ||
=== Seles === | ===[[Seles]]=== | ||
{ | {{{!}} class="wikitable mw-collapsible" style{{=}}"width: 700px;" | ||
{{!}}- | |||
! | ! Contents !! Acquisition !! Image | ||
{{!}}- | |||
{{!}} [[Items#burnout|Burn Out]] {{!}}{{!}} Near the Save Point; not accessible until after the first scripted battle. {{!}}{{!}} | |||
[[File: | [[File:Seles_Chest01.webp|256px]] | ||
{{!}}- | |||
{{!}}} | |||
=== Forest === | ===[[Forest]]=== | ||
{ | {{{!}} class="wikitable mw-collapsible" style{{=}}"width: 700px;" | ||
{{!}}- | |||
! | ! Contents !! Acquisition !! Image | ||
{{!}}- | |||
{{!}} [[Items#healingpotion|Healing Potion]] {{!}}{{!}} Turn around near the Merchant and follow the upper path back to the right. {{!}}{{!}}[[File:Forest_Chest01.webp|256px]] | |||
[[File: | {{!}}- | ||
{{!}} [[Items#charmpotion|Charm Potion]] {{!}}{{!}} Against the background trees just past the first fallen tree acting as a bridge. {{!}}{{!}}[[File:Forest_Chest02.webp|256px]] | |||
{{!}}- | |||
{{!}} 20 Gold {{!}}{{!}} In the maze, on the right edge, take either of the two paths lower than the one Dart enters from. {{!}}{{!}}[[File:Forest_Chest03.webp|256px]] | |||
{{!}}- | |||
[[File: | {{!}} [[Items#burnout|Burn Out]] {{!}}{{!}} In the maze, on the left edge, take the lower path. {{!}}{{!}}[[File:Forest_Chest04.webp|256px]] | ||
{{!}}} | |||
[[File: | |||
=== Hellena Prison (First Visit) === | ===[[Hellena Prison]] (First Visit)=== | ||
'''Note:''' These chests will be inaccessible for a time after leaving Hellena and will become permanently inaccessible after the second visit to Hellena. | '''Note:''' These chests will be inaccessible for a time after leaving Hellena and will become permanently inaccessible after the second visit to Hellena. | ||
{ | {{{!}} class{{=}}"wikitable mw-collapsible" style{{=}}"width: 700px;" | ||
{{!}}- | |||
! | ! Contents !! Acquisition !! Image | ||
{{!}}- | |||
{{!}} [[Items#burnout|Burn Out]] {{!}}{{!}} From the storeroom with the merchant, take the top left exit and follow the path. {{!}}{{!}} [[file:Hellena_Chest01.webp|256px]] | |||
[[ | {{!}}- | ||
{{!}} [[Items#angelsprayer|Angel's Prayer]] {{!}}{{!}} Head up to level two of the prison and just beyond the first elevator, enter the barracks to find this chest in the upper left area of the room near the beds. {{!}}{{!}} [[file:Hellena_Chest02.webp|256px]] | |||
{{!}}- | |||
[[ | {{!}} [[Equipment#leatherjacket|Leather Jacket]] {{!}}{{!}} In the barracks: continue left beyond the first chest {{!}}{{!}} [[file:Hellena_Chest03.webp|256px]] | ||
{{!}}- | |||
{{!}} 50G {{!}}{{!}} In the barracks: central kitchen area {{!}}{{!}} [[file:Hellena_Chest04.webp|256px]] | |||
[[ | {{!}}- | ||
{{!}} [[Items#sparknet|Spark Net]] {{!}}{{!}} First prison tower: inside a cell {{!}}{{!}} [[file:Hellena_Chest05.webp|256px]] | |||
{{!}}- | |||
[[ | {{!}} 20G {{!}}{{!}} First prison tower: inside a cell {{!}}{{!}} [[file:Hellena_Chest06.webp|256px]] | ||
{{!}}- | |||
{{!}} 20G {{!}}{{!}} Second prison tower: inside a cell {{!}}{{!}} [[file:Hellena_Chest07.webp|256px]] | |||
[[ | {{!}}- | ||
{{!}} 20G {{!}}{{!}} Second prison tower: inside a cell{{!}}{{!}} [[file:Hellena_Chest08.webp|256px]] | |||
{{!}}} | |||
[[ | |||
[[ | |||
[[ | |||
=== Prairie === | ===[[Prairie]]=== | ||
{ | {{{!}} class="wikitable mw-collapsible" style{{=}}"width: 700px;" | ||
{{!}}- | |||
! | ! Contents !! Acquisition !! Image | ||
{{!}}- | |||
{{!}} 100G {{!}}{{!}} Following winding path when coming from Hellena, go down away from the ocean to discover a hidden opening in the rockface. {{!}}{{!}} [[File:Prairie_Chest01.webp|256px]] | |||
{{!}}- | |||
{{!}} [[Items#totalvanishing|Total Vanishing]] {{!}}{{!}} Hidden in the bottom left hand corner around the Shack. {{!}}{{!}} [[File:Prairie_Chest02.webp|256px]] | |||
{{!}}- | |||
{{!}} [[Items#angelsprayer|Angel's Prayer]] {{!}}{{!}} Up a path shortly after crossing the log bridge. {{!}}{{!}} [[File:Prairie_Chest03.webp|256px]] | |||
{{!}}} | |||
=== Limestone Cave === | ===[[Limestone Cave]]=== | ||
{ | {{{!}} class="wikitable mw-collapsible" style{{=}}"width: 700px;" | ||
{{!}}- | |||
! | ! Contents !! Acquisition !! Image | ||
{{!}}- | |||
{{!}} [[Items#detonaterock|Detonate Rock]] {{!}}{{!}} Directly to the left upon entering the first area. {{!}}{{!}} [[File:Limestone_Cave_Chest01.webp|256px]] | |||
{{!}}- | |||
{{!}} [[Items#healingpotion|Healing Potion]] {{!}}{{!}} Down a secret path along the bottom right of the first area. {{!}}{{!}} [[File:Limestone_Cave_Chest02.webp|256px]] | |||
{{!}}- | |||
{{!}} 20G {{!}}{{!}} Take the slide in the second area without any inputs. {{!}}{{!}} [[File:Limestone_Cave_Chest03.webp|256px]] | |||
{{!}}- | |||
{{!}} [[Equipment#bastardsword|Bastard Sword]] {{!}}{{!}} Take the slide in the second area and hold up and then down to follow the correct path. {{!}}{{!}} [[File:Limestone_Cave_Chest04.webp|256px]] | |||
{{!}}- | |||
{{!}} [[Items#totalvanishing|Total Vanishing]] {{!}}{{!}} Along the stepping stones. Shana can be made to block the path if the player advances too far.<br>If that happens, simply leave the area and return to get it. {{!}}{{!}} [[File:Limestone_Cave_Chest05.webp|256px]] | |||
{{!}}- | |||
{{!}} [[Items#bodypurifier|Body Purifier]] {{!}}{{!}} Further along the stepping stones. {{!}}{{!}} [[File:Limestone_Cave_Chest06.webp|256px]] | |||
{{!}}- | |||
{{!}} 100G {{!}}{{!}} Take the upper exit from the room after the stepping stones and jump across larger stones in the next area. {{!}}{{!}} [[File:Limestone_Cave_Chest07.webp|256px]] | |||
{{!}}- | |||
{{!}} [[Items#angelsprayer|Angel's Prayer]] {{!}}{{!}} Just past the rock fireflies. {{!}}{{!}} [[File:Limestone_Cave_Chest08.webp|256px]] | |||
{{!}}- | |||
{{!}} [[Items#burnout|Burn Out]] {{!}}{{!}} Continue up the path past the rock fireflies. {{!}}{{!}} [[File:Limestone_Cave_Chest09.webp|256px]] | |||
{{!}}- | |||
{{!}} [[Items#sparknet|Spark Net]] {{!}}{{!}} Head through the uppermost exit in the room after the rock fireflies, then jump more stones. {{!}}{{!}} [[File:Limestone_Cave_Chest10.webp|256px]] | |||
{{!}}- | |||
{{!}} [[Equipment#poisonguard|Poison Guard]] {{!}}{{!}} In the same room as above. You must chase and catch the frog creature for it to appear. {{!}}{{!}} [[File:Limestone_Cave_Chest11.webp|256px]] | |||
{{!}}- | |||
{{!}} [[Items#charmpotion|Charm Potion]] {{!}}{{!}} In the room past the rock fireflies, along the left path. {{!}}{{!}} [[File:Limestone_Cave_Chest12.webp|256px]] | |||
{{!}}- | |||
{{!}} [[Items#bodypurifier|Body Purifier]] {{!}}{{!}} Past the save point to the left of the path. {{!}}{{!}} [[File:Limestone_Cave_Chest13.webp|256px]] | |||
{{!}}- | |||
{{!}} [[Equipment#bandana|Bandana]] {{!}}{{!}} On the path past the save point on the right of the path. {{!}}{{!}} [[File:Limestone_Cave_Chest14.webp|256px]] | |||
{{!}}- | |||
{{!}} [[Items#healingpotion|Healing Potion]] {{!}}{{!}} Along the winding path in the area after Orobolus. {{!}}{{!}} [[File:Limestone_Cave_Chest15.webp|256px]] | |||
{{!}}- | |||
{{!}} 50G {{!}}{{!}} Further along the winding path after Orobolus. {{!}}{{!}} [[File:Limestone_Cave_Chest16.webp|256px]] | |||
{{!}}} | |||
=== | ===[[Bale]]=== | ||
{ | {{{!}} class="wikitable mw-collapsible" style{{=}}"width: 700px;" | ||
{{!}}- | |||
! | ! Contents !! Acquisition !! Image | ||
{{!}}- | |||
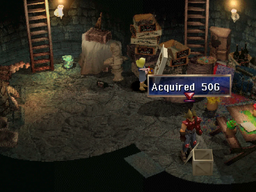
{{!}} 50G {{!}}{{!}} Inside artist's room, the first house in Bale. {{!}}{{!}} [[File:Bale_Chest01.webp|256px]] | |||
{{!}}- | |||
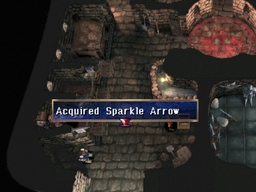
{{!}} Sparkle Arrow {{!}}{{!}} On the ground floor of the castle, left side. {{!}}{{!}} [[File:Bale_Chest02.webp|256px]] | |||
{{!}}- | |||
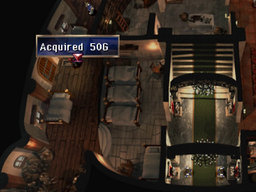
{{!}} 50G {{!}}{{!}} On the second floor of the castle, left side. {{!}}{{!}} [[File:Bale_Chest03.webp|256px]] | |||
{{!}}- | |||
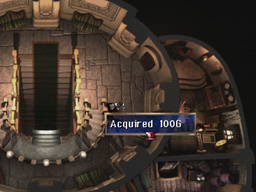
{{!}} 100G {{!}}{{!}} On the third floor of the castle, in a room to the right. {{!}}{{!}} [[File:Bale_Chest04.webp|256px]] | |||
{{!}}- | |||
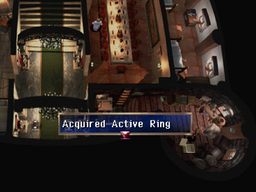
{{!}} Active Ring {{!}}{{!}} On the third floor of the castle follow the path in the lower left hand corner and climb down the ladder. {{!}}{{!}} [[File:Bale_Chest05.webp|256px]] | |||
{{!}}- | |||
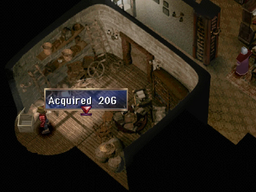
{{!}} 20G {{!}}{{!}} In the room next to the kitchen in Lavitz's house. {{!}}{{!}} [[File:Bale_Chest06.webp|256px]] | |||
{{!}}- | |||
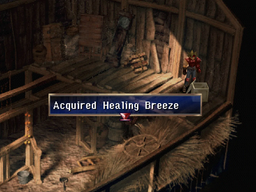
{{!}} Healing Breeze {{!}}{{!}} Go to the roof of Lavitz's house and then to the barn on the right. Must enter inputs to cross the beam. {{!}}{{!}} [[File:Bale_Chest07.webp|256px]] | |||
{{!}}- | |||
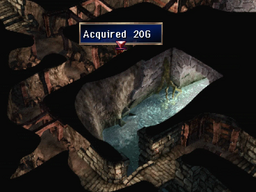
{{!}} 20G {{!}}{{!}} There is a path under the fountain when you first enter Bale. Accessible after bribing Dran with Good Spirits. Will be in the third area of this path. {{!}}{{!}} [[File:Bale_Chest08.webp|256px]] | |||
{{!}}- | |||
{{!}} 20G {{!}}{{!}} Will be up the ladder at the end of the Dran path. Must take the set of ladder down from the top left of the castle’s second floor and turn the wheel to access it. {{!}}{{!}} [[File:Bale_Chest09.webp|256px]] | |||
{{!}}- | |||
{{!}}} | |||
=== | ===[[Hoax]]=== | ||
{ | {{{!}} class="wikitable mw-collapsible" style{{=}}"width: 700px;" | ||
{{!}}- | |||
! | ! Contents !! Acquisition !! Image | ||
{{!}}- | |||
{{!}} [[Items#angelsprayer|Angel's Prayer]] {{!}}{{!}} In the top right corner of the Hotel. {{!}}{{!}} [[File:Hoax_Chest01.webp|256px]] | |||
{{!}}- | |||
{{!}} [[Items#healingpotion|Healing Potion]] {{!}}{{!}} In the corner of the bottom floor of the barracks located at the lower edge of Hoax. {{!}}{{!}} [[File:Hoax_Chest02.webp|256px]] | |||
{{!}}- | |||
{{!}} {{!}} 20G {{!}}{{!}} In the attic of midwife Gilda's house, the second house on the upper path. {{!}}{{!}} [[File:Hoax_Chest03.webp|256px]] | |||
{{!}}} | |||
=== Marshland === | ===[[Marshland]]=== | ||
{ | {{{!}} class="wikitable mw-collapsible" style{{=}}"width: 700px;" | ||
{{!}}- | |||
! | ! Contents !! Acquisition !! Image | ||
{{!}}- | |||
{{!}} [[Items#sunrhapsody|Sun Rhapsody]] {{!}}{{!}} Instead of taking the tree path in the first area, go on the upper right path to the Seventh Fort. (Missable if you don't fight the Sandorans){{!}}{{!}} [[File:Marshland_Chest01.webp|256px]] | |||
{{!}}- | |||
{{!}} [[Items#sunrhapsody|Sun Rhapsody]] {{!}}{{!}} Inside the Fort on the right. (Missable if you don't fight the Sandorans) {{!}}{{!}} [[File:Marshland_Chest02.webp|256px]] | |||
{{!}}- | |||
{{!}} [[Items#healingpotion|Healing Potion]] {{!}}{{!}} Inside the Fort on the left. (Missable if you don't fight the Sandorans) {{!}}{{!}} [[File:Marshland_Chest03.webp|256px]] | |||
{{!}}- | |||
{{!}} [[Items#spiritpotion|Spirit Potion]] {{!}}{{!}} Inside the Fort in the bottom right corner. (Missable if you don't fight the Sandorans) {{!}}{{!}} [[File:Marshland_Chest04.webp|256px]] | |||
{{!}}- | |||
{{!}} [[Equipment#lance|Lance]] {{!}}{{!}} Inside the Fort take the path on the left to go outside the fort. (Missable if you don't fight the Sandorans) {{!}}{{!}} [[File:Marshland_Chest05.webp|256px]] | |||
{{!}}- | |||
{{!}} [[Items#spiritpotion|Spirit Potion]] {{!}}{{!}} Follow the tree path in the first are and get on the boat. Get off at the first stop. {{!}}{{!}} [[File:Marshland_Chest06.webp|256px]] | |||
{{!}}- | |||
{{!}} [[Items#burnout|Burn Out]] {{!}}{{!}} Down from the first boat stop and get off. {{!}}{{!}} [[File:Marshland_Chest07.webp|256px]] | |||
{{!}}- | |||
{{!}} [[Items#bodypurifier|Body Purifier]] {{!}}{{!}} Down from the second boat stop and get off. {{!}}{{!}} [[File:Marshland_Chest08.webp|256px]] | |||
{{!}}- | |||
{{!}} [[Equipment#stunguard|Stun Guard]] {{!}}{{!}} Go left from the third boat stop, on the right side. {{!}}{{!}} [[File:Marshland_Chest09.webp|256px]] | |||
{{!}}- | |||
{{!}} [[Items#magicstoneofsignet|Magic Stone of Signet]] {{!}}{{!}} On the left side of last boat stop. {{!}}{{!}} [[File:Marshland_Chest10.webp|256px]] | |||
{{!}}} | |||
=== Volcano Villude === | ===[[Volcano Villude]]=== | ||
{ | {{{!}} class="wikitable mw-collapsible" style{{=}}"width: 700px;" | ||
{{!}}- | |||
! | ! Contents !! Acquisition !! Image | ||
{{!}}- | |||
{{!}} [[Items#spearfrost|Spear Frost]] {{!}}{{!}} Directly on your path in the second area. {{!}}{{!}} [[File:Chest_Volcano_Villude01.webp|256px]] | |||
{{!}}- | |||
{{!}} [[Items#mindpurifier|Mind Purifier]] {{!}}{{!}} On the left side of the third area. {{!}}{{!}} [[File:Volcano_Villude_Chest02.webp|256px]] | |||
{{!}}- | |||
{{!}} [[Equipment#panicguard|Panic Guard]] {{!}}{{!}} In the third area go into the room to the right. {{!}}{{!}} [[File:Volcano_Villude_Chest03.webp|256px]] | |||
{{!}}- | |||
{{!}} 50G {{!}}{{!}} Directly on your path in the last area. {{!}}{{!}} [[File:Volcano_Villude_Chest04.webp|256px]] | |||
{{!}}} | |||
=== Nest of Dragon === | ===[[Nest of Dragon]]=== | ||
{ | {{{!}} class="wikitable mw-collapsible" style{{=}}"width: 700px;" | ||
! Contents !! Acquisition !! Image | |||
! | {{!}}- | ||
{{!}} [[Equipment#chainmail|Chain Mail]] {{!}}{{!}} Stay on the normal path and then hop over some rocks before the spider web pit, follow the path all the way to the end. {{!}}{{!}} [[File:Nest_of_Dragon_Chest01.webp|256px]] | |||
{{!}}- | |||
{{!}} [[Items#mindpurifier|Mind Purifier]] {{!}}{{!}} Once in the pit climb the first vine, go to the hole on your right and then the hole to the left. {{!}}{{!}} [[File:Nest_of_Dragon_Chest02.webp|256px]] | |||
{{!}}- | |||
{{!}} [[Equipment#braveryamulet|Bravery Amulet]] {{!}}{{!}} From the previous chest go to the hole near the bottom right of the screen and follow the path. {{!}}{{!}} [[File:Nest_of_Dragon_Chest03.webp|256px]] | |||
{{!}}- | |||
{{!}} [[Items#bodypurifier|Body Purifier]] {{!}}{{!}} Instead of going in the hole near the bottom right climb the vine, then go down the hole at the end of the path. {{!}}{{!}} [[File:Nest_of_Dragon_Chest04.webp|256px]] | |||
{{!}}- | |||
{{!}} [[Items#spiritpotion|Spirit Potion]] {{!}}{{!}} Along the path to the previous chest. {{!}}{{!}} [[File:Nest_of_Dragon_Chest05.webp|256px]] | |||
{{!}}} | |||
=== | ===[[Lohan]]=== | ||
{ | {{{!}} class="wikitable mw-collapsible" style{{=}}"width: 700px;" | ||
{{!}}- | |||
! | ! Contents !! Acquisition !! Image | ||
{{!}}- | |||
{{!}} 100G {{!}}{{!}} Next to the chipmunk cages outside of the Arena. {{!}}{{!}} [[Missing File]] | |||
{{!}}- | |||
{{!}} [[Equipment#angelrobe|Angel Robe]] {{!}}{{!}} Just outside Dabas' Antique Shop. {{!}}{{!}} [[Missing File]] | |||
{{!}}- | |||
{{!}} 200G {{!}}{{!}} Across from the Clinic, inside the building with a green door. {{!}}{{!}} [[Missing File]] | |||
{{!}}} | |||
=== Shrine of Shirley === | ===[[Shrine of Shirley]]=== | ||
{ | {{{!}} class="wikitable mw-collapsible" style{{=}}"width: 700px;" | ||
{{!}}- | |||
! | ! Contents !! Location !! Image | ||
{{!}}- | |||
{{!}} Note {{!}}{{!}} On a landing at the entrance to the area. {{!}}{{!}} [[Missing File]] | |||
{{!}}- | |||
{{!}} Note {{!}}{{!}} On a landing in the right-side exit of the main hall. {{!}}{{!}} [[Missing File]] | |||
{{!}}- | |||
{{!}} Note {{!}}{{!}} Next to the silver statute. {{!}}{{!}} [[Missing File]] | |||
{{!}}- | |||
{{!}} Note {{!}}{{!}} On the landing near the ship wheel. {{!}}{{!}} [[Missing File]] | |||
{{!}}- | |||
{{!}} Note {{!}}{{!}} At the top of the stairs at the very back of the area. {{!}}{{!}} [[Missing File]] | |||
{{!}}- | |||
{{!}} Note {{!}}{{!}} Near the entrance of the amphitheater {{!}}{{!}} [[Missing File]] | |||
{{!}}- | |||
{{!}} 20G {{!}}{{!}} On a post in the building behind the amphitheater. {{!}}{{!}} [[Missing File]] | |||
{{!}}- | |||
{{!}} 20G {{!}}{{!}} On a post in the building behind the amphitheater. {{!}}{{!}} [[Missing File]] | |||
{{!}}- | |||
{{!}} 20G {{!}}{{!}} On a post in the building behind the amphitheater. {{!}}{{!}} [[Missing File]] | |||
{{!}}- | |||
{{!}} 20G {{!}}{{!}} On a post in the building behind the amphitheater. {{!}}{{!}} [[Missing File]] | |||
{{!}}- | |||
{{!}} 20G {{!}}{{!}} On a post in the building behind the amphitheater. {{!}}{{!}} [[Missing File]] | |||
{{!}}- | |||
{{!}} 20G {{!}}{{!}} On a post in the building behind the amphitheater. {{!}}{{!}} [[Missing File]] | |||
{{!}}- | |||
{{!}} 20G {{!}}{{!}} On the floor in the building behind the amphitheater. {{!}}{{!}} [[Missing File]] | |||
{{!}}- | |||
{{!}} [[Equipment#demonstiletto|Demon Stiletto]] {{!}}{{!}} At the back of the building behind the amphitheater. {{!}}{{!}} [[Missing File]] | |||
{{!}}- | |||
{{!}} [[Items#healingbreeze|Healing Breeze]] {{!}}{{!}} At the back right the building behind the amphitheater. {{!}}{{!}} [[Missing File]] | |||
{{!}}} | |||
=== Hellena Prison (Second Visit) === | ===[[Hellena Prison]] (Second Visit)=== | ||
Note: All chests from the first visit are still available, however all the chests become <b>Missable</b> once your second visit is over. | |||
{{{!}} class{{=}}"wikitable mw-collapsible" style{{=}}"width: 700px;" | |||
{{!}}- | |||
! Contents !! Acquisition !! Image | |||
{{!}}- | |||
{{!}} [[Equipment#felthat|Felt Hat]] {{!}}{{!}} Take the elevator that was previously out of order to get to the next screen. Get off and enter the door. Then, head right to jump over the pit and enter that door.{{!}}{{!}} [[File:Area13(Hellena2)Chest1.png|256px]] | |||
{{!}}- | |||
{{!}} [[Equipment#therapyring|Therapy Ring]] {{!}}{{!}} Continue past the previous chest following the path. {{!}}{{!}} [[File:Area13(Hellena2)Chest2.png|256px]] | |||
{{!}}- | |||
{{!}} [[Equipment#leatherarmor|Leather Armor]] {{!}}{{!}} Get off the elevator and take the rope ladder. {{!}}{{!}} [[File:Area13(Hellena2)Chest3.png|256px]] | |||
{{!}}- | |||
{{!}} [[Items#thunderbolt|Thunderbolt]] {{!}}{{!}} Through the door from the elevator, take the door on your left and follow the path.{{!}}{{!}} [[File:Area13(Hellena2)Chest5.png|256px]] | |||
{{!}}- | |||
{{!}} [[Equipment#silvervest|Silver Vest]] {{!}}{{!}} From the previous chest, instead of taking the elevator slide down the rope to your right.{{!}}{{!}} [[File:Area13(Hellena2)Chest6.png|256px]] | |||
{{!}}- | |||
{{!}} [[Items#pandemonium|Pandemonium]] {{!}}{{!}} Instead of the right door, take the far left door and follow the path.{{!}}{{!}} [[File:Area13(Hellena2)Chest4.png|256px]] | |||
{{!}}- | |||
{{!}} [[Items#healingpotion|Healing Potion]] {{!}}{{!}} Return to the main elevator and head up to the skybridge. Take the path on the left.{{!}}{{!}} [[File:Area13(Hellena2)Chest7.png|256px]] | |||
{{!}}- | |||
{{!}} [[Items#sachet|Sachet]] {{!}}{{!}} Fall into Jiango's lair and head to the top of the room.{{!}}{{!}} [[File:Area13(Hellena2)Chest8.png|256px]] | |||
{{!}}- | |||
{{!}} [[Items#healingpotion|Healing Potion]] {{!}}{{!}} After defeating Jiango, continue on the path.{{!}}{{!}} [[File:Area13(Hellena2)Chest9.png|256px]] | |||
{{!}}- | |||
{{!}} [[Equipment#broadsword|Broad Sword]] {{!}}{{!}} On the roof, near the Save Point: top{{!}}{{!}} [[File:Area13(Hellena2)Chest10.png|256px]] | |||
{{!}}- | |||
{{!}} [[Equipment#spear|Spear]] {{!}}{{!}} On the roof, near the Save Point: left{{!}}{{!}} [[File:Area13(Hellena2)Chest11.png|256px]] | |||
{{!}}- | |||
{{!}} 20G{{!}}{{!}}On the roof, near the Save Point: bottom{{!}}{{!}} [[File:Area13(Hellena2)Chest12.png|256px]] | |||
{{!}}} | |||
=== | ===[[Kazas]]=== | ||
{ | {{{!}} class="wikitable mw-collapsible" style{{=}}"width: 700px;" | ||
{{!}}- | |||
! | ! Contents !! Acquisition !! Image | ||
{{!}}- | |||
{{!}} [[Items#attackball|Attack Ball]] {{!}}{{!}} First building on the right and up the ladder. {{!}}{{!}} [[File:Kazas_Chest_Attack_Ball.png|256px]] | |||
{{!}}- | |||
{{!}} [[Equipment#twisterglaive|Twister Glaive]] {{!}}{{!}} Second building on the right. {{!}}{{!}} [[File:Kazas_Chest_Twister_Glaive.png|256px]] | |||
{{!}}- | |||
{{!}} 20G {{!}}{{!}} Cavern passage. Down the second rope then to the left. {{!}}{{!}} [[File:Kazas_Chest_20G.png|256px]] | |||
{{!}}- | |||
{{!}} [[Items#sparknet|Spark Net]] {{!}}{{!}} Along the way from the fortress to the castle. {{!}}{{!}} [[Missing File]] | |||
{{!}}- | |||
{{!}} [[Items#pellet|Pellet]] {{!}}{{!}} Right side of the main entrance to the castle. {{!}}{{!}} [[Missing File]] | |||
{{!}}- | |||
{{!}} [[Items#burnout|Burn Out]] {{!}}{{!}} Left side of the main entrance to the castle, on the second story. {{!}}{{!}} [[Missing File]] | |||
{{!}}- | |||
{{!}} [[Items#darkmist|Dark Mist]] {{!}}{{!}} Below the trash disposal. {{!}}{{!}} [[Missing File]] | |||
{{!}}- | |||
{{!}} [[Items#translight|Trans Light]] {{!}}{{!}} Below the trash disposal. {{!}}{{!}} [[Missing File]] | |||
{{!}}- | |||
{{!}} [[Equipment#beastfang|Beast Fang]] {{!}}{{!}} Across from the Item Shop in the Black Castle. {{!}}{{!}} [[Missing File]] | |||
{{!}}- | |||
{{!}} [[Equipment#spiritring|Spirit Ring]] {{!}}{{!}} On wall under construction. {{!}}{{!}} [[Missing File]] | |||
{{!}}- | |||
{{!}} [[Items#spearfrost|Spear Frost]] {{!}}{{!}} On wall under construction. {{!}}{{!}} [[Missing File]] | |||
{{!}}- | |||
{{!}} [[Items#spinninggale|Spinning Gale]] {{!}}{{!}} Elevator down from the way to construction wall. {{!}}{{!}} [[Missing File]] | |||
{{!}}- | |||
{{!}} [[Items#materialshield|Material Shield]] {{!}}{{!}} Right after Kongol, right of the throne room door. {{!}}{{!}} [[Missing File]] | |||
{{!}}} | |||
== Disc 2 == | ==Disc 2== | ||
== Disc 3 == | ===[[Fletz]]=== | ||
{{{!}} class="wikitable mw-collapsible" style{{=}}"width: 700px;" | |||
{{!}}- | |||
! Contents !! Acquisition !! Image | |||
{{!}}- | |||
{{!}} [[Items#moonserenade|Moon Serenade]] {{!}}{{!}} In the Twin Castle's training room. {{!}}{{!}} [[Missing File]] | |||
{{!}}- | |||
{{!}} [[Items#sunrhapsody|Sun Rhapsody]] {{!}}{{!}} In the Twin Castle's training room, closest to wall. {{!}}{{!}} [[Missing File]] | |||
{{!}}} | |||
===[[Barrens]]=== | |||
{{{!}} class="wikitable mw-collapsible" style{{=}}"width: 700px;" | |||
{{!}}- | |||
! Contents !! Acquisition !! Image | |||
{{!}}- | |||
{{!}} [[Equipment#warriordress|Warrior Dress]] {{!}}{{!}} Ledge near entrance. {{!}}{{!}} [[Missing File]] | |||
{{!}}- | |||
{{!}} [[Items#recoveryball|Recovery Ball]] {{!}}{{!}} On top of a tall winding path. {{!}}{{!}} [[Missing File]] | |||
{{!}}- | |||
{{!}} 50G {{!}}{{!}} On cliff near exit towards Donau. {{!}}{{!}} [[Missing File]] | |||
{{!}}- | |||
{{!}}} | |||
===[[Valley of Corrupted Gravity]]=== | |||
{{{!}} class="wikitable mw-collapsible" style{{=}}"width: 700px;" | |||
{{!}}- | |||
! Contents !! Acquisition !! Image | |||
{{!}}- | |||
{{!}} [[Items#speedup|Speed Up]] {{!}}{{!}} First area, head to the left. Jump over the floating rock. You will see the chest in an underpass down to the right. {{!}}{{!}} [[Missing File]] | |||
{{!}}- | |||
{{!}} [[Items#sachet|Sachet]] {{!}}{{!}} First area, jump across to the ledge on the right over the floating rock. Chest is to the north of the area. {{!}}{{!}} [[Missing File]] | |||
{{!}}- | |||
{{!}} [[Items#meteorfall|Meteor Fall]] {{!}}{{!}} Second area, over to the east you will find the chest. Jump on the moving rock platforms to get there. {{!}}{{!}} [[Missing File]] | |||
{{!}}- | |||
{{!}} [[Equipment#talisman|Talisman]] {{!}}{{!}} Fourth area, accessible via a rock platform from the previous area. Choosing the right platform will bring you into the next area on the correct ledge. {{!}}{{!}} [[Missing File]] | |||
{{!}}- | |||
{{!}} [[Equipment#knighthelm|Knight Helm]] {{!}}{{!}} Fourth area, accessible via a rock platform from the previous area. Choosing the right platform will bring you into the next area on the correct ledge. {{!}}{{!}} [[Missing File]] | |||
{{!}}- | |||
{{!}}} | |||
===[[Home of Giganto]]=== | |||
{{{!}} class="wikitable mw-collapsible" style{{=}}"width: 700px;" | |||
{{!}}- | |||
! Contents !! Acquisition !! Image | |||
{{!}}- | |||
{{!}} [[Equipment#fakeknightshield|Fake Knight Shield]] {{!}}{{!}} First area, between two stones. {{!}}{{!}} [[Missing File]] | |||
{{!}}- | |||
{{!}} 20G {{!}}{{!}} Enter the building to the left of the area with the arrow trap. {{!}}{{!}} [[Missing File]] | |||
{{!}}- | |||
{{!}} [[Equipment#bandit'sring|Bandit's Ring]] {{!}}{{!}} There is a building in the area with the arrow trap. Enter it, then exit using the most southern door. {{!}}{{!}} [[Missing File]] | |||
{{!}}- | |||
{{!}} [[Items#angelsprayer|Angel's Prayer]] {{!}}{{!}} Head down the stairs on the left of the Rock Fireflies {{!}}{{!}} [[Missing File]] | |||
{{!}}} | |||
===[[Phantom Ship]]=== | |||
{{{!}} class="wikitable mw-collapsible" style{{=}}"width: 700px;" | |||
{{!}}- | |||
! Contents !! Acquisition !! Image | |||
{{!}}- | |||
{{!}} 1.[[Equipment#stunguard|Stun Guard]]<br>2.[[Equipment#panicguard|Panic Guard]]<br>3.[[Equipment#magicegobell|Magic Ego Bell]]<br>4.[[Equipment#talisman|Talisman]]<br>5.[[Equipment#ultimatewargod|Ultimate Wargod]]<br>6.100G {{!}}{{!}} After acquiring four numbers from ghosts in another room of the ship, the correct three must be entered in a specific order for the chest to open. The exact rules of this puzzle are explained further [[Phantom Ship#=== Puzzle Chest ===|here]]. {{!}}{{!}} [[Missing File]] | |||
{{!}}- | |||
{{!}} 50G {{!}}{{!}} In the hall with 8 ghost fires. {{!}}{{!}} [[Missing File]] | |||
{{!}}- | |||
{{!}} 20G {{!}}{{!}} In the room with the four number ghosts. {{!}}{{!}} [[Missing File]] | |||
{{!}}- | |||
{{!}} Encounter {{!}}{{!}} 1st Cabin off the Hallway. {{!}}{{!}} [[Missing File]] | |||
{{!}}- | |||
{{!}} Encounter {{!}}{{!}} 2nd Cabin off the Hallway. {{!}}{{!}} [[Missing File]] | |||
{{!}}- | |||
{{!}} Encounter {{!}}{{!}} In the room with the four number ghosts. {{!}}{{!}} [[Missing File]] | |||
{{!}}- | |||
{{!}} 100G {{!}}{{!}} Captain's Quarters - Left {{!}}{{!}} [[Missing File]] | |||
{{!}}- | |||
{{!}} 200G {{!}}{{!}} Captain's Quarters - Right {{!}}{{!}} [[Missing File]] | |||
{{!}}- | |||
{{!}} [[Equipment#braveryamulet|Bravery Amulet]] {{!}}{{!}} Ghost Knights Boss Room. {{!}}{{!}} [[Missing File]] | |||
{{!}}- | |||
{{!}} [[Equipment#dancingdagger|Dancing Dagger]] {{!}}{{!}} In the nursery after the Boss fight. {{!}}{{!}} [[Missing File]] | |||
{{!}}} | |||
===[[Lidiera]]=== | |||
{{{!}} class="wikitable mw-collapsible" style{{=}}"width: 700px;" | |||
{{!}}- | |||
! Contents !! Acquisition !! Image | |||
{{!}}- | |||
{{!}} [[Items#healingpotion|Healing Potion]] {{!}}{{!}} Near the town's exit. {{!}}{{!}} [[Missing File]] | |||
{{!}}- | |||
{{!}} [[Items#healingrain|Healing Rain]] {{!}}{{!}} In the cave that lowers the water. {{!}}{{!}} [[Missing File]] | |||
{{!}}- | |||
{{!}} [[Items#healingfog|Healing Fog]] {{!}}{{!}} In the cave that lowers the water. {{!}}{{!}} [[Missing File]] | |||
{{!}}} | |||
===[[Undersea Cavern]]=== | |||
{{{!}} class="wikitable mw-collapsible" style{{=}}"width: 700px;" | |||
{{!}}- | |||
! Contents !! Acquisition !! Image | |||
{{!}}- | |||
{{!}} [[Items#attackball|Attack Ball]] {{!}}{{!}} Area 1 - where the water used to be. {{!}}{{!}} [[Missing File]] | |||
{{!}}- | |||
{{!}} [[Equipment#jeweledcrown|Jeweled Crown]] {{!}}{{!}} Area 2 - to the right just after entering. {{!}}{{!}} [[Missing File]] | |||
{{!}}- | |||
{{!}} [[Items#gushingmagma|Gushing Magma]] {{!}}{{!}} Area 2 - further into the room. {{!}}{{!}} [[Missing File]] | |||
{{!}}- | |||
{{!}} [[Items#recoveryball|Recovery Ball]] {{!}}{{!}} Side area, at the top of a long coral path. {{!}}{{!}} [[Missing File]] | |||
{{!}}- | |||
{{!}} [[Items#burnout|Burn Out]] {{!}}{{!}} Area 3 - on a platform you hop to. {{!}}{{!}} [[Missing File]] | |||
{{!}}- | |||
{{!}} [[Items#attackball|Attack Ball]] {{!}}{{!}} Area 3 - last chest just before the save point. {{!}}{{!}} [[Missing File]] | |||
{{!}}- | |||
{{!}} [[Items#recoveryball|Recovery Ball]] {{!}}{{!}} Side area, at the bottom of a long coral path. {{!}}{{!}} [[Missing File]] | |||
{{!}}} | |||
==Disc 3== | |||
===[[Evergreen Forest]]=== | |||
{{{!}} class="wikitable mw-collapsible" style{{=}}"width: 700px;" | |||
{{!}}- | |||
! Contents !! Acquisition !! Image | |||
{{!}}- | |||
{{!}} [[Equipment#destoneamulet|Destone Amulet]] {{!}}{{!}} Near the flying squirrel in the tree {{!}}{{!}} [[Missing File]] | |||
{{!}}- | |||
{{!}} [[Items#bodypurifier|Body Purifier]] {{!}}{{!}} Right side the screen with a large chasm in the center {{!}}{{!}} [[Missing File]] | |||
{{!}}- | |||
{{!}} [[Items#depetrifier|Depetrifier]] {{!}}{{!}} Where the party meets Teo {{!}}{{!}} [[Missing File]] | |||
{{!}}- | |||
{{!}} [[Items#mindpurifier|Mind Purifier]] {{!}}{{!}} Under a tent beside the guard blocking the path to the Mountain of Mortal Dragon. {{!}}{{!}} [[Missing File]] | |||
{{!}}} | |||
===[[Deningrad]]=== | |||
{{{!}} class="wikitable mw-collapsible" style{{=}}"width: 700px;" | |||
{{!}}- | |||
! Contents !! Acquisition !! Image | |||
{{!}}- | |||
{{!}} [[Items#angelsprayer|Angel's Prayer]] {{!}}{{!}} In the Crystal Palace, to the left of the twin staircases. {{!}}{{!}} [[File:Deningrad_Chest01.webp|256px]] | |||
{{!}}- | |||
{{!}} [[Equipment#holyahnk|Holy Ahnk]] {{!}}{{!}} In the Crystal Palace, in the lounge side room. {{!}}{{!}} [[File:Deningrad_Chest02.webp|256px]] | |||
{{!}}- | |||
{{!}}} | |||
===[[Kadessa]]=== | |||
{{{!}} class="wikitable mw-collapsible" style{{=}}"width: 700px;" | |||
{{!}}- | |||
! Contents !! Acquisition !! Image | |||
{{!}}- | |||
{{!}} [[Items#mindpurifier|Mind Purifier]] {{!}}{{!}} In the second area by the steam vents. {{!}}{{!}} [[Missing File]] | |||
{{!}}- | |||
{{!}} [[Equipment#dancersshoes|Dancer's Shoes]] {{!}}{{!}} By the second area with teleporters. {{!}}{{!}} [[Missing File]] | |||
{{!}}- | |||
{{!}} [[Items#powerup|Power Up]] {{!}}{{!}} In the area with moving platforms, at the very top of the first accessible platform. {{!}}{{!}} [[Missing File]] | |||
{{!}}- | |||
{{!}} [[Equipment#mindcrush|Mind Crush]] {{!}}{{!}} In the area with moving platforms across a gap. {{!}}{{!}} [[Missing File]] | |||
{{!}}- | |||
{{!}}} | |||
===[[Mountain of Mortal Dragon]]=== | |||
{{{!}} class="wikitable mw-collapsible" style{{=}}"width: 700px;" | |||
{{!}}- | |||
! Contents !! Acquisition !! Image | |||
{{!}}- | |||
{{!}} [[Items#attackball|Attack Ball]] {{!}}{{!}} Second area by a massive skull. {{!}}{{!}} [[File:Mountain_of_Mortal_Dragon_Chest01.webp|256px]] | |||
{{!}}- | |||
{{!}} [[Items#mindpurifier|Mind Purifier]] {{!}}{{!}} Fourth area on a low ledge. {{!}}{{!}} [[File:Mountain_of_Mortal_Dragon_Chest02.webp|256px]] | |||
{{!}}- | |||
{{!}} [[Items#healingbreeze|Healing Breeze]] {{!}}{{!}} Third area on a high ledge. {{!}}{{!}} [[File:Mountain_of_Mortal_Dragon_Chest03.webp|256px]] | |||
{{!}}- | |||
{{!}} [[Equipment#gigantoarmor|Giganto Armor]] {{!}}{{!}} Third area on a low ledge. {{!}}{{!}} [[File:Mountain_of_Mortal_Dragon_Chest04.webp|256px]] | |||
{{!}}- | |||
{{!}} [[Equipment#dragonhelm|Dragon Helm]] {{!}}{{!}} Fourth area on a high ledge. {{!}}{{!}} [[File:Mountain_of_Mortal_Dragon_Chest05.webp|256px]] | |||
{{!}}- | |||
{{!}} [[Items#totalvanishing|Total Vanishing]] {{!}}{{!}} Area with a Save Point. {{!}}{{!}} [[File:Mountain_of_Mortal_Dragon_Chest06.webp|256px]] | |||
{{!}}- | |||
{{!}} [[Items#speeddown|Speed Down]] {{!}}{{!}} In the area past the Save Point, on the right hand side almost completely hidden from view by rock. {{!}}{{!}} [[File:Mountain_of_Mortal_Dragon_Chest07.webp|256px]] | |||
{{!}}- | |||
{{!}} [[Items#bodypurifier|Body Purifier]] {{!}}{{!}} In the area past the Save point, on the right hand side in plain view. {{!}}{{!}} [[File:Mountain_of_Mortal_Dragon_Chest08.webp|256px]] | |||
{{!}}- | |||
{{!}}} | |||
===[[Kashua Glacier]]=== | |||
{{{!}} class="wikitable" style{{=}}"width: 700px;" | |||
{{!}}- | |||
! Contents !! Acquisition !! Image | |||
{{!}}- | |||
{{!}} [[Items#thunderbolt|Thunderbolt]] {{!}}{{!}} Area 1 lower section. {{!}}{{!}} [[File:Kashua_Glacier_Chest01.webp|256px]] | |||
{{!}}- | |||
{{!}} [[Equipment#heatblade|Heat Blade]] {{!}}{{!}} Area 1 upper section. {{!}}{{!}} [[File:Kashua_Glacier_Chest02.webp|256px]] | |||
{{!}}- | |||
{{!}} [[Items#meteorfall|Meteor Fall]] {{!}}{{!}} Area 2 upper section. {{!}}{{!}} [[File:Kashua_Glacier_Chest03.webp|256px]] | |||
{{!}}- | |||
{{!}} [[Equipment#heavymace|Heavy Mace]] {{!}}{{!}} Area 2 lower section. {{!}}{{!}} [[File:Kashua_Glacier_Chest04.webp|256px]] | |||
{{!}}- | |||
{{!}} [[Items#gushingmagma|Gushing Magma]] {{!}}{{!}} Area 3 by the merchants Cuarto and Segundo. {{!}}{{!}} [[File:Kashua_Glacier_Chest05.webp|256px]] | |||
{{!}}- | |||
{{!}} [[Items#dancingray|Dancing Ray]] {{!}}{{!}} Area 4 left side. {{!}}{{!}} [[File:Kashua_Glacier_Chest06.webp|256px]] | |||
{{!}}- | |||
{{!}} [[Equipment#phoenixplume|Phoenix Plume]] {{!}}{{!}} Area 4 right side. {{!}}{{!}} [[File:Kashua_Glacier_Chest07.webp|256px]] | |||
{{!}}- | |||
{{!}} [[Items#fatalblizzard|Fatal Blizzard]] {{!}}{{!}} Area 5 right side. {{!}}{{!}} [[File:Kashua_Glacier_Chest08.webp|256px]] | |||
{{!}}- | |||
{{!}} [[Items#blackrain|Black Rain]] {{!}}{{!}} Area 5 left side. {{!}}{{!}} [[File:Kashua_Glacier_Chest09.webp|256px]] | |||
{{!}}- | |||
{{!}} [[Items#ravetwister|Rave Twister]] {{!}}{{!}} Area 6 overlooking Flanvel Tower. {{!}}{{!}} [[File:Kashua_Glacier_Chest10.webp|256px]] | |||
{{!}}} | |||
===[[Tower of Flanvel]]=== | |||
Note: Only the first three chests are accessible until the [[Goods#vanishingstone|Vanishing Stone]] is obtained. | |||
{{{!}} class="wikitable mw-collapsible" style{{=}}"width: 700px;" | |||
{{!}}- | |||
! Contents !! Acquisition !! Image | |||
{{!}}- | |||
{{!}} [[Equipment#spiritring|Spirit Ring]] {{!}}{{!}} Area 1. {{!}}{{!}} [[File:Flanvel_Tower_Chest01.webp|256px]] | |||
{{!}}- | |||
{{!}} [[Equipment#magering|Mage Ring]] {{!}}{{!}} Area 2. {{!}}{{!}} [[File:Flanvel_Tower_Chest02.webp|256px]] | |||
{{!}}- | |||
{{!}} [[Equipment#therapyring|Therapy Ring]] {{!}}{{!}} Area 4. {{!}}{{!}} [[File:Flanvel_Tower_Chest03.webp|256px]] | |||
{{!}}- | |||
{{!}} [[Equipment#dragonhelm|Dragon Helm]] {{!}}{{!}} Area with 3 teleporters going down. {{!}}{{!}} [[File:Flanvel_Tower_Chest04.webp|256px]] | |||
{{!}}- | |||
{{!}} [[Equipment#magicalhat|Magical Hat]] {{!}}{{!}} Boss room left side. {{!}}{{!}} [[File:Flanvel_Tower_Chest05.webp|256px]] | |||
{{!}}- | |||
{{!}} [[Equipment#dancersring|Dancer's Ring]] {{!}}{{!}} Boss room lower right side. {{!}}{{!}} [[File:Flanvel_Tower_Chest06.webp|256px]] | |||
{{!}}- | |||
{{!}} [[Equipment#holyahnk|Holy Ahnk]] {{!}}{{!}} Boss room upper right side. {{!}}{{!}} [[File:Flanvel_Tower_Chest07.webp|256px]] | |||
{{!}}- | |||
{{!}}} | |||
===[[Snowfield]]=== | |||
{{{!}} class="wikitable mw-collapsible" style{{=}}"width: 700px;" | |||
{{!}}- | |||
! Contents !! Acquisition !! Image | |||
{{!}}- | |||
{{!}} [[Items#burnout|Burn Out]] {{!}}{{!}} Area 1. {{!}}{{!}} [[File:Snowfield_Chest01.webp|256px]] | |||
{{!}}- | |||
{{!}} [[Items#magicshield|Magic Shield]] {{!}}{{!}} Snowslide using 1,3,4. {{!}}{{!}} [[File:Snowfield_Chest02.webp|256px]] | |||
{{!}}- | |||
{{!}} [[Equipment#dancersring|Dancer's Ring]] {{!}}{{!}} Snowslide using 2,4. {{!}}{{!}} [[File:Snowfield_Chest03.webp|256px]] | |||
{{!}}- | |||
{{!}} [[Items#gushingmagma|Gushing Magma]] {{!}}{{!}} Snowslide area upper section. {{!}}{{!}} [[File:Snowfield_Chest04.webp|256px]] | |||
{{!}}- | |||
{{!}} [[Items#burningwave|Burning Wave]] {{!}}{{!}} Snowslide area lower section. {{!}}{{!}} [[File:Snowfield_Chest05.webp|256px]] | |||
{{!}}- | |||
{{!}} [[Items#midnightterror|Midnight Terror]] {{!}}{{!}} Area 1 of Fort Magrad. {{!}}{{!}} [[File:Snowfield_Chest06.webp|256px]] | |||
{{!}}- | |||
{{!}} [[Items#stunninghammer|Stunning Hammer]] {{!}}{{!}} Area 2 of Fort Magrad, furthest from the memorial. {{!}}{{!}} [[File:Snowfield_Chest07.webp|256px]] | |||
{{!}}- | |||
{{!}} [[Items#poisonneedle|Poison Needle]] {{!}}{{!}} Area 2 of Fort Magrad, closest to the memorial. {{!}}{{!}} [[File:Snowfield_Chest08.webp|256px]] | |||
{{!}}- | |||
{{!}} [[Equipment#armorofyore|Armor of Yore]] {{!}}{{!}} Area 3 of Fort Magrad, left side. {{!}}{{!}} [[File:Snowfield_Chest09.webp|256px]] | |||
{{!}}- | |||
{{!}} [[Items#panicbell|Panic Bell]] {{!}}{{!}} Area 3 of Fort Magrad, right side. {{!}}{{!}} [[File:Snowfield_Chest010.webp|256px]] | |||
{{!}}- | |||
{{!}}} | |||
===[[Vellweb]]=== | |||
{{{!}} class="wikitable mw-collapsible" style{{=}}"width: 700px;" | |||
{{!}}- | |||
! Contents !! Acquisition !! Image | |||
{{!}}- | |||
{{!}} [[Items#attackball|Attack Ball]] {{!}}{{!}} Area 3. {{!}}{{!}} [[File:Vellweb_Chest01.webp|256px]] | |||
{{!}}- | |||
{{!}} [[Equipment#roseshairband|Rose's Hairband]] {{!}}{{!}} Outer ledges on the right side. {{!}}{{!}} [[File:Vellweb_Chest02.webp|256px]] | |||
{{!}}- | |||
{{!}} [[Items#spiritpotion|Spirit Potion]] {{!}}{{!}} Outer ledges on the left side. {{!}}{{!}} [[File:Vellweb_Chest03.webp|256px]] | |||
{{!}}} | |||
== Disc 4 == | == Disc 4 == | ||
== | ===[[Death Frontier]]=== | ||
{{{!}} class="wikitable mw-collapsible" style{{=}}"width: 700px;" | |||
{{!}}- | |||
! Contents !! Acquisition !! Image | |||
{{!}}- | |||
{{!}} [[Items#moonserenade|Moon Serenade]] {{!}}{{!}} Falling down the sinkhole on submap 750 or the leftmost sinkhole of 751. {{!}}{{!}} [[File:Death_Frontier_Chest01.webp|256px]] | |||
{{!}}- | |||
{{!}} [[Items#healingbreeze|Healing Breeze]] {{!}}{{!}} On submap 751, surrounded by three sinkholes. {{!}}{{!}} [[File:Death_Frontier_Chest02.webp|256px]] | |||
{{!}}- | |||
{{!}} [[Items#healingfog|Healing Fog]] {{!}}{{!}} On submap 756. {{!}}{{!}} [[File:Death_Frontier_Chest03.webp|256px]] | |||
{{!}}- | |||
{{!}} [[Items#healingrain|Healing Rain]] {{!}}{{!}} Falling down the sinkhole of submap 753 or 756. {{!}}{{!}} [[File:Death_Frontier_Chest04.webp|256px]] | |||
{{!}}- | |||
{{!}} [[Items#recoveryball|Recovery Ball]] {{!}}{{!}} Falling down the right most sinkhole on submap 761 or 762. {{!}}{{!}} [[File:Death_Frontier_Chest05.webp|256px]] | |||
{{!}}- | |||
{{!}} [[Equipment#gladius|Gladius]] {{!}}{{!}} On submap 762. {{!}}{{!}} [[File:Death_Frontier_Chest06.webp|256px]] | |||
{{!}}- | |||
{{!}} [[Items#powerup|Power Up]] {{!}}{{!}} On submap 775. {{!}}{{!}} [[File:Death_Frontier_Chest07.webp|256px]] | |||
{{!}}- | |||
{{!}} [[Items#sunrhapsody|Sun Rhapsody]] {{!}}{{!}} Falling down the sinkhole on submap 771, 776, or the rightmost sinkhole on 775. {{!}}{{!}} [[File:Death_Frontier_Chest08.webp|256px]] | |||
{{!}}- | |||
{{!}} [[Equipment#banditsshoes|Bandit's Shoes]] {{!}}{{!}} On submap 786. {{!}}{{!}} [[File:Death_Frontier_Chest09.webp|256px]] | |||
{{!}}- | |||
{{!}} [[Items#healingpotion|Healing Potion]] {{!}}{{!}} Falling down the sinkhole on submap 783 or 786. {{!}}{{!}} [[File:Death_Frontier_Chest10.webp|256px]] | |||
{{!}}- | |||
{{!}}} | |||
===[[Ulara]]=== | |||
{{{!}} class="wikitable mw-collapsible" style{{=}}"width: 700px;" | |||
{{!}}- | |||
! Contents !! Acquisition !! Image | |||
{{!}}- | |||
{{!}} [[Items#sunrhapsody|Sun Rhapsody]] {{!}}{{!}} At the entrance near the teleporter. {{!}}{{!}} [[File:Ulara_Chest01.webp|256px]] | |||
{{!}}- | |||
{{!}} [[Items#moonserenade|Moon Serenade]] {{!}}{{!}} Inside Charle's home on the second floor. {{!}}{{!}} [[File:Ulara_Chest02.webp|256px]] | |||
{{!}}- | |||
{{!}}} | |||
===[[Rouge]]=== | |||
{{{!}} class="wikitable mw-collapsible" style{{=}}"width: 700px;" | |||
{{!}}- | |||
! Contents !! Acquisition !! Image | |||
{{!}}- | |||
{{!}} 100G {{!}}{{!}} Room past Martel. {{!}}{{!}} [[File:Rouge_Chest01.webp|256px]] | |||
{{!}}- | |||
{{!}} [[Equipment#satorivest|Satori Vest]] {{!}}{{!}} Through the bottom right passage out of the Mayor's house. {{!}}{{!}} [[File:Rouge_Chest02.webp|256px]] | |||
{{!}}- | |||
{{!}} [[Equipment#wargodcalling|Wargod Calling]] {{!}}{{!}} At the end of the path after going down the right hand side ladder in the Mayor's house. {{!}}{{!}} [[File:Rouge_Chest03.webp|256px]] | |||
{{!}}} | |||
===[[Aglis]]=== | |||
{{{!}} class="wikitable mw-collapsible" style{{=}}"width: 700px;" | |||
{{!}}- | |||
! Contents !! Acquisition !! Image | |||
{{!}}- | |||
{{!}} [[Items#burnout|Burn Out]] {{!}}{{!}} On the lower platform of the first set of teleporters after the first fork. {{!}}{{!}} [[File:Aglis_Chest01.webp|256px]] | |||
{{!}}- | |||
{{!}} [[Items#gushingmagma|Gushing Magma]] {{!}}{{!}} On the upper platform of the first set of teleporters after the first fork. {{!}}{{!}} [[File:Aglis_Chest02.webp|256px]] | |||
{{!}}- | |||
{{!}} [[Equipment#magicalhat|Magical Hat]] {{!}}{{!}} Leftmost chest on the central platform of the second set of teleporters after the first fork. {{!}}{{!}} [[File:Aglis_Chest03.webp|256px]] | |||
{{!}}- | |||
{{!}} [[Items#moonserenade|Moon Serenade]] {{!}}{{!}} Rightmost chest on the central platform of the second set of teleporters after the first fork. {{!}}{{!}} [[File:Aglis_Chest04.webp|256px]] | |||
{{!}}- | |||
{{!}} [[Items#angelsprayer|Angel's Prayer]] {{!}}{{!}} In the far left corner of the research room with Phewy. {{!}}{{!}} [[File:Aglis_Chest05.webp|256px]] | |||
{{!}}- | |||
{{!}} [[Items#sunrhapsody|Sun Rhapsody]] {{!}}{{!}} On the far right side of the teleporters past the research room. {{!}}{{!}} [[File:Aglis_Chest06.webp|256px]] | |||
{{!}}- | |||
{{!}} [[Items#healingfog|Healing Fog]] {{!}}{{!}} Behind the first teleporter past the mirror room. {{!}}{{!}} [[File:Aglis_Chest07.webp|256px]] | |||
{{!}}- | |||
{{!}} [[Items#healingrain|Healing Rain]] {{!}}{{!}} On a platform near the first set of teleporters past the mirror room, but can only be reached by using the second set of teleporters further on. {{!}}{{!}} [[File:Aglis_Chest08.webp|256px]] | |||
{{!}}- | |||
{{!}} 200G {{!}}{{!}} On the lower platform past the room collecting courage. {{!}}{{!}} [[File:Aglis_Chest09.webp|256px]] | |||
{{!}}- | |||
{{!}} [[Items#healingbreeze|Healing Breeze]] {{!}}{{!}} On the upper platform past the room collecting courage. {{!}}{{!}} [[File:Aglis_Chest10.webp|256px]] | |||
{{!}}- | |||
{{!}}} | |||
===[[Zenebatos]]=== | |||
{{{!}} class="wikitable mw-collapsible" style{{=}}"width: 700px;" | |||
{{!}}- | |||
! Contents !! Acquisition !! Image | |||
{{!}}- | |||
{{!}} [[Items#flashhall|Flash Hall]] {{!}}{{!}} Outside the prison on the lower section. {{!}}{{!}} [[File:Zenebatos_Chest01.webp|256px]] | |||
{{!}}- | |||
{{!}} 200G {{!}}{{!}} Outside the prison on the upper section. {{!}}{{!}} [[File:Zenebatos_Chest02.webp|256px]] | |||
{{!}}- | |||
{{!}} [[Items#frozenjet|Frozen Jet]] {{!}}{{!}} On the upper floor of teleporters leading to the Legislation Center. {{!}}{{!}} [[File:Zenebatos_Chest03.webp|256px]] | |||
{{!}}- | |||
{{!}} [[Items#burningwave|Burning Wave]] {{!}}{{!}} On the lower floor of teleporters leading to the Legislation Center. {{!}}{{!}} [[File:Zenebatos_Chest04.webp|256px]] | |||
{{!}}- | |||
{{!}} [[Items#spectralflash|Spectral Flash]] {{!}}{{!}} On the upper floor of teleporters leading to the Law Factory. {{!}}{{!}} [[File:Zenebatos_Chest05.webp|256px]] | |||
{{!}}- | |||
{{!}} [[Items#nightraid|Night Raid]] {{!}}{{!}} On the middle floor of teleporters leading to the Law Factor. {{!}}{{!}} [[File:Zenebatos_Chest06.webp|256px]] | |||
{{!}}- | |||
{{!}} [[Equipment#rainbowdress|Rainbow Dress]] {{!}}{{!}} On the lower floor of teleporters leading to the Law Factory. {{!}}{{!}} [[File:Zenebatos_Chest07.webp|256px]] | |||
{{!}}- | |||
{{!}} [[Items#downburst|Down Burst]] {{!}}{{!}} On the lower floor of teleporters leading to the Law Launcher. {{!}}{{!}} [[File:Zenebatos_Chest08.webp|256px]] | |||
{{!}}- | |||
{{!}} [[Equipment#spiritcloak|Spirit Cloak]] {{!}}{{!}} On the upper floor of teleporters leading to the Law Launcher. {{!}}{{!}} [[File:Zenebatos_Chest09.webp|256px]] | |||
{{!}}- | |||
{{!}} [[Items#gravitygrabber|Gravity Grabber]] {{!}}{{!}} On the middle floor of teleporters leading to the Law Launcher. {{!}}{{!}} [[File:Zenebatos_Chest10.webp|256px]] | |||
{{!}}- | |||
{{!}}} | |||
===[[Mayfil]]=== | |||
{{{!}} class="wikitable mw-collapsible" style{{=}}"width: 700px;" | |||
{{!}}- | |||
! Contents !! Acquisition !! Image | |||
{{!}}- | |||
{{!}} [[Equipment#poisonguard|Poison Guard]] {{!}}{{!}} Teleporters after Feyrbrand on the upper level. {{!}}{{!}} [[File:Mayfil_Chest01.webp|256px]] | |||
{{!}}- | |||
{{!}} [[Equipment#stunguard|Stun Guard]] {{!}}{{!}} Teleporters after Divine Dragon. {{!}}{{!}} [[File:Mayfil_Chest02.webp|256px]] | |||
{{!}}- | |||
{{!}} [[Equipment#panicguard|Panic Guard]] {{!}}{{!}} Teleporters after Regole on the lower level. {{!}}{{!}} [[File:Mayfil_Chest03.webp|256px]] | |||
{{!}}- | |||
{{!}} [[Equipment#protector|Protector]] {{!}}{{!}} Teleporters after Regole on the upper level. {{!}}{{!}} [[File:Mayfil_Chest04.webp|256px]] | |||
{{!}}- | |||
{{!}} [[Equipment#activering|Active Ring]] {{!}}{{!}} Teleporters after Feyrbrand on the lower level. {{!}}{{!}} [[File:Mayfil_Chest05.webp|256px]] | |||
{{!}}- | |||
{{!}} [[Equipment#destoneamulet|Destone Amulet]] {{!}}{{!}} Room with Divine Dragon. {{!}}{{!}} [[File:Mayfil_Chest06.webp|256px]] | |||
{{!}}- | |||
{{!}} [[Equipment#braveryamulet|Bravery Amulet]] {{!}}{{!}} In the room when falling down the grid floor puzzle. {{!}}{{!}} [[File:Mayfil_Chest07.webp|256px]] | |||
{{!}}- | |||
{{!}} [[Equipment#magicegobell|Magic Ego Bell]] {{!}}{{!}} Room with Recovery Pad. {{!}}{{!}} [[File:Mayfil_Chest08.webp|256px]] | |||
{{!}}- | |||
{{!}} [[Equipment#healingrain|Healing Rain]] {{!}}{{!}} Room where we reunite with Lavitz. {{!}}{{!}} [[File:Mayfil_Chest09.webp|256px]] | |||
{{!}}- | |||
{{!}} [[Equipment#spectralflash|Spectral Flash]] {{!}}{{!}} Room beyond the point of no return. {{!}}{{!}} [[File:Mayfil_Chest10.webp|256px]] | |||
{{!}}} | |||
=== | ===[[Divine Tree]]=== | ||
{{{!}} class="wikitable mw-collapsible" style{{=}}"width: 700px;" | |||
{{!}}- | |||
* | ! Contents !! Acquisition !! Image | ||
{{!}}- | |||
{{!}} [[Equipment#phoenixplume|Phoenix Plume]] {{!}}{{!}} The sparkle on the ground in the second area, partially obscured by roots on the left hand side. {{!}}{{!}} [[File:Divine_Tree_Chest01.webp|256px]] | |||
{{!}}- | |||
{{!}} [[Equipment#silverdgarmor|Silver DG Armor]] {{!}}{{!}} The sparkle in the tree hollow near the Water after riding the current. {{!}}{{!}} [[File:Divine_Tree_Chest02.webp|256px]] | |||
{{!}}- | |||
{{!}}} | |||
*While written as White Silver Dragon's Armor when picked up, this item is listed under equipment as Silver DG Armor. | |||
===[[Moon That Never Sets]]=== | |||
{{{!}} class="wikitable mw-collapsible" style{{=}}"width: 700px;" | |||
{{!}}- | |||
! Contents !! Acquisition !! Image | |||
{{!}}- | |||
{{!}} [[Items#frozenjet|Frozen Jet]] {{!}}{{!}} In the forest. {{!}}{{!}} [[File:Moon_That_Never_Sets_Chest01.webp|256px]] | |||
{{!}}- | |||
{{!}} [[Items#downburst|Down Burst]] {{!}}{{!}} In the forest during winter. {{!}}{{!}} [[File:Moon_That_Never_Sets_Chest02.webp|256px]] | |||
{{!}}- | |||
{{!}} 200G {{!}}{{!}} In the Minintos house closest to Bale. {{!}}{{!}} [[File:Moon_That_Never_Sets_Chest03.webp|256px]] | |||
{{!}}- | |||
{{!}} [[Items#spectralflash|Spectral Flash]] {{!}}{{!}} In the area past the Minintos. {{!}}{{!}} [[File:Moon_That_Never_Sets_Chest04.webp|256px]] | |||
{{!}}- | |||
{{!}} [[Items#flashhall|Flash Hall]] {{!}}{{!}} In the Minintos house furthest from Bale. {{!}}{{!}} [[File:Moon_That_Never_Sets_Chest05.webp|256px]] | |||
{{!}}- | |||
{{!}} [[Equipment#golddgarmor|Gold DG Armor]] {{!}}{{!}} Inside the jail of the Gigantos throne room. {{!}}{{!}} [[File:Moon_That_Never_Sets_Chest06.webp|256px]] | |||
{{!}}- | |||
{{!}} [[Items#nightraid|Night Raid]] {{!}}{{!}} In the dragon area on the ground level. {{!}}{{!}} [[File:Moon_That_Never_Sets_Chest07.webp|256px]] | |||
{{!}}- | |||
{{!}} [[Items#burningwave|Burning Wave]] {{!}}{{!}} In the dragon area on a ledge. {{!}}{{!}} [[File:Moon_That_Never_Sets_Chest08.webp|256px]] | |||
{{!}}- | |||
{{!}} [[Items#gravitygrabber|Gravity Grabber]] {{!}}{{!}} In the second area after the Archangel. {{!}}{{!}} [[File:Moon_That_Never_Sets_Chest09.webp|256px]] | |||
{{!}}- | |||
{{!}} [[Equipment#detonatearrow|Detonate Arrow]] {{!}}{{!}} Near the last save point. {{!}}{{!}} [[File:Moon_That_Never_Sets_Chest10.webp|256px]] | |||
{{!}}- | |||
{{!}}} | |||
*Although listed as Golden Dragon's Armor on picking it up, this item is called Golden DG Armor under equipment. | |||
== Trivia == | |||
#Counting the chests you get the Red and Blue Stone from and the fake [[Drake]] chests in [[Shrine of Shirley]], there are a total of 108 chests in Disc 1. | |||
#1,210 gold is contained in chests. | |||
#While most locations have chests, [[Donau]], the [[Queen Fury]], [[Fueno]], [[Furni]], [[Neet]], and the [[Forest of Winglies]] do not. | |||
[[Category: | [[Category:List]][[Category:Missing Information]] | ||
Latest revision as of 11:56, 30 March 2026
This page is a list of all chests in the game that give usable items or money.
Disc 1
Seles
| Contents | Acquisition | Image |
|---|---|---|
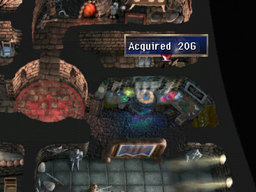
| Burn Out | Near the Save Point; not accessible until after the first scripted battle. |
Forest
| Contents | Acquisition | Image |
|---|---|---|
| Healing Potion | Turn around near the Merchant and follow the upper path back to the right. | 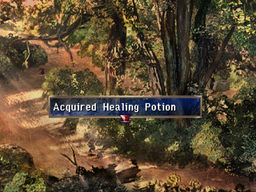
|
| Charm Potion | Against the background trees just past the first fallen tree acting as a bridge. | 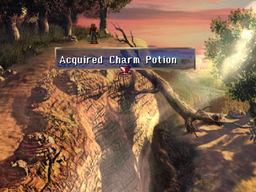
|
| 20 Gold | In the maze, on the right edge, take either of the two paths lower than the one Dart enters from. | 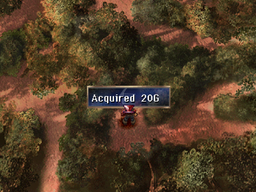
|
| Burn Out | In the maze, on the left edge, take the lower path. | 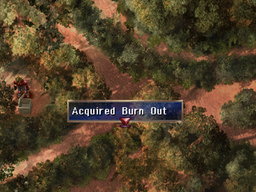
|
Hellena Prison (First Visit)
Note: These chests will be inaccessible for a time after leaving Hellena and will become permanently inaccessible after the second visit to Hellena.
| Contents | Acquisition | Image |
|---|---|---|
| Burn Out | From the storeroom with the merchant, take the top left exit and follow the path. | 
|
| Angel's Prayer | Head up to level two of the prison and just beyond the first elevator, enter the barracks to find this chest in the upper left area of the room near the beds. | 
|
| Leather Jacket | In the barracks: continue left beyond the first chest | 
|
| 50G | In the barracks: central kitchen area | 
|
| Spark Net | First prison tower: inside a cell | 
|
| 20G | First prison tower: inside a cell | 
|
| 20G | Second prison tower: inside a cell | 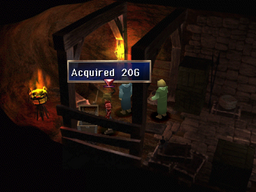
|
| 20G | Second prison tower: inside a cell | 
|
Prairie
| Contents | Acquisition | Image |
|---|---|---|
| 100G | Following winding path when coming from Hellena, go down away from the ocean to discover a hidden opening in the rockface. | 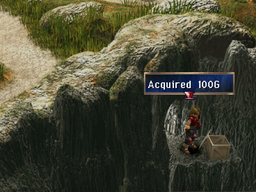
|
| Total Vanishing | Hidden in the bottom left hand corner around the Shack. | 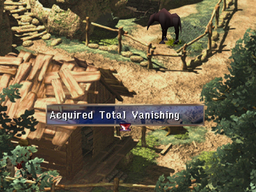
|
| Angel's Prayer | Up a path shortly after crossing the log bridge. | 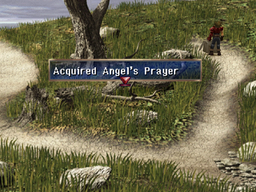
|
Limestone Cave
| Contents | Acquisition | Image |
|---|---|---|
| Detonate Rock | Directly to the left upon entering the first area. | 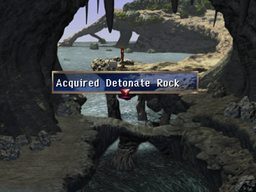
|
| Healing Potion | Down a secret path along the bottom right of the first area. | 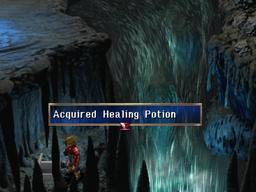
|
| 20G | Take the slide in the second area without any inputs. | 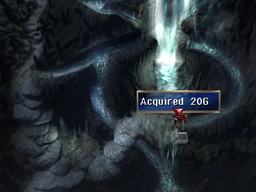
|
| Bastard Sword | Take the slide in the second area and hold up and then down to follow the correct path. | 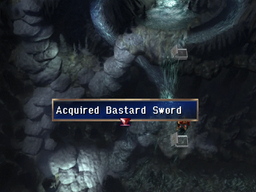
|
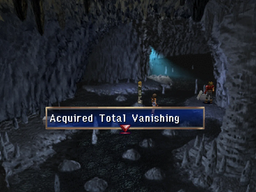
| Total Vanishing | Along the stepping stones. Shana can be made to block the path if the player advances too far. If that happens, simply leave the area and return to get it. |
|
| Body Purifier | Further along the stepping stones. | 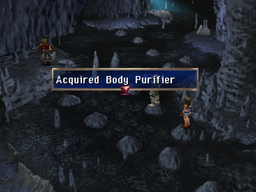
|
| 100G | Take the upper exit from the room after the stepping stones and jump across larger stones in the next area. | 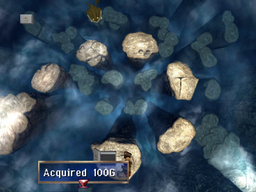
|
| Angel's Prayer | Just past the rock fireflies. | 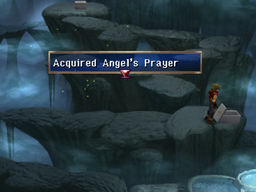
|
| Burn Out | Continue up the path past the rock fireflies. | 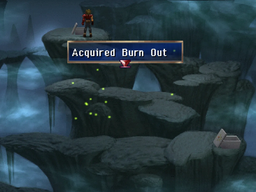
|
| Spark Net | Head through the uppermost exit in the room after the rock fireflies, then jump more stones. | 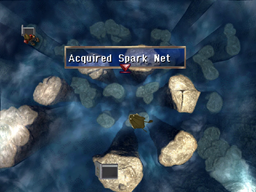
|
| Poison Guard | In the same room as above. You must chase and catch the frog creature for it to appear. | 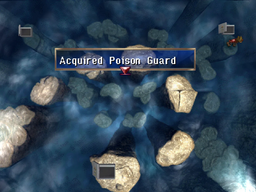
|
| Charm Potion | In the room past the rock fireflies, along the left path. | 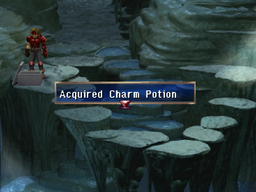
|
| Body Purifier | Past the save point to the left of the path. | 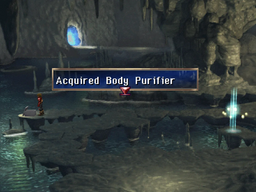
|
| Bandana | On the path past the save point on the right of the path. | 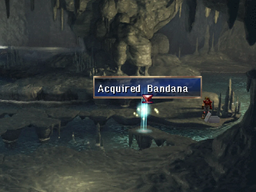
|
| Healing Potion | Along the winding path in the area after Orobolus. | 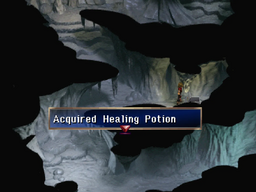
|
| 50G | Further along the winding path after Orobolus. | 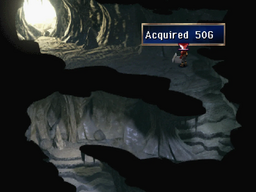
|
Bale
Hoax
| Contents | Acquisition | Image |
|---|---|---|
| Angel's Prayer | In the top right corner of the Hotel. | 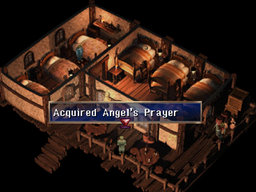
|
| Healing Potion | In the corner of the bottom floor of the barracks located at the lower edge of Hoax. | 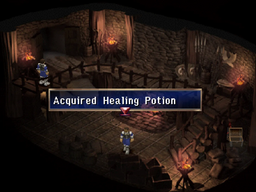
|
| 20G | In the attic of midwife Gilda's house, the second house on the upper path. | 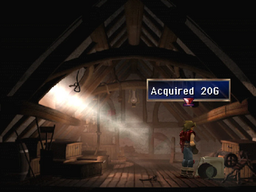
|
Marshland
| Contents | Acquisition | Image |
|---|---|---|
| Sun Rhapsody | Instead of taking the tree path in the first area, go on the upper right path to the Seventh Fort. (Missable if you don't fight the Sandorans) | 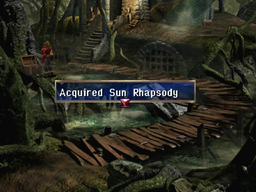
|
| Sun Rhapsody | Inside the Fort on the right. (Missable if you don't fight the Sandorans) | 
|
| Healing Potion | Inside the Fort on the left. (Missable if you don't fight the Sandorans) | 
|
| Spirit Potion | Inside the Fort in the bottom right corner. (Missable if you don't fight the Sandorans) | 
|
| Lance | Inside the Fort take the path on the left to go outside the fort. (Missable if you don't fight the Sandorans) | 
|
| Spirit Potion | Follow the tree path in the first are and get on the boat. Get off at the first stop. | 
|
| Burn Out | Down from the first boat stop and get off. | 
|
| Body Purifier | Down from the second boat stop and get off. | 
|
| Stun Guard | Go left from the third boat stop, on the right side. | 
|
| Magic Stone of Signet | On the left side of last boat stop. | 
|
Volcano Villude
| Contents | Acquisition | Image |
|---|---|---|
| Spear Frost | Directly on your path in the second area. | 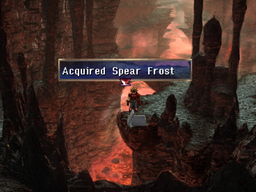
|
| Mind Purifier | On the left side of the third area. | 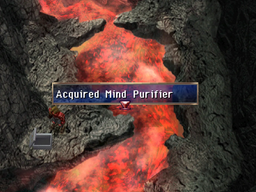
|
| Panic Guard | In the third area go into the room to the right. | 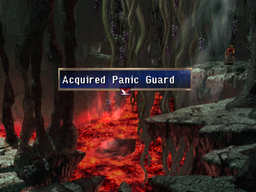
|
| 50G | Directly on your path in the last area. | 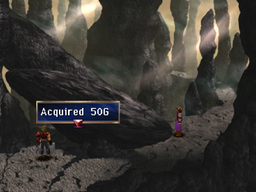
|
Nest of Dragon
| Contents | Acquisition | Image |
|---|---|---|
| Chain Mail | Stay on the normal path and then hop over some rocks before the spider web pit, follow the path all the way to the end. | 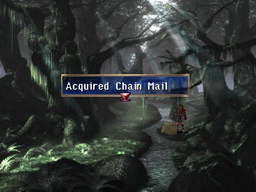
|
| Mind Purifier | Once in the pit climb the first vine, go to the hole on your right and then the hole to the left. | 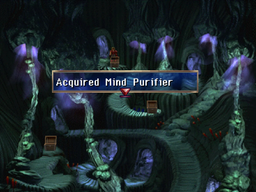
|
| Bravery Amulet | From the previous chest go to the hole near the bottom right of the screen and follow the path. | 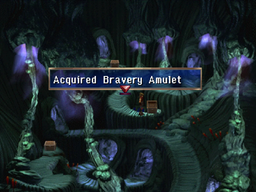
|
| Body Purifier | Instead of going in the hole near the bottom right climb the vine, then go down the hole at the end of the path. | 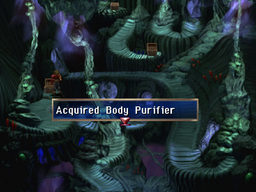
|
| Spirit Potion | Along the path to the previous chest. | 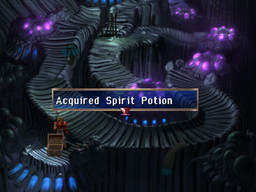
|
Lohan
| Contents | Acquisition | Image |
|---|---|---|
| 100G | Next to the chipmunk cages outside of the Arena. | Missing File |
| Angel Robe | Just outside Dabas' Antique Shop. | Missing File |
| 200G | Across from the Clinic, inside the building with a green door. | Missing File |
Shrine of Shirley
| Contents | Location | Image |
|---|---|---|
| Note | On a landing at the entrance to the area. | Missing File |
| Note | On a landing in the right-side exit of the main hall. | Missing File |
| Note | Next to the silver statute. | Missing File |
| Note | On the landing near the ship wheel. | Missing File |
| Note | At the top of the stairs at the very back of the area. | Missing File |
| Note | Near the entrance of the amphitheater | Missing File |
| 20G | On a post in the building behind the amphitheater. | Missing File |
| 20G | On a post in the building behind the amphitheater. | Missing File |
| 20G | On a post in the building behind the amphitheater. | Missing File |
| 20G | On a post in the building behind the amphitheater. | Missing File |
| 20G | On a post in the building behind the amphitheater. | Missing File |
| 20G | On a post in the building behind the amphitheater. | Missing File |
| 20G | On the floor in the building behind the amphitheater. | Missing File |
| Demon Stiletto | At the back of the building behind the amphitheater. | Missing File |
| Healing Breeze | At the back right the building behind the amphitheater. | Missing File |
Hellena Prison (Second Visit)
Note: All chests from the first visit are still available, however all the chests become Missable once your second visit is over.
| Contents | Acquisition | Image |
|---|---|---|
| Felt Hat | Take the elevator that was previously out of order to get to the next screen. Get off and enter the door. Then, head right to jump over the pit and enter that door. | 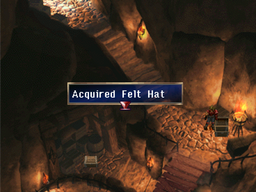
|
| Therapy Ring | Continue past the previous chest following the path. | 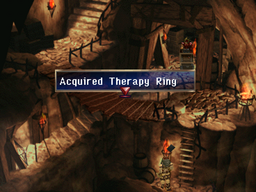
|
| Leather Armor | Get off the elevator and take the rope ladder. | 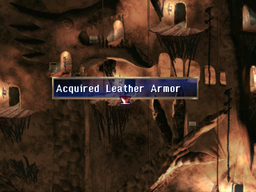
|
| Thunderbolt | Through the door from the elevator, take the door on your left and follow the path. | 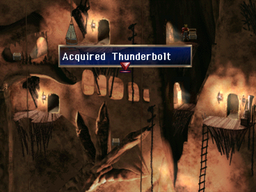
|
| Silver Vest | From the previous chest, instead of taking the elevator slide down the rope to your right. | 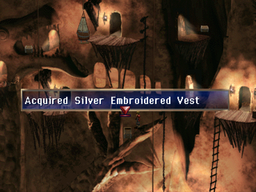
|
| Pandemonium | Instead of the right door, take the far left door and follow the path. | 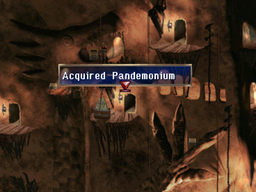
|
| Healing Potion | Return to the main elevator and head up to the skybridge. Take the path on the left. | 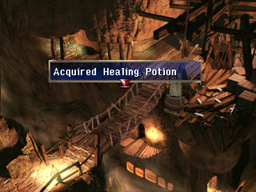
|
| Sachet | Fall into Jiango's lair and head to the top of the room. | 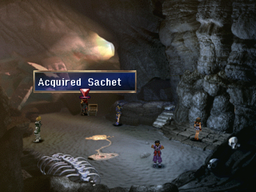
|
| Healing Potion | After defeating Jiango, continue on the path. | 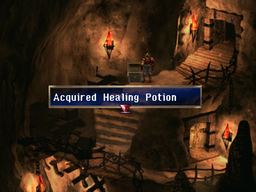
|
| Broad Sword | On the roof, near the Save Point: top | 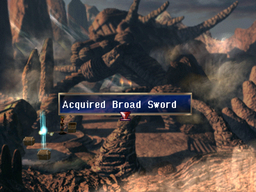
|
| Spear | On the roof, near the Save Point: left | 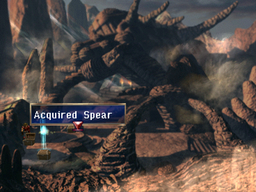
|
| 20G | On the roof, near the Save Point: bottom | 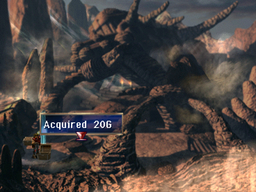
|
Kazas
| Contents | Acquisition | Image |
|---|---|---|
| Attack Ball | First building on the right and up the ladder. | 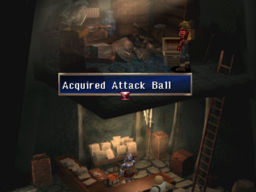
|
| Twister Glaive | Second building on the right. | 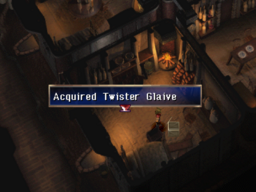
|
| 20G | Cavern passage. Down the second rope then to the left. | 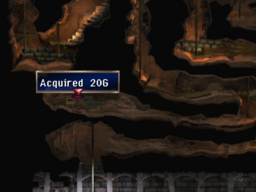
|
| Spark Net | Along the way from the fortress to the castle. | Missing File |
| Pellet | Right side of the main entrance to the castle. | Missing File |
| Burn Out | Left side of the main entrance to the castle, on the second story. | Missing File |
| Dark Mist | Below the trash disposal. | Missing File |
| Trans Light | Below the trash disposal. | Missing File |
| Beast Fang | Across from the Item Shop in the Black Castle. | Missing File |
| Spirit Ring | On wall under construction. | Missing File |
| Spear Frost | On wall under construction. | Missing File |
| Spinning Gale | Elevator down from the way to construction wall. | Missing File |
| Material Shield | Right after Kongol, right of the throne room door. | Missing File |
Disc 2
Fletz
| Contents | Acquisition | Image |
|---|---|---|
| Moon Serenade | In the Twin Castle's training room. | Missing File |
| Sun Rhapsody | In the Twin Castle's training room, closest to wall. | Missing File |
Barrens
| Contents | Acquisition | Image |
|---|---|---|
| Warrior Dress | Ledge near entrance. | Missing File |
| Recovery Ball | On top of a tall winding path. | Missing File |
| 50G | On cliff near exit towards Donau. | Missing File |
Valley of Corrupted Gravity
| Contents | Acquisition | Image |
|---|---|---|
| Speed Up | First area, head to the left. Jump over the floating rock. You will see the chest in an underpass down to the right. | Missing File |
| Sachet | First area, jump across to the ledge on the right over the floating rock. Chest is to the north of the area. | Missing File |
| Meteor Fall | Second area, over to the east you will find the chest. Jump on the moving rock platforms to get there. | Missing File |
| Talisman | Fourth area, accessible via a rock platform from the previous area. Choosing the right platform will bring you into the next area on the correct ledge. | Missing File |
| Knight Helm | Fourth area, accessible via a rock platform from the previous area. Choosing the right platform will bring you into the next area on the correct ledge. | Missing File |
Home of Giganto
| Contents | Acquisition | Image |
|---|---|---|
| Fake Knight Shield | First area, between two stones. | Missing File |
| 20G | Enter the building to the left of the area with the arrow trap. | Missing File |
| Bandit's Ring | There is a building in the area with the arrow trap. Enter it, then exit using the most southern door. | Missing File |
| Angel's Prayer | Head down the stairs on the left of the Rock Fireflies | Missing File |
Phantom Ship
| Contents | Acquisition | Image |
|---|---|---|
| 1.Stun Guard 2.Panic Guard 3.Magic Ego Bell 4.Talisman 5.Ultimate Wargod 6.100G |
After acquiring four numbers from ghosts in another room of the ship, the correct three must be entered in a specific order for the chest to open. The exact rules of this puzzle are explained further here. | Missing File |
| 50G | In the hall with 8 ghost fires. | Missing File |
| 20G | In the room with the four number ghosts. | Missing File |
| Encounter | 1st Cabin off the Hallway. | Missing File |
| Encounter | 2nd Cabin off the Hallway. | Missing File |
| Encounter | In the room with the four number ghosts. | Missing File |
| 100G | Captain's Quarters - Left | Missing File |
| 200G | Captain's Quarters - Right | Missing File |
| Bravery Amulet | Ghost Knights Boss Room. | Missing File |
| Dancing Dagger | In the nursery after the Boss fight. | Missing File |
Lidiera
| Contents | Acquisition | Image |
|---|---|---|
| Healing Potion | Near the town's exit. | Missing File |
| Healing Rain | In the cave that lowers the water. | Missing File |
| Healing Fog | In the cave that lowers the water. | Missing File |
Undersea Cavern
| Contents | Acquisition | Image |
|---|---|---|
| Attack Ball | Area 1 - where the water used to be. | Missing File |
| Jeweled Crown | Area 2 - to the right just after entering. | Missing File |
| Gushing Magma | Area 2 - further into the room. | Missing File |
| Recovery Ball | Side area, at the top of a long coral path. | Missing File |
| Burn Out | Area 3 - on a platform you hop to. | Missing File |
| Attack Ball | Area 3 - last chest just before the save point. | Missing File |
| Recovery Ball | Side area, at the bottom of a long coral path. | Missing File |
Disc 3
Evergreen Forest
| Contents | Acquisition | Image |
|---|---|---|
| Destone Amulet | Near the flying squirrel in the tree | Missing File |
| Body Purifier | Right side the screen with a large chasm in the center | Missing File |
| Depetrifier | Where the party meets Teo | Missing File |
| Mind Purifier | Under a tent beside the guard blocking the path to the Mountain of Mortal Dragon. | Missing File |
Deningrad
| Contents | Acquisition | Image |
|---|---|---|
| Angel's Prayer | In the Crystal Palace, to the left of the twin staircases. | File:Deningrad Chest01.webp |
| Holy Ahnk | In the Crystal Palace, in the lounge side room. | File:Deningrad Chest02.webp |
Kadessa
| Contents | Acquisition | Image |
|---|---|---|
| Mind Purifier | In the second area by the steam vents. | Missing File |
| Dancer's Shoes | By the second area with teleporters. | Missing File |
| Power Up | In the area with moving platforms, at the very top of the first accessible platform. | Missing File |
| Mind Crush | In the area with moving platforms across a gap. | Missing File |
Mountain of Mortal Dragon
| Contents | Acquisition | Image |
|---|---|---|
| Attack Ball | Second area by a massive skull. | File:Mountain of Mortal Dragon Chest01.webp |
| Mind Purifier | Fourth area on a low ledge. | File:Mountain of Mortal Dragon Chest02.webp |
| Healing Breeze | Third area on a high ledge. | File:Mountain of Mortal Dragon Chest03.webp |
| Giganto Armor | Third area on a low ledge. | File:Mountain of Mortal Dragon Chest04.webp |
| Dragon Helm | Fourth area on a high ledge. | File:Mountain of Mortal Dragon Chest05.webp |
| Total Vanishing | Area with a Save Point. | File:Mountain of Mortal Dragon Chest06.webp |
| Speed Down | In the area past the Save Point, on the right hand side almost completely hidden from view by rock. | File:Mountain of Mortal Dragon Chest07.webp |
| Body Purifier | In the area past the Save point, on the right hand side in plain view. | File:Mountain of Mortal Dragon Chest08.webp |
Kashua Glacier
| Contents | Acquisition | Image |
|---|---|---|
| Thunderbolt | Area 1 lower section. | File:Kashua Glacier Chest01.webp |
| Heat Blade | Area 1 upper section. | File:Kashua Glacier Chest02.webp |
| Meteor Fall | Area 2 upper section. | File:Kashua Glacier Chest03.webp |
| Heavy Mace | Area 2 lower section. | File:Kashua Glacier Chest04.webp |
| Gushing Magma | Area 3 by the merchants Cuarto and Segundo. | File:Kashua Glacier Chest05.webp |
| Dancing Ray | Area 4 left side. | File:Kashua Glacier Chest06.webp |
| Phoenix Plume | Area 4 right side. | File:Kashua Glacier Chest07.webp |
| Fatal Blizzard | Area 5 right side. | File:Kashua Glacier Chest08.webp |
| Black Rain | Area 5 left side. | File:Kashua Glacier Chest09.webp |
| Rave Twister | Area 6 overlooking Flanvel Tower. | File:Kashua Glacier Chest10.webp |
Tower of Flanvel
Note: Only the first three chests are accessible until the Vanishing Stone is obtained.
| Contents | Acquisition | Image |
|---|---|---|
| Spirit Ring | Area 1. | File:Flanvel Tower Chest01.webp |
| Mage Ring | Area 2. | File:Flanvel Tower Chest02.webp |
| Therapy Ring | Area 4. | File:Flanvel Tower Chest03.webp |
| Dragon Helm | Area with 3 teleporters going down. | File:Flanvel Tower Chest04.webp |
| Magical Hat | Boss room left side. | File:Flanvel Tower Chest05.webp |
| Dancer's Ring | Boss room lower right side. | File:Flanvel Tower Chest06.webp |
| Holy Ahnk | Boss room upper right side. | File:Flanvel Tower Chest07.webp |
Snowfield
| Contents | Acquisition | Image |
|---|---|---|
| Burn Out | Area 1. | File:Snowfield Chest01.webp |
| Magic Shield | Snowslide using 1,3,4. | File:Snowfield Chest02.webp |
| Dancer's Ring | Snowslide using 2,4. | File:Snowfield Chest03.webp |
| Gushing Magma | Snowslide area upper section. | File:Snowfield Chest04.webp |
| Burning Wave | Snowslide area lower section. | File:Snowfield Chest05.webp |
| Midnight Terror | Area 1 of Fort Magrad. | File:Snowfield Chest06.webp |
| Stunning Hammer | Area 2 of Fort Magrad, furthest from the memorial. | File:Snowfield Chest07.webp |
| Poison Needle | Area 2 of Fort Magrad, closest to the memorial. | File:Snowfield Chest08.webp |
| Armor of Yore | Area 3 of Fort Magrad, left side. | File:Snowfield Chest09.webp |
| Panic Bell | Area 3 of Fort Magrad, right side. | File:Snowfield Chest010.webp |
Vellweb
| Contents | Acquisition | Image |
|---|---|---|
| Attack Ball | Area 3. | File:Vellweb Chest01.webp |
| Rose's Hairband | Outer ledges on the right side. | File:Vellweb Chest02.webp |
| Spirit Potion | Outer ledges on the left side. | File:Vellweb Chest03.webp |
Disc 4
Death Frontier
| Contents | Acquisition | Image |
|---|---|---|
| Moon Serenade | Falling down the sinkhole on submap 750 or the leftmost sinkhole of 751. | File:Death Frontier Chest01.webp |
| Healing Breeze | On submap 751, surrounded by three sinkholes. | File:Death Frontier Chest02.webp |
| Healing Fog | On submap 756. | File:Death Frontier Chest03.webp |
| Healing Rain | Falling down the sinkhole of submap 753 or 756. | File:Death Frontier Chest04.webp |
| Recovery Ball | Falling down the right most sinkhole on submap 761 or 762. | File:Death Frontier Chest05.webp |
| Gladius | On submap 762. | File:Death Frontier Chest06.webp |
| Power Up | On submap 775. | File:Death Frontier Chest07.webp |
| Sun Rhapsody | Falling down the sinkhole on submap 771, 776, or the rightmost sinkhole on 775. | File:Death Frontier Chest08.webp |
| Bandit's Shoes | On submap 786. | File:Death Frontier Chest09.webp |
| Healing Potion | Falling down the sinkhole on submap 783 or 786. | File:Death Frontier Chest10.webp |
Ulara
| Contents | Acquisition | Image |
|---|---|---|
| Sun Rhapsody | At the entrance near the teleporter. | File:Ulara Chest01.webp |
| Moon Serenade | Inside Charle's home on the second floor. | File:Ulara Chest02.webp |
Rouge
| Contents | Acquisition | Image |
|---|---|---|
| 100G | Room past Martel. | File:Rouge Chest01.webp |
| Satori Vest | Through the bottom right passage out of the Mayor's house. | File:Rouge Chest02.webp |
| Wargod Calling | At the end of the path after going down the right hand side ladder in the Mayor's house. | File:Rouge Chest03.webp |
Aglis
| Contents | Acquisition | Image |
|---|---|---|
| Burn Out | On the lower platform of the first set of teleporters after the first fork. | File:Aglis Chest01.webp |
| Gushing Magma | On the upper platform of the first set of teleporters after the first fork. | File:Aglis Chest02.webp |
| Magical Hat | Leftmost chest on the central platform of the second set of teleporters after the first fork. | File:Aglis Chest03.webp |
| Moon Serenade | Rightmost chest on the central platform of the second set of teleporters after the first fork. | File:Aglis Chest04.webp |
| Angel's Prayer | In the far left corner of the research room with Phewy. | File:Aglis Chest05.webp |
| Sun Rhapsody | On the far right side of the teleporters past the research room. | File:Aglis Chest06.webp |
| Healing Fog | Behind the first teleporter past the mirror room. | File:Aglis Chest07.webp |
| Healing Rain | On a platform near the first set of teleporters past the mirror room, but can only be reached by using the second set of teleporters further on. | File:Aglis Chest08.webp |
| 200G | On the lower platform past the room collecting courage. | File:Aglis Chest09.webp |
| Healing Breeze | On the upper platform past the room collecting courage. | File:Aglis Chest10.webp |
Zenebatos
| Contents | Acquisition | Image |
|---|---|---|
| Flash Hall | Outside the prison on the lower section. | File:Zenebatos Chest01.webp |
| 200G | Outside the prison on the upper section. | File:Zenebatos Chest02.webp |
| Frozen Jet | On the upper floor of teleporters leading to the Legislation Center. | File:Zenebatos Chest03.webp |
| Burning Wave | On the lower floor of teleporters leading to the Legislation Center. | File:Zenebatos Chest04.webp |
| Spectral Flash | On the upper floor of teleporters leading to the Law Factory. | File:Zenebatos Chest05.webp |
| Night Raid | On the middle floor of teleporters leading to the Law Factor. | File:Zenebatos Chest06.webp |
| Rainbow Dress | On the lower floor of teleporters leading to the Law Factory. | File:Zenebatos Chest07.webp |
| Down Burst | On the lower floor of teleporters leading to the Law Launcher. | File:Zenebatos Chest08.webp |
| Spirit Cloak | On the upper floor of teleporters leading to the Law Launcher. | File:Zenebatos Chest09.webp |
| Gravity Grabber | On the middle floor of teleporters leading to the Law Launcher. | File:Zenebatos Chest10.webp |
Mayfil
| Contents | Acquisition | Image |
|---|---|---|
| Poison Guard | Teleporters after Feyrbrand on the upper level. | File:Mayfil Chest01.webp |
| Stun Guard | Teleporters after Divine Dragon. | File:Mayfil Chest02.webp |
| Panic Guard | Teleporters after Regole on the lower level. | File:Mayfil Chest03.webp |
| Protector | Teleporters after Regole on the upper level. | File:Mayfil Chest04.webp |
| Active Ring | Teleporters after Feyrbrand on the lower level. | File:Mayfil Chest05.webp |
| Destone Amulet | Room with Divine Dragon. | File:Mayfil Chest06.webp |
| Bravery Amulet | In the room when falling down the grid floor puzzle. | File:Mayfil Chest07.webp |
| Magic Ego Bell | Room with Recovery Pad. | File:Mayfil Chest08.webp |
| Healing Rain | Room where we reunite with Lavitz. | File:Mayfil Chest09.webp |
| Spectral Flash | Room beyond the point of no return. | File:Mayfil Chest10.webp |
Divine Tree
| Contents | Acquisition | Image |
|---|---|---|
| Phoenix Plume | The sparkle on the ground in the second area, partially obscured by roots on the left hand side. | File:Divine Tree Chest01.webp |
| Silver DG Armor | The sparkle in the tree hollow near the Water after riding the current. | File:Divine Tree Chest02.webp |
- While written as White Silver Dragon's Armor when picked up, this item is listed under equipment as Silver DG Armor.
Moon That Never Sets
| Contents | Acquisition | Image |
|---|---|---|
| Frozen Jet | In the forest. | File:Moon That Never Sets Chest01.webp |
| Down Burst | In the forest during winter. | File:Moon That Never Sets Chest02.webp |
| 200G | In the Minintos house closest to Bale. | File:Moon That Never Sets Chest03.webp |
| Spectral Flash | In the area past the Minintos. | File:Moon That Never Sets Chest04.webp |
| Flash Hall | In the Minintos house furthest from Bale. | File:Moon That Never Sets Chest05.webp |
| Gold DG Armor | Inside the jail of the Gigantos throne room. | File:Moon That Never Sets Chest06.webp |
| Night Raid | In the dragon area on the ground level. | File:Moon That Never Sets Chest07.webp |
| Burning Wave | In the dragon area on a ledge. | File:Moon That Never Sets Chest08.webp |
| Gravity Grabber | In the second area after the Archangel. | File:Moon That Never Sets Chest09.webp |
| Detonate Arrow | Near the last save point. | File:Moon That Never Sets Chest10.webp |
- Although listed as Golden Dragon's Armor on picking it up, this item is called Golden DG Armor under equipment.
Trivia
- Counting the chests you get the Red and Blue Stone from and the fake Drake chests in Shrine of Shirley, there are a total of 108 chests in Disc 1.
- 1,210 gold is contained in chests.
- While most locations have chests, Donau, the Queen Fury, Fueno, Furni, Neet, and the Forest of Winglies do not.

